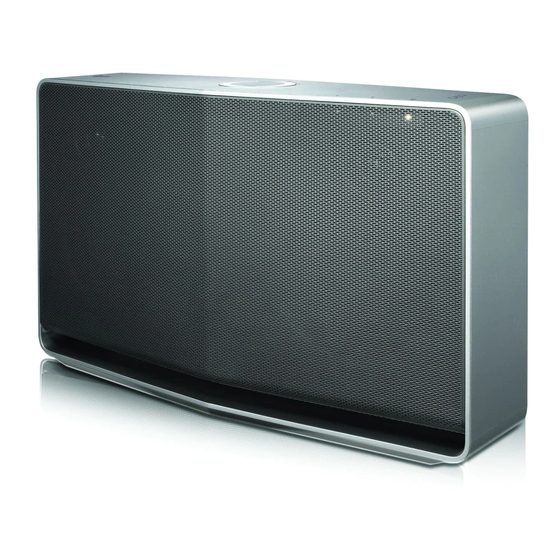
LG NP8540 Service Manual
Wireless multi-room audio
Hide thumbs
Also See for NP8540:
- Simple manual (77 pages) ,
- Owner's manual (62 pages) ,
- Manual (4 pages)
Chapters
Table of Contents

Related Manuals for LG NP8540


Summary of Contents for LG NP8540
- Page 1 Internal Use Only Website http://biz.lgservice.com Wireless Multi-room Audio SERVICE MANUAL MODEL: NP8540 CAUTION BEFORE SERVICING THE UNIT, READ THE “SAFETY PRECAUTIONS” IN THIS MANUAL. P/NO : AFN76793356 SEPTEMBER, 2014...
- Page 2 CONTENTS SECTION 1 ..SUMMARY SECTION 2 ..CABINET & MAIN CHASSIS SECTION 3 ..ELECTRICAL SECTION 4 ..REPLACEMENT PARTS LIST...
-
Page 3: Table Of Contents
SECTION 1 SUMMARY CONTENTS PRODUCT SAFETY SERVICING GUIDELINES FOR AUDIO PRODUCTS ..........1-3 SERVICING PRECAUTIONS .......................... 1-4 • GENERAL SERVICING PRECAUTIONS • INSULATION CHECKING PRODEDURE • ELECTROSTATICALLY SENSITIVE (ES) DEVICES SOFTWARE UPDATE GUIDE ........................1-5 HIDDEN MODE ............................... 1-11 VERSION CHECK ............................1-12 SPECIFICATIONS ............................ -
Page 4: Product Safety Servicing Guidelines For Audio Products
When servicing this product, under no circumstances should the original design be modified or altered without permission from LG Corporation. All components should be replaced only with types identical to those in the original circuit and their physical location, wiring and lead dress must conform to original layout upon completion of repairs. -
Page 5: Servicing Precautions
SERVICING PRECAUTIONS CAUTION: Before servicing the Audio products covered by this Electrostatically Sensitive (ES) Devices service data and its supplements and addends, read and fol- Some semiconductor (solid state) devices can be damaged low the SAFETY PRECAUTIONS. easily by static electricity. Such components commonly are NOTE: if unforeseen circumstances create conflict between called Electrostatically Sensitive (ES) Devices. -
Page 6: Software Update Guide
SOFTWARE UPDATE GUIDE 1. Using MP tool 1) Open MP tool and select “Key DN”. 2) Check the section for download and open download fi le. - Page 7 3) Connect PC and SET by cross LAN cable. Setting PC IP : 192.168.0.1 255.255.255.0 192.168.0.1 4) Set power on. 5) Connect LAN cable to Set and then Press “ADD” key within 3sec after connect the LAN. (Please connect the LAN when blinking WiFi-LED after booting) *Download fi...
- Page 8 7) Press “Update” button. 8) Download result display “OK!” if start download.
- Page 9 9) You can identify update status by network indicator lamp. <Updating : blinking red LED> <Complete update : blinking white LED>...
- Page 10 2. Using APP 1) Connect set and music fl ow app. 2) Select “setup update” menu then you can see below menu. 3) Enter “Check” button then display speaker list for update. download...
- Page 11 4) Enter “download” button then start download to speaker. d o wn load Downloading… 5) Display below menu after done download then enter “Ready” button for updating. Read y Downloaded 1-10...
-
Page 12: Hidden Mode
6) Display below menu after done update Updated 7) Set rebooting. (Booting previous version if failed update.) HIDDEN MODE Reset Press “ADD” button for 8 seconds. Micom reset Remote control “play + “WIFI SETUP” key. 1-11... -
Page 13: Version Check
VERSION CHECK 1) Version Check : Select “Factory Set1”. 2) Connect PC and SET by cross LAN cable. Setting PC IP : 192.168.0.1 255.255.255.0 192.168.0.1 3) Set power on 4) Connect LAN cable to Set and then Press “ADD” key within 3sec after connect the LAN. (Please connect the LAN when blinking WiFi-LED after booting) 5) Display the version in the tool. -
Page 14: Specifications
SPECIFICATIONS • GENERAL Power Supply 18 V 2.67 A (AC adapter) Power consumption 10 W Networked standby : 5.4 W AC adapter Model : DA-48A18 Manufacturer: Yang Ming Industrial Input: 100 - 240 V ~ 50/60 Hz Output: 18 V 2.67 A Dimensions (W x H x D) Approx. - Page 15 1-14...
- Page 16 SECTION 2 CABINET & MAIN CHASSIS CONTENTS DISASSEMBLY INSTRUCTIONS ........................2-2 EXPLODED VIEWS ............................2-7 1. CABINET AND MAIN FRAME SECTION ....................2-7 2. PACKING ACCESSORY SECTION ......................2-9...
-
Page 17: Disassembly Instructions
DISASSEMBLY INSTRUCTIONS 1. Remove the Cover Rear Assembly. Work on soft sheet. Using Flat-blade tool, put one of both side hole. Place beneath a thick soft sheet. Lift tool using the principle of leverage... - Page 18 2. Remove the Case Rear Assembly Screws (NP8540 : 15EA, NP8740 : 17EA). Exist only NP8740 3. Pull Out Cable. Bluetooth Cable Volume PCB Cable WIFI Cable Speaker Cable Push down the rubber...
- Page 19 4. Remove the Case Rear Assembly, Chassis PCB Assembly. 5. Remove the Knob Volume. Using small and long tool, Put the Holder PCB volume hole.
- Page 20 6. Remove the Screws 3EA of Case Main Assembly Top And Pull Out PCB Volume Assembly, Holder PCB Volume. 7. Pull Out PCB LED Assembly. After Push the Guide hook, Pull out PCB LED Assembly.
- Page 21 8. Pull Out Wi-Fi Module at Case Rear Assembly. After Push the Guide hook, pull out Wi-Fi Module 9. Remove the Unit, Tweeter Screws 12EA.
-
Page 22: Exploded Views
EXPLODED VIEWS 1. CABINET AND MAIN FRAME SECTION CABLE4 WiFi CABLE1 CABLE2 VOLUME CABLE3 CABLE5 MAIN... -
Page 23: Packing Accessory Section
2. PACKING ACCESSORY SECTION 801 Owner’s manual 830 Adapter 300 Power Cord 803 Packing 804 Bag 803 Packing 802 Box... - Page 24 SECTION 3 ELECTRICAL CONTENTS ONE POINT REPAIR GUIDE ..........................3-2 1. IF NOT BOOTING WHEN YOU TURN ON THE SET. AND LED DOESN’T TURN ON ....... 3-2 2. NO SOUND FROM THE SPEAKER ....................... 3-4 3. IF NOT BOOTING WHEN YOU TURN ON THE SET ................3-5 4.
-
Page 25: One Point Repair Guide
ONE POINT REPAIR GUIDE 1. IF NOT BOOTING WHEN YOU TURN ON THE SET. AND LED DOESN’T TURN ON. 1-1. IC903 (NO 5.2 VA) 1-1-1. Solution Replace IC903 on main board. 1-1-2. How to troubleshoot (Countermeasure) 1) Please Check 18 VA of IC903 Pin2(IN) 2) If 18 VA is abnormal, check the parts. - Page 26 ONE POINT REPAIR GUIDE IF NOT BOOTING WHEN YOU TURN ON THE SET. AND LED DOESN’T TURN ON. 1-2. IC904 (NO 3.6 VA) 1-2-1. Solution Replace IC904 on main board. 1-2-2. How to troubleshoot (Countermeasure) 1) Please check 5.2 VA of IC904 Pin3(INPUT). 2) If 5.2 VA is abnormal, follow the stage 1-1 at the previous page.
-
Page 27: Sound From The Speaker
ONE POINT REPAIR GUIDE 2. NO SOUND FROM THE SPEAKER 2-1. IC700 (NO 18 VA / 3.3 V) 2-1-1. Solution Replace IC700 on main board. 2-1-2. How to troubleshoot (Countermeasure) 1) Please check 18 VA(PVDD) of C709, C726 and 3.3 V(DVDD) of L903. 2) If 18 VA is abnormal, follow the stage 1-1 at the previous page. -
Page 28: If Not Booting When You Turn On The Set
ONE POINT REPAIR GUIDE 3. IF NOT BOOTING WHEN YOU TURN ON THE SET. 3-1. IC902 (NO 1.5 V / 1.2 V) 3-1-1. Solution Replace IC902 on main board. 3-1-2. How to troubleshoot (Countermeasure) 1) Please check 5.2 VA of L902(VIN). 2) If 5.2 VA is abnormal, follow the stage 1-1 at the previous page. - Page 29 ONE POINT REPAIR GUIDE IF NOT BOOTING WHEN YOU TURN ON THE SET. 3-2. IC900 (NO 3.3 V) 3-2-1. Solution Replace IC900 on main board. 3-2-2. How to troubleshoot (Countermeasure) 1) Please check 18 VA of IC900 Pin2(VIN). 2) If 18 VA is abnormal, follow the stage 1-1-2 at the previous page. 3) If 18 VA is OK, but 3.3 V is abnormal at the IC900(Pin7) replace IC900.
- Page 30 ONE POINT REPAIR GUIDE IF NOT BOOTING WHEN YOU TURN ON THE SET. 3-3. IC103 (NO 3.3 VA) 3-3-1. Solution Replace IC103 on main board. 3-3-2. How to troubleshoot (Countermeasure) 1) Check 3.3 VA of IC103 Pin48(VIN). 2) If 3.3 VA is abnormal, follow the stage 3-2 at the previous page. 3) If 3.3 VA of IC103 Pin48(VIN) is OK, check the EEP_CLK(Pin1), EEP_DAT(Pin2) signal.
- Page 31 ONE POINT REPAIR GUIDE IF NOT BOOTING WHEN YOU TURN ON THE SET. 3-4. IC501 (MPEG IC) 3-4-1. Solution Replace IC501 on main board. 3-4-2. How to troubleshoot (Countermeasure) 1) Check physical status of IC501 on your eyes. 2) Check 1.2 V of L910, If 1.2 V is abnormal, follow the stage 3-1-2 at the previous page. 3) Check 1.5 V of L909, If 1.5 V is abnormal, follow the stage 3-1-2 at the previous page.
- Page 32 ONE POINT REPAIR GUIDE IF NOT BOOTING WHEN YOU TURN ON THE SET. 3-5. IC503, IC504 (DDR IC) 3-5-1. Solution Replace IC503, IC504 on main board. 3-5-2. How to troubleshoot (Countermeasure) 1) Check 0.75 V of DDR3_VREF (Point 1). If voltage is abnormal follow the stage 3-1-2 at the previous page. 2) Check 0.75 V of DDR3_VREF (Point 2).
- Page 33 ONE POINT REPAIR GUIDE IF NOT BOOTING WHEN YOU TURN ON THE SET. 3-6. IC505 (NAND Flash memory IC) 3-6-1. Solution Replace IC505 on main board. 3-6-2. How to troubleshoot (Countermeasure) 1) Check 3.3 V of R512, R511, C5B1 2) If 3.3 V is abnormal, follow the stage 3-2-2 at the previous page. 3) When you followed above step but it doesn’t work, replace the IC505.
- Page 34 ONE POINT REPAIR GUIDE IF NOT BOOTING WHEN YOU TURN ON THE SET. 3-7. X501 (Crystal) 3-7-1. Solution Replace X501 on main board. 3-7-2. How to troubleshoot (Countermeasure) 1) Check the frequency of 27 MHz crystal(X501). 2) If 3.3 V is abnormal, follow the stage 3-2-2 at the previous page. 3) If the crystal doesn’t oscillate, replace X501.
-
Page 35: Wired Network Connection Error
ONE POINT REPAIR GUIDE 4. WIRED NETWORK CONNECTION ERROR When you connect AP through the wired LAN, connection failed. 4-1. JK500 (Ethernet Jack) 4-1-1. Solution Replace JK500 on main board. 4-1-2. How to troubleshoot (Countermeasure) 1) If there is soldering problem, please re-soldering pin JK500. 2) If after re-soldering, problem still occurs, replace JK500. -
Page 36: Portable Function Doesn't Working
ONE POINT REPAIR GUIDE 5. PORTABLE FUNCTION DOESN’T WORKING 5-1. IC102 (ADC) 5-1-1. Solution Replace IC102 on main board. 5-1-2. How to troubleshoot (Countermeasure) 1) Check 5.2 VA. If 5.2 VA is abnormal follow the stage 1-1. 2) Check 3.3 V_S of IC102(Pin4). If 3.3 V_S is abnormal follow the stage 3-2. -
Page 37: Electrical Troubleshooting Guide
ELECTRICAL TROUBLESHOOTING GUIDE 1. POWER SUPPLY ON MAIN BOARD No 18 VA Replace F900 (same fuse). Is the F900 normal? Replace D901. Is the D901 normal? Is C908/ 917/ 922/ 919 normal? Replace C908/ 917/ 922/ 919. Check JK900 and replace it. No 5.2 VA Is the Vcc of IC903 18 VA? Check the 18 V. - Page 38 ELECTRICAL TROUBLESHOOTING GUIDE POWER SUPPLY ON MAIN BOARD No 1.2 V Is the Vin 5.2 VA Check the IC903. supplied to IC902, L903? Replace the weird one. Around the IC902 parts OK ? (RLC) Replace the IC902. No 1.5 V Is the Vin 5.2 VA Check the IC903.
- Page 39 ELECTRICAL TROUBLESHOOTING GUIDE POWER SUPPLY ON MAIN BOARD No 3.6 VA Is the Vin 5.2 VA Check the IC903. supplied to IC904, L907? Replace the weird one. Around the IC904 parts OK? (RLC) Replace the IC904. No 3.3 V Is the Vin 18 VA Check the 18 V.
-
Page 40: Micom
ELECTRICAL TROUBLESHOOTING GUIDE 2. MICOM MICOM Is the DC_V of IC103 Pin48 3.3 VA? Check power circuit troubleshooting. Replace R129, R164. Is the DC_V of IC103 Pin40 3.3 V? Check R129, R164. Check power circuit troubleshooting. 3-17... -
Page 41: Led
ELECTRICAL TROUBLESHOOTING GUIDE 3. LED LED doesn’t blinking Cable connection is OK? Connect the cable correctly or replace it. (CN101, 400, 300, 301) Check power circuit troubleshooting. 3.6 V load on L106? Check the IC103 Replace IC103. Pin15, 16, 17, 18 signal. Replace LD400, 401, 404. - Page 42 ELECTRICAL TROUBLESHOOTING GUIDE 4. AUDIO (Wi-Fi MODE) Is the Vcc of IC700 18 V? Check power circuit troubleshooting. (Pin6, 43) Is the Vdd of IC700 3.3 V? Check power circuit troubleshooting. (Pin30) ① Check mode (Wi-Fi, B/T, Portable) Check AMP I2S signal Replace IC700.
-
Page 43: Audio
ELECTRICAL TROUBLESHOOTING GUIDE 4-1. AUDIO (BLUETOOTH MODE) ① Check 3.3 V Check power circuit troubleshooting. (CN501 Pin1). Check UART signal Check the IC504 and B/T module, replace it. (CN500 Pin3, 4, 5, 7). Replace the Bluetooth module. 3-20... - Page 44 ELECTRICAL TROUBLESHOOTING GUIDE 4-2. AUDIO (PORTABLE MODE) ① Is the Vcc of IC102 Check power circuit troubleshooting. 5.2 V? (Pin3) Is the Vdd of IC102 Check power circuit troubleshooting. 3.3 V? (Pin4) Check Audio L/R signal Check the device output or cable connection. (L101, L102).
-
Page 45: Waveforms Of Major Check Point
WAVEFORMS OF MAJOR CHECK POINT 1. MICOM MICOM to MPEG IC103 PIN 34, 35 2. AMP MICOM to AMP I2S IC700 PIN 23, 24, 25 3-22... -
Page 46: Mpeg
3. MPEG IC501 MT8506 XTAL 27 MHz IC501 MT8506 WE# IC501 MT8506 CLK 3-23... - Page 47 MPEG IC501 MT8506 CAS# IC501 MT8506 BA0 3-24...
-
Page 48: Bluetooth
4. BLUETOOTH 11 12 BT_TX, BT_RX, BT_RT 5. Wi-Fi WIFI_N, WIFI_P 3-25... - Page 49 3-26...
-
Page 50: Wiring Diagram
WIRING DIAGRAM 6P, 1.25 mm ST, SMD (6602T12004E) VOLUME SPK R SPK L 10P, 1.25 mm AG, SMD Wi-Fi (6602T12005J) Module 6P, 1.25 mm AG, SMD (6630V90135D) 6P, 1.25 mm 4P, 2.0 mm 10P, 1.25 mm 10P, 0.5 mm AG, SMD AG Lock, SMD AG, SMD AG,(ROM) FFC... -
Page 51: Block Diagram
BLOCK DIAGRAM +1.2 V +5.2VA +18 VA Dual DC-DC +1.5 V DC-DC +3.3 V +5.2 VA MP2315GJ TPS65252 +5 V +18 VA PORTABLE +3.3 V (PCM1808) DCDC +5 V +3.5 V_wifi MP2315GJ LM37102 27 MHz +3.3 V +1.5 V +1.2 V +3.3 VS +18 VA +3.3 VA I2S(MCLK/BCK/LRCK/DATA) -
Page 52: Circuit Diagrams
THIS CIRCUIT DIAGRAM MAY OCCASIONALLY DESIGN BE MODIFIED OR ALTERED WITHOUT DIFFER FROM THE ACTUAL CIRCUIT USED. THIS PERMISSION FROM THE LG CORPORATION. ALL WAY, IMPLEMENTATION OF THE LATEST SAFETY COMPONENTS SHOULD BE REPLACED ONLY WITH AND PERFORMANCE IMPROVEMENT CHANGES... -
Page 53: Main - Mpeg Circuit Diagram
2. MAIN - MPEG CIRCUIT DIAGRAM 11 12 MPEG : WAVEFORM NUMBER EAX65467701_14_1.9-SD_MAIN(#2) 2014. 06. 30 3-33 3-34... -
Page 54: Main - Memory & Hw Trap Circuit Diagram
3. MAIN - MEMORY & HW TRAP CIRCUIT DIAGRAM MEMORY EAX65467701_14_1.9-SD_MAIN(#3) 2014. 06. 30 3-35 3-36... -
Page 55: Volume Circuit Diagram
4. VOLUME CIRCUIT DIAGRAM VOLUME EAX65563801_14_1.9-SD 2014. 06. 30 3-37 3-38... -
Page 56: Led Circuit Diagram
5. LED CIRCUIT DIAGRAM EAX65543301-14_1.9-SD 2014. 06. 30 3-39 3-40... -
Page 57: Circuit Voltage Chart
CIRCUIT VOLTAGE CHART 1. ICs IC Sym Vcc/Vdd • Spec : 1.8 to 5.5 V IC100 • Measured Voltage : EEPROM Vdd : 3.33 • Spec : 2.7 ~ 3.6 V IC102 • Measured Voltage : Vdd : +3.3 • Spec : −0.5 to +6.5 V IC103 •... -
Page 58: Printed Circuit Board Diagrams
PRINTED CIRCUIT BOARD DIAGRAMS 1. MAIN P.C.BOARD (TOP VIEW) (BOTTOM VIEW) 3-43 3-44... -
Page 59: Volume P.c.board
2. VOLUME P.C.BOARD (TOP VIEW) (BOTTOM VIEW) 3. LED P.C.BOARD (TOP VIEW) (BOTTOM VIEW) 3-45 3-46...
Need help?
Do you have a question about the NP8540 and is the answer not in the manual?
Questions and answers