Table of Contents
Advertisement
Available languages
Available languages
Quick Links
Podadora de Pasto a Gasolina
Manual de Usuario y Garantía.
User's Manual and Warranty.
ATENCIÓN: Lea, entienda y siga las instrucciones de seguridad contenidas en este
manual antes de operar esta herramienta.
WARNING: Read, understand and follow the safety rules in this manual, before operating this tool.
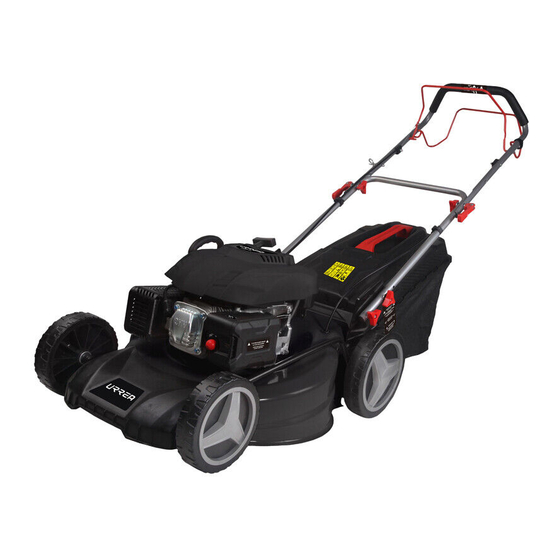
Gasoline Lawn Mower
PP921A
Advertisement
Table of Contents

Related Manuals for Urrea PP921A


Summary of Contents for Urrea PP921A
- Page 1 Podadora de Pasto a Gasolina Gasoline Lawn Mower PP921A Manual de Usuario y Garantía. User’s Manual and Warranty. ATENCIÓN: Lea, entienda y siga las instrucciones de seguridad contenidas en este manual antes de operar esta herramienta. WARNING: Read, understand and follow the safety rules in this manual, before operating this tool.
-
Page 2: Table Of Contents
E S P A Ñ O L E N G L I S H CONTENIDO CONTENT Normas generales de seguridad General operation Operación en general General operation Funcionamiento en pendientes Slope operation Servcio Service Guarda anti-chispas Spark arrestor Características Features Instrucciones de ensamble Assembly instructions Instrucciones de operación... -
Page 3: Normas Generales De Seguridad
E S P A Ñ O L • M an u a l d e u s u ar io 15. No cambie la configuración del motor ni tra- NORMAS GENERALES DE SEGURIDAD te de exceder la velocidad de la máquina. ADVERTENCIA: La presencia de este símbolo 16. -
Page 4: Servcio
puede ocultar obstáculos. 10. Vuelva a colocar la tapa de la gasolina y ajús- 3. Asegúrese de mantenerse equilibrado. Si tela bien. tropieza y cae puede lesionarse gravemente. Si 11. Limpie la gasolina derramada sobre el mo- siente que pierde el equilibrio, suelte inmedia- tor y el equipo. -
Page 5: Guarda Antichispas
E S P A Ñ O L • M an u a l d e u s u ar io tanque dentro de un edificio donde los vapores 9. MANIJA PARA AJUSTAR LA ALTURA puedan alcanzar una fuente de ignición. 10. - Page 6 mano y enganche la bolsa colectora. gente de alta calidad clasificado como acei- 2. Suelte la tapa de descarga trasera para asegu- te SAE30 (o equivalente, como SAE 10W/30, a rar la bolsa colectora. menudo nombrado como aceite para podadora de 4 tiempos).
-
Page 7: Instrucciones De Operación
E S P A Ñ O L • M an u a l d e u s u ar io 5. Apriete bien la tapa después de haber llena- Jale este control contra el asa para operar la uni- dad. Sueltelo para detener el motor y la cuchilla. ADVERTENCIA: El mecanismo de control, AJUSTE también es un dispositivo de seguridad. - Page 8 Suelte la palanca de encendido/apagado, ésta 1. Seleccione su configuración requerida. regresará a su posición original, el motor se apa- 2. Encienda el motor y déjelo correr, y colóquelo gará automáticamente. en la velocidad requerida. Vea la sección “Para encender el motor”. ARRANQUE CON BOTÓN Y FUNCIÓN DE VELO- 3.
-
Page 9: Mantenimiento
E S P A Ñ O L • M an u a l d e u s u ar io descarga y la carcasa de la podadora deben es- ¿COMO DAR SERVICIO AL FILTRO DE AIRE? tar limpias y libres de bloqueo. Un filtro de aire sucio reduce la potencia del mo- tor suministrando muy poco aire al carburador. - Page 10 de aceite. GUARDAR LA PODADORA POR LARGOS PERIO- ADVERTENCIA: Siempre sujete la cuchilla DOS DE TIEMPO con cuidado, los bordes afilados pueden causar serias lesiones. USE GUANTES DE PROTECCIÓN. Si la podadora será guardada por periodos Adquiera una nueva cuchilla después de 50 ho- mayores a 15 días, debe realizarle un manteni- ras de uso o después de 2 años, lo que suceda miento especial a la podadora.
-
Page 11: Solucionador De Problemas
Esto lo pone en peligro a usted y a su entorno. Las fallas que no puedan ser corregidas con la ayuda de la siguiente tabla deberán ser corregi- ESPECIFICACIONES TÉCNICAS das por personal autorizado, acuda a su centro PP921A de servicio. POTENCIA 5,1 HP Por favor evite cualquier reparación inapropia-... -
Page 12: General Operation
ample deflectors and/or grass catchers, in place. GENERAL SAFETY RULES 16. Do not change the engine governor settings WARNING: This symbol points out important or over speed the engine. safety instructions which, if not followed, could 17. Disengage all blade and drive clutches be- endanger the personal safety and/or property of fore starting the engine. -
Page 13: Service
E N G L I S H • Us er 's M an u a l 1. Mow across the face of slopes; never up and and equipment. Move machine to another area. down. Exercise extreme caution when changing Wait 5 minutes before starting engine. direction on slopes. -
Page 14: Spark Arrestor
3. Check the blade and engine mounting bolts Failure to do so can result in accidents, injuries at frequent intervals for proper tightness. Also, or death. visually inspect blade for damage (e.g., bent, DO NOT MODIFY ENGINE cracked, worn) Replace blade with the original To avoid serious injury or death, do not modify equipment manufacture’s (O.E.M.) blade only, engine in any way. -
Page 15: Assembly Instructions
E N G L I S H • Us er 's M an u a l 5. FIXING KNOB WITH SQUARE NECK BLOT First need remove the grass bag and plug the 6. LOWER HANDLE mulching plug. 7. GRASS BOX 8. -
Page 16: Operation Instructions
3. Then remove the dipstick and check the oil Pull the adjusting handle out and select the Level . The oil level must be between the Min Desired cutting height. The handle snaps and Max marks on the dipstick. If near the lower Into the desired position. - Page 17 E N G L I S H • Us er 's M an u a l FUNCTION vice. Never attempt to bypass its operations. 1. Charge the battery for 3 hours before use. START AND STOP THE ENGINE 2. Pull the Brake lever back to the handle. 3.
-
Page 18: Maintenance
engine stop/start lever and drive lever (clutch MAINTENANCE lever) closed and walk along with it self-propel- GENERAL RECOMMENDATIONS ling to start mowing. • Always observe safety rules when perform- ing any maintenance. Working Advices • The warranty on this lawn mower does not 1. - Page 19 E N G L I S H • Us er 's M an u a l 5. lnstall the spark plug carefully by hand, to WARNING: You will need garden gloves (not avoid crossthreading. provided) and a spanner wrench (not provided) 6.
-
Page 20: Troubleshooting
must be performed on the lawn mower. If the plug. following steps are not carried out, when you Clean the cooling fins of the cylinder and the next operate the lawn mower it may not start housing. correctly and may need to be serviced. Use the original packaging to ship whenever DANGER: Do not empty the petrol tank in possible. -
Page 21: Technical Data
E N G L I S H • Us er 's M an u a l TECHNICAL DATA PP921A POWER 5,1 HP DISPLACEMENT 196 cc MAXIMUM CUTTING 21" (530 mm) CAPACITY WHEEL DIAMETER 8"/10" NO LOAD SPEED 2 800 r/min... -
Page 22: Notas
Notas / Notes... -
Page 23: Garantía
E N G L I S H • Us er 's M an u a l Notas / Notes... -
Page 24: Warranty Policy
P Ó L I Z A D E G A R A N T Í A W A R R A N T P O L I C Y Urrea Herramientas Profesionales S.A. de C.V. Urrea Herramientas Profesionales S.A. de C.V. - Page 25 P Ó L I Z A D E G A R A N T Í A W A R R A N T P O L I C Y Urrea Herramientas Profesionales S.A. de C.V. Urrea Herramientas Profesionales S.A. de C.V.
- Page 26 Cada 8 horas o diariamente / Daily or every 8 hours Primeras 8 horas de uso / First 8 hours working Cada 200 horas o 3 meses / Every 3 months 200 hours Cada 600 horas o 6 meses / Every 6 months 600 hours Importante: Los periodos de mantenimiento indicados sirven como referencia.
Need help?
Do you have a question about the PP921A and is the answer not in the manual?
Questions and answers