Table of Contents
Advertisement
Available languages
Available languages
Quick Links
Manual de Usuario y Garantía.
User's Manual and Warranty.
ATENCIÓN: Lea, entienda y siga las instrucciones de seguridad contenidas en este manual, antes
de operar esta herramienta.
WARNING: Read, understand and follow the safety rules in this manual, before operating this tool.
TP942 manual.indd 1
Tractor Podadora
Riding Mower
TP942
769-10923
09/06/15 10:05
Advertisement
Table of Contents

Subscribe to Our Youtube Channel
Related Manuals for Urrea TP942


Summary of Contents for Urrea TP942
- Page 1 User’s Manual and Warranty. ATENCIÓN: Lea, entienda y siga las instrucciones de seguridad contenidas en este manual, antes de operar esta herramienta. WARNING: Read, understand and follow the safety rules in this manual, before operating this tool. 769-10923 TP942 manual.indd 1 09/06/15 10:05...
-
Page 2: Table Of Contents
COMBUSTIBLE: Utilice una mezcla de FUEL: Use a mixture of gasoline and oil for gasolina y aceite para motores de 2 2-stroke engines. tiempos. TP942 manual.indd 2 09/06/15 10:05... -
Page 3: Normas Generales De Seguridad
12. El operar el tractor sin la cubierta de descarga o dañada están involucrados en un gran porcentaje de lesiones relaciona- puede provocar el contacto con la cuchilla o lesiones por obje- das con tractores corta césped. Estos operadores deberían eva- tos disparados por las cuchillas. TP942 manual.indd 3 09/06/15 10:05... - Page 4 Deje que la máquina se enfríe 5 minutos antes de almace- deslizamiento. narla. NIÑOS: Puede ocurrir un accidente si el operador no está alerta de la presencia de los niños. Los niños sueles ser atraídos hacia TP942 manual.indd 4 09/06/15 10:05...
-
Page 5: Ensamble Y Configuración
(+). El negativo es el terminal de la batería marcada Neg. (-). horas de funcionamiento. Al finalizar el estimado de vida útil, adquiera una máquina nueva o haga inspeccionar anualmen- te su podadora por un distribuidor de servicio autorizado para TP942 manual.indd 5 09/06/15 10:05... - Page 6 1. Con las ruedas del tractor viendo hacia adelante, coloque el su operación. Tenga cuidado de no sobrepasar el nivel recomen- volante sobre el eje de dirección. dado de aceite en el tanque. Realice mantenimiento o verifique el aceite del motor como se TP942 manual.indd 6 09/06/15 10:05...
- Page 7 Vea la Para detener el motor, gire la llave de encendido en sentido con- figura 5. trario a las agujas del reloj hasta la posición OFF (apagado). Fig. 5 TP942 manual.indd 7 09/06/15 10:05...
-
Page 8: Instrucciones De Operación
(TdF, adapte a la altura deseada. enganche de cuchilla) en la posición enganchada (ON), inde- pendientemente de que el freno de mano esté colocado o no. TP942 manual.indd 8 09/06/15 10:05... - Page 9 1. Si las cuchillas están enganchadas, coloque la palanca de de control de velocidad en la posición de baja velocidad, realice toma de fuerza (TdF, enganche de cuchilla) en la posición OFF lo siguiente: (desconectada). 1. Coloque la palanca de cambios en posición NEUTRAL. TP942 manual.indd 9 09/06/15 10:05...
-
Page 10: Mantenimiento
Controle el nivel de aceite del motor antes de cada uso como se indica en el manual del Propietario/ Operador que viene emba- lado con la unidad. Siga las instrucciones con atención. TP942 manual.indd 10 09/06/15 10:05... - Page 11 EJES DELANTEROS unidad con la batería muerta. Cada extremo de la barra de pivote delantera del tractor puede 3. Arranque el tractor como se indica en la sección Operación. TP942 manual.indd 11 09/06/15 10:05...
- Page 12 Consulte con su distribuidor de servicio autorizado de la ménsula estabilizadora. Fig. 10 para realizar un ajuste correcto del freno. Vea la figura 10. TP942 manual.indd 12 09/06/15 10:05...
- Page 13 10. Deslice suavemente la base de corte (desde el lado derecho) batería antes de cargar la batería de su tractor. Siempre siga las afuera de la parte inferior del tractor. instrucciones y tenga en cuenta las advertencias. TP942 manual.indd 13 09/06/15 10:05...
- Page 14 10. Tire de la parte derecha de la banda, y coloque el lado an- librio adecuado de la cuchilla. gosto en V de la correa en la polea de TdF. TP942 manual.indd 14 09/06/15 10:05...
-
Page 15: Solucionador De Problemas
Bajo nivel de aceite en el motor. Llene el cárter con la adecuada cantidad de aceite. Flujo de aire restringido. Limpie los recortes de pasto y suciedad acumulados alrededor de las aletas de refrigeración del motor y del alojamiento del soplador. TP942 manual.indd 15 09/06/15 10:05... -
Page 16: General Safety Rules
‘ON’ position and move the RH and LH drive control levers toward roads, sidewalks, bystanders and the like. Also, avoid to the neutral position before attempting to start the engine. discharging material against a wall or obstruction which may TP942 manual.indd 16 09/06/15 10:05... - Page 17 · Do not try to stabilize the machine by putting your foot on blade(s) and all moving parts have stopped. Disconnect the the ground. spark plug wire and ground against the engine to prevent un- · Do not use a grass catcher on steep slopes. intended starting. TP942 manual.indd 17 09/06/15 10:05...
-
Page 18: Assembly & Set-Up
Never black cable to the negative bat- tamper with factory setting of engine governor. tery terminal (–) with the bolt Fig. 1 and hex nut. TP942 manual.indd 18 09/06/15 10:05... - Page 19 • This engine is certified to operate on unleaded gasoline. For to the following steps. best results, fill the fuel tank with only clean, fresh, unleaded gasoline with a pump sticker octane rating of 87 or higher. TP942 manual.indd 19 09/06/15 10:05...
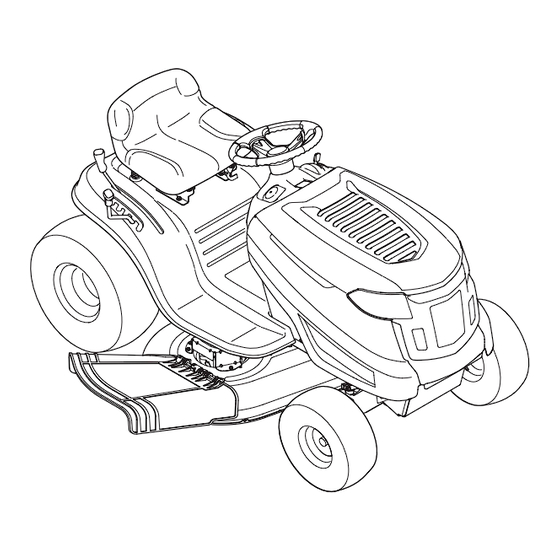
- Page 20 See Figure 8. IMPORTANT: Never force the shift Shift Lever lever. Doing so may result in serious Deck Lift Lever damage to the tractor’s transmission. Fig. 8 Cup Holder PTO (Blade Engage) Lever TP942 manual.indd 20 09/06/15 10:05...
-
Page 21: Operation Instructions
1. Insert the tractor key into the ignition switch. · Keep safety devices (guards, shields, and switches, etc.) in 2. Place the PTO (Blade Engage) lever in the disengaged (OFF) place and working. position. TP942 manual.indd 21 09/06/15 10:05... - Page 22 To raise the cutting deck, move the deck lift lever to the left, have seated themselves into the pulleys during the break-in then place it in the notch best suited for your application. Refer period. to Setting The Cutting Height earlier in this section. TP942 manual.indd 22 09/06/15 10:05...
-
Page 23: Maintenance
NOT recommended. It may cause damage to electrical 1. Run the engine for a few minutes to allow the oil in the components, spindles, pulleys, bearings or the engine. crankcase to warm up. Warm oil will flow more freely and carry TP942 manual.indd 23 09/06/15 10:05... - Page 24 Both measurements taken should be prevent corrosion. equal. If they’re not, proceed to the next step. TP942 manual.indd 24 09/06/15 10:05...
- Page 25 4. Make the final connection on the engine block of the tractor, carefully remove the deck sup- away from the battery. Attach to a unpainted part to assure a Fig. 13 port from the deck lift arm. good connection. TP942 manual.indd 25 09/06/15 10:05...
- Page 26 Fig. 18. 4. To properly sharpen the cutting blades, remove equal amounts of metal from both ends of the blades along the cut- ting edges, parallel to the trailing edge, at a 25° to 30° angle. TP942 manual.indd 26 09/06/15 10:05...
-
Page 27: Troubleshooting
Dirty air cleaner. Replace air cleaner paper element or clean foam pre-cleaner. ENGINE OVERHEATS Engine oil level low. Fill crankcase with proper amount and weight of oil. Air flow restricted. Clean grass clippings and debris from around the engine’s cooling fins and blower housing. TP942 manual.indd 27 09/06/15 10:05... - Page 28 M a n u a l d e u s u a r i o / U s e r ’s m a n u a l Notas / Notes TP942 manual.indd 28 09/06/15 10:05...
-
Page 29: Periodic Maintenance Chart
NOTE: The service intervals indicated are to be used as a guide. Service to be performed more frequently as necessary by operating condition. • When damage or defect occurs in listed parts, replace with a new one. TP942 manual.indd 29 09/06/15 10:05... -
Page 30: Warranty Policy
P Ó L I Z A D E G A R A N T Í A W A R R A N T P O L I C Y Urrea Herramientas Profesionales S.A. de C.V. garan- Urrea Herramientas Profesionales S.A. de C.V. War- tiza este producto por el termino de 1 año en sus piezas,... - Page 31 M a n u a l d e u s u a r i o / U s e r ’s m a n u a l Notas / Notes TP942 manual.indd 31 09/06/15 10:05...
-
Page 32: Slope Gauge
Siempre corte el césped a través de la superficie de la cuesta, nunca slopes in excess of 15 degrees. All slopes require extra caution. Always mow hacia arriba y abajo de las pendientes. across the face of slopes, never up and down slopes. TP942 manual.indd 32 09/06/15 10:05...
Need help?
Do you have a question about the TP942 and is the answer not in the manual?
Questions and answers