Table of Contents
Advertisement
Quick Links
Xperience platform
All of Nexmosphere's controllers are built on the same platform principles. If this is your first time using a Nexmosphere
controller, we recommend to first read
our platform and its terminology.
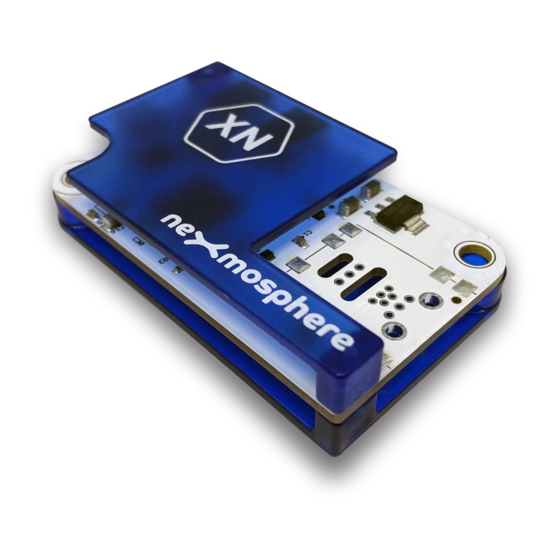
XN-135M3
The XN-135M3 is an Xperience controller with 2 X-talk interfaces and
1 presence sensor interface:
1.
X-talk interface 001
2.
X-talk interface 002
3.
Presence sensor interface (X-talk address 003)
USB.
5V Power input and API interface (micro-USB connector)
LED.
White status LED
Hardware setup
1. Connect one or more Elements to any of the 2 X-talk interfaces. Connect an IR presence sensor to its dedicated interface.*
2. Connect the micro-USB cable to a 3rd party device (e.g. Digital Signage Player or PC).
3. Wait until the white status LED stops blinking. This lasts about 5 seconds.
*Make sure the IR sensor matches the Controller and sensor cable: XN-135M31 matches with sensor S-CM01 and cable CA3-S..C,
XN-135M34 matches with sensor S-CM04 and cable CA3-S..C, XN-135M37 matches with sensor S-CM07 and cable CA3-54C.
Software setup for testing (Terminal)
Typically, the XN-135M3 controller is connected to a 3rd party device, such as a Digital Signage Player, on which CMS software is installed that has built-in
functionality for sending and receiving Serial Events. However, if you want to do a first test on a PC or Mac, follow the instructions below:
1. Download a terminal program. For example
2. Open the Terminal program and go to settings. Choose the COM port on which the XN-135 controller enumerated*.
In most cases this is the highest available number in the COM port drop-down setting.
3. Set the COM port settings to the following values
Baudrate
Parity
Data
Stop
4. Set the COM port to "Open". The controller is now ready for use.
5. When sending consecutive API serial commands to the XN-135M3 controller, place a 50mS delay between each command.
*In case the XN-135M3 controller is not recognized as a COM port by the 3rd party device, a driver (Prolific PL2303) can be downloaded
Functionality
The XN-135M3 runs our API which provides serial output when a specific sensor Element is triggered (for example a pick-up,
or -motion sensor or touch button) and provides control over output Elements (for example controlling LED strips) via serial
input commands. These API serial commands are typically used to create interactive Xperiences for Digital Signage.
The complete API Manual and additional helpful documents can be found on
documentation. To get you started, we've included some starter examples of our Elements and the corresponding API serial
commands on the following pages.
3rd party devices and software
This Quick Start Guide offers a generic explanation of the setup and operation of the XN-135M3 Xperience controller. It
does not cover information on how to integrate the Controllers, Elements and their API triggers in specific 3rd party devices
or software. We have manuals available with step-by-step instructions on how to integrate Nexmosphere products with the
products of our hardware, -and software partners. You'll find these on the support and partner pages of our website.
N e x m o s p h e r e
H i g h Te c h C a m p u s 1 0 ( M μ b u i l d i n g )
5 6 5 6 A E E i n d h o v e n • T h e N e t h e r l a n d s
https://nexmosphere.com/technology/xperience-platform/
001 002 003
XN
008 007 006 005
Termite
or
115200
None
Bits 8
Bits 1
T + 3 1 4 0 2 4 0 7 0 7 0
E s u p p o r t @ n e x m o s p h e r e . c o m
XN-135M3 XPERIENCE CONTROLLER
004
LED
USB
Hercules.
Flow Control
None
EOL
CR+LF
Protocol
ASCII
All content contained herein is subject to change without prior notice.
QUICK START GUIDE
to learn the basics about
001 002
1
2
XN
here.
https://nexmosphere.com/support-
© 2020 Nexmosphere. All rights reserved. v1.0 / 04-20
003
3
1
Advertisement
Table of Contents

Related Manuals for Nexmosphere XN-135M3


Summary of Contents for Nexmosphere XN-135M3
- Page 1 Software setup for testing (Terminal) Typically, the XN-135M3 controller is connected to a 3rd party device, such as a Digital Signage Player, on which CMS software is installed that has built-in functionality for sending and receiving Serial Events. However, if you want to do a first test on a PC or Mac, follow the instructions below: 1.
- Page 2 (4x button interface) USB-A to Micro-USB cable to X-talk interface 002 is pressed, the following API serial XT-B4 (connect to 3rd party device) commands are sent from the XN-135M3 to the 3rd party Push buttons (with LED, 4x) device: X002A[3]...
- Page 3 Combining Elements The XN-135M3 Xperience controller has 2 X-talk interfaces and 1 presence sensor interface to which any combination of Elements can be connected. For example, three of the examples in this Quick Start Guide can be combined on a single XN-135M3.
Need help?
Do you have a question about the XN-135M3 and is the answer not in the manual?
Questions and answers