Table of Contents
Advertisement
Quick Links
BA-0067
Betriebsanleitung
Operation manual
Instrucciones de servicio
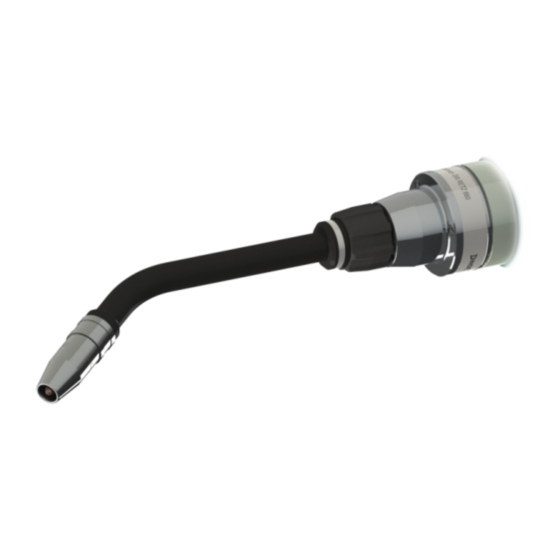
Anwendungsbeispiel
Sample application
Ejemplo de aplicación
LITE.torch
LITE.torch
LITE.torch
Drehmedium
Rotary interface
Interface de giro
DIX RET 360 (WB)
DIX RETZ 660 (WB)
Für künftige Verwendung aufbewahren!
Keep in secure area for future reference!
Conservar para uso posterior!
S o l d a d u r a
w e l d i n g
S c h w e i S S e n
S c h w e i S S e n
w e l d i n g
Advertisement
Table of Contents

Related Manuals for DINSE DIX RET 360

Summary of Contents for DINSE DIX RET 360
- Page 1 LITE.torch LITE.torch Drehmedium Rotary interface Interface de giro DIX RET 360 (WB) DIX RETZ 660 (WB) Für künftige Verwendung aufbewahren! Keep in secure area for future reference! Conservar para uso posterior! S o l d a d u r a...
- Page 2 DINSE G.m.b.H. Ningún tipo de copia y de traducción, incluso parcial, de estas instrucciones, se puede reproducir sin autorización escrita de DINSE G.m.b.H., ni almacenar, procesar y divulgar utilizando sistemas electrónicos.
- Page 3 Inbetriebnahme lesen, um einen fully before operating this product. The falta estas instrucciones de servicio, sicheren Umgang mit dem DINSE - Produkt zu owner of the product must make this operating para garantizar un manejo seguro del producto garantieren. Der Betreiber muss dem Bediener manual available to each operator and ensure DINSE.
-
Page 4: Table Of Contents
1. Introduction 5. Installation 1.1 EC-Declaration of conformity DIX RET 360 5.1 Mounting on a robot arm 1.2 EC-Declaration of conformity DIX RET 360 WB 5.1.1 Tools and components 5.1.2 Mounting of the flange 1.3 EC-Declaration of conformity DIX RETZ 660 1.4 EC-Declaration of conformity DIX RETZ 660 WB... -
Page 5: Einleitung
Por favor, póngase en contacto con el dis- country, if you have any questions or requests triebspartner ihres Landes in Verbindung, wenn tribuidor DINSE de su país, si usted tiene regarding equipment and supplies. Sie Fragen oder Wünsche bzgl. Zubehör und cualquier pregunta o solicitud de los equipos Ausstattung haben. - Page 6 Introduction Introducción EG-Konformitätserklärung EC-Declaration of conformity Declaración de conformidad DIX RET 360 DIX RET 360 DIX RET 360 S o l d a d u r a w e l d i n g S c h w e i S S e n...
-
Page 7: Eg-Konformitätserklärung Dix Ret 360 Wb
Introduction Introducción EG-Konformitätserklärung EC-Declaration of conformity Declaración de conformidad DIX RET 360 WB DIX RET 360 WB DIX RET 360 WB S o l d a d u r a w e l d i n g S c h w e i S S e n... - Page 8 Einleitung Introduction Introducción EG-Konformitätserklärung EC-Declaration of conformity Declaración de conformidad DIX RETZ 660 DIX RETZ 660 DIX RETZ 660 S o l d a d u r a w e l d i n g S c h w e i S S e n S c h w e i S S e n w e l d i n g...
-
Page 9: Eg-Konformitätserklärung Dix Retz 660 Wb
Einleitung Introduction Introducción EG-Konformitätserklärung EC-Declaration of conformity Declaración de conformidad DIX RETZ 660 WB DIX RETZ 660 WB DIX RETZ 660 WB S o l d a d u r a w e l d i n g S c h w e i S S e n S c h w e i S S e n w e l d i n g... -
Page 10: Sicherheit
D I N S E - P r o d u k t e s i n d m i t All DINSE products are equipped with safety Todos los productos DINSE están equipados Schutzeinrichtungen ausgerüstet. Sie sind devices. They are manufactured using the con dispositivos de protección. -
Page 11: Bestimmungsgemäße Verwendung
Por motivos de seguridad, DINSE prohíbe refacciones y modificaciones arbitrarias Inter- Aus Sicherheitsgründen untersagt DINSE For safety reasons, DINSE does not permit, face de giro. eigenmächtige Umbauten und Veränderungen authorize, or recommend any third-party mo- des Drehmediums. -
Page 12: Gefährdungen Bei Bestimmungsgemäßer Verwendung
Sicherheit Safety Seguridad Gefährdungen bei bestim- Safeguarding against potential Riesgos existentes al emplear mungsgemäßer Verwendung hazards during regular usage adecuadamente el producto Achtung: Unfallverhütungsvorschriften Attention: Always observe the accident ATENCIÓN: Atender las normas de preven- beachten!Außerachtlassung nachfolgender prevention and safety regulations listed ción de accidentes! Sicherheitsmaßnahmen kann lebensgefähr- below. - Page 13 Sicherheit Safety Seguridad Gefährdungen bei bestim- Safeguarding against potential Riesgos existentes al emplear mungsgemäßer Verwendung hazards during regular usage adecuadamente el producto Gefahr Eye injury may occur due to Peligro de lesiones en los flying chips, wire electrode Augenverletzungen durch ojos debido al desprendi- umherfliegende Späne,...
-
Page 14: Zugelassene Bediener
In the event your DINSE product needs repair, En caso de reclamaciones básicas durante any repairs must be performed by either DINSE el plazo de garantía, se debe enviar a DINSE electricians or qualified electricians appointed interface de giro inalterado. -
Page 15: Transport Und Verpackung
Bei Funktionsstörungen setzen Sie sich mit contacto con DINSE – Distribuidores a su DINSE in Verbindung und senden Sie bitte das In case of damage, contact the DINSE – Distri- país, y envíe el interface de giro completo a: vollständige Drehmedium an:... -
Page 16: Technische Daten
Technische Daten Technical Data Datos técnicos Kompatible Pistolenköpfe Torch heads Cabezas de la antorcha Es gilt die Ergänzungsvereinbarung zur Entsorgung von Elektro- und Elektronikgeräten der Allgemeinen Lieferbedingungen des ZVEI - Stand 2002 The supplementary agreement on disposal of electrical and electronic equipment according to the general conditions of ZVEI applies here - Status 2002 El acuerdo complementario para la eliminación de aparatos electrónicos y eléctricos rige las condiciones generales de entrega de ZVEI - versión 2002... -
Page 17: Drehmedium
Technische Daten Technical Data Datos técnicos Drehmedium Rotary interface Interface de giro Schweißverfahren MIG/MAG-Schweißen und Löten Welding technique MIG/MAG welding and soldering Procedimientos de soldadura Soldadura y uniones por soldadura MIG/MAG Schutzart Protection class IP 23 Tipo de protección Drehbarkeit 260°... -
Page 18: Anwendungshinweise
Anwendungshinweise Instructions for use Instrucciones de uso E s g i b t e i n e Vi e l z a h l v e r s c h i e d e n e r There are many different robot types and Existe una gran variedad de tipos de robot y de Robotertypen und verschiedene Roboterher- numerous robot manufacturers. -
Page 19: Inbetriebnahme
● Socket spanner DIX SCS 300 ● Llave de enchufe DIX SCS 300 ● Steckschlüssel DIX SCS 300 Refer to the DINSE product catalog for Encontrará más información sobre las N ä h e r e I n f o r m a t i o n e n more details about DINSE tools. -
Page 20: Montage Des Flansches
Inbetriebnahme Installation Puesta en marcha Montage am Roboterarm Mounting on a robot arm Montaje en el brazo del robot 5.1.2 Mounting of the flange 5.1.2 Montage des Flansches 5.1.2 Montaje de la brida de 1. Antes de fijar la interfaz rotativa, el robot 1. - Page 21 Inbetriebnahme Installation Puesta en marcha Montage am Roboterarm Mounting on a robot arm Montaje en el brazo del robot 5.1.2 Mounting of the flange 5.1.2 Montage des Flansches 5.1.2 Montaje de la brida de Überstehende Köpfe der Protruding heads of the Las cabezas que sobresalgan Innensechskantschrauben hexagon socket screws and/...
-
Page 22: Montage Lite.torch
Power Pin Power Pin Power Pin Verwenden Sie nur die Original DINSE - Only use original DINSE plastic screws to Emplee solo los tornillos de plástico Kunststoffschrauben, um die Isolierung ensure proper insulation of the compact originales de Dinse para garantizar el des Kompaktsteckers zu gewährleisten. - Page 23 DINSE Schlauchlegende: Key to DINSE hoses: Leyenda de mangueras DINSE: Schutzgas: Schlauch ø 6mm, gelb Shield gas: Hose dia. 6mm, yellow Gas de protección: Manguera Ø...
- Page 24 Inbetriebnahme Installation Puesta en marcha Montage am Roboterarm Mounting on a robot arm Montaje en el brazo del robot 5.1.3 Montage LITE.torch 5.1.3 Mounting the LITE.torch 5.1.3 Montaje del LITE.torch 3. Setzen Sie den LITE.torch gerade auf 3. Place the LITE.torch straight on the 3.
-
Page 25: Montage Des Pistolenkopfes
Inbetriebnahme Installation Puesta en marcha Montage am Roboterarm Mounting on a robot arm Montaje en el brazo del robot 5.1.4 Montage des Pistolenkopfes 5.1.4 Mounting the torch head 5.1.4 Montaje del cabezal de pistola 1. Schrauben Sie den Stutzen DIX MES 1. -
Page 26: Drahtführungsspirale Einführen
2. Loosen the screw base on the torch head m i t d e m D I N S E S p e z i a l s c h l ü s s e l with the DINSE DIX SSL 1/2 clamp nut. DINSE DIX SSL 1/2. - Page 27 D I N S E S p e z i a l s c h l ü s s e l with the DINSE DIX SSL 1/2 special zal de pistola con la llave especial DINSE DIX SSL 1/2.
- Page 28 Drahtführungsspirale Ensure that you insert liners cut to length können den Drahtförders- punta de la espiral de guía by DINSE into the torch set with the ground off side first. ACHTUNG! chlauch zerstören. de hilo pueden dañar el con- ¡ATENCIÓN!
- Page 29 7. Drehen Sie die Kontaktspitze mit dem 7. Tighten the contact tip (hand-tight) using 7. Apriete la punta de contacto con la llave DINSE Spezialschlüssel DIX SSL 1/2 fest the DINSE DIX SSL 1/2 special wrench. especial DINSE DIX SSL 1/2 (manual- (Handfest). mente).
- Page 30 Inbetriebnahme Installation Puesta en marcha Montage am Roboterarm Mounting on a robot arm Montaje en el brazo del robot 5.1.5 Drahtführungsspirale einführen 5.1.5 Insert liner 5.1.5 Inserción de la espiral de guía de hilo 9. Fixieren Sie die Drahtführungsspirale in 9.
-
Page 31: Verfahrwege Prüfen
M i t d e m D I N S E L I T E . t o r c h Travel of the robot in any direction is Con el sistema de soldadura DINSE Schweißsystem sind alle Verfahrwege possible with the DINSE LITE.torch LITE.torch se pueden realizar todos... -
Page 32: Wartungshinweise
Wartungshinweise Maintenance instructions Indicaciones de mantenimiento Das Drehmedium ist durch die Verwendung Due to our use of high-grade components, El juego de interfaz de giro es en gran parte hochwertiger Bauteile weitgehend wartungsfrei. the rotary interface should require very little libre de mantenimiento debido a la utilización Um einen störungsfreien Betrieb zu gewähr- maintenance. - Page 33 Wasser verwendet werden. We recommend sending the complete Recomendamos enviar toda la interfaz rotary interface to DINSE for servicing rotativa una vez al año a DINSE para Wir empfehlen jährlich das vollständige and maintenance. su mantenimiento y conservación. Drehmedium zur Wartung und Instand- haltung an DINSE zu schicken.
-
Page 34: Schweißgarnitur Reparieren
Beachten Sie bitte, dass Reparaturen Please note that repairs should Tenga en cuenta que las reparaciones generell nur von DINSE oder von ihr generally be performed only by DINSE las puede realizar sólo DINSE o un or qualified electricians appointed by beauftragte Elektrofachkräfte ausge-... - Page 35 Wartungshinweise Maintenance instructions Indicaciones de mantenimiento Flüssiggekühlte Liquid-cooled LITE.torch LITE.torch refrigerada por líquido LITE.torch Roboterstellung Robot position Robot posición Gehen Sie wie folgt vor: Proceed as follows: Proceda de la siguiente manera: Schalten Sie das Kühlsystem aus, wenn Switch off the cooling system when repla- Desconecte el sistema de refrigeración al Sie den LITE.torch wechseln.
-
Page 36: Störungsbehebung
Störungsbehebung Troubleshooting Solución del problema Störung Mögliche Ursache Behebung Draht wird nicht oder ruckartig gefördert Verstopfte oder beschädigte Draht- Reinigen oder wechseln Sie die Draht- führungsspirale führungsspirale aus Kontaktspitze mit zu kleiner Bohrung Verwenden Sie eine auf den Draht abges- timmte Kontaktspitze Drahtführungsspirale mit zu kleinem Innen- Verwenden Sie eine auf den Draht abges-... - Page 37 Störungsbehebung Troubleshooting Solución del problema Störung Mögliche Ursache Behebung Kühlflüssigkeitsschläuche nicht Verbinden Sie die Kühlflüssigkeitsschläuche Schweißpistole wird zu heiß angeschlossen mit dem Drahtvorschubkoffer Zu wenig Kühlflüssigkeit Füllen Sie Kühlflüssigkeit nach Leckage im Kühlkreislauf Beheben Sie die Leckage und füllen Sie Kühlflüssigkeit nach Kühlflüssigkeit verschmutzt Tauschen Sie die Kühlflüssigkeit gegen...
-
Page 38: Anhang A
Anhang A Appendix A Apéndice A Montage des Knickschutzes bei Mounting the bend protection at Montaje de la protección frente a pandeo en Motoman-Yaskawa-Robotern Motoman-Yaskawa-Robots Motoman-Yaskawa-Robots 1. Ziehen Sie den Knickschutz über die Schweiß- 1. Pull the bend protection over the torch set 1. -
Page 39: Anhang B
Anhang B Appendix B Apéndice B Montage des Zusatzflansches Mounting the adding flange at Montaje de la platina adaptadora en bei ABB-Robotern ABB-Robots ABB-Robots 1. Setzen Sie den zusätzlichen Flansch auf 1. Place the additional flange on the 1. Coloque la brida adicional de sobre flange of the robot arm. -
Page 40: Anhang C
Anhang C Appendix C Apéndice C Tausch ECO.torch gegen LITE.torch Change ECO.torch into LITE.torch Intercambio ECO.torch contra LITE.torch bei ABB-Robotern at ABB-Robots en ABB-Robots z.B.: ABB IRB 1600 ID ROBOTER p.e.: ABB IRB 1600 ID ROBOT e.g.: ABB IRB 1600 ID ROBOT S o l d a d u r a w e l d i n g S c h w e i S S e n... - Page 41 Anhang C Appendix C Apéndice C Tausch ECO.torch gegen LITE.torch Change ECO.torch into LITE.torch Intercambio ECO.torch contra LITE.torch Wenn Sie das ECO.torch Drehmedium gegen If you want to change the ECO.torch rotary Si desea sustituir la interfaz de giro ECO. den LITE.torch austauschen wollen, bedenken interface for the LITE.torch, remember that the torch por la LITE.torch, tenga en cuenta que...
- Page 42 Anhang C Appendix C Apéndice C Tausch ECO.torch gegen LITE.torch Change ECO.torch into LITE.torch Intercambio ECO.torch contra LITE.torch 4. Place the LITE.torch straight on the flange. 4. Setzen Sie den LITE.torch gerade auf den 4. Coloque la LITE.torch recta sobre la brida. Flansch auf.
-
Page 43: Anhang D
Por favor pregunte qué Power Pin necesita Sie für Ihren Drahtvorschub benötigen. power pin you require for your wire feeder. su devanador de hilo. Lassen Sie sich von unseren DINSE-Anwen- Seek advice from our DINSE application Nuestros técnicos de aplicaciones de DINSE dungstechnikern beraten. - Page 44 2. Apriete el casquillo roscado con la llave m i t d e m D I N S E S p e z i a l s c h l ü s s e l with the DINSE DIX SSL 1/2 special especial DINSE DIX SSL 1/2.
- Page 45 D I N S E S p e z i a l s c h l ü s s e l with the DINSE DIX SSL 1/2 special zal de pistola con la llave especial DINSE DIX SSL 1/2.
- Page 46 Anhang D Appendix D Apéndice D Drehmedium mit integrierter Drahtbremse Rotary interface with integrated wire brake Interfaz rotativa con freno de hilo integrado Einführen der Drahtführungsspirale Insert liner Inserción de la espiral de guía de hilo Eine Drahtführungsspirale A liner with too small an inside Una espiral de guía de hilo con m i t k l e i n e m...
- Page 47 Anhang D Appendix D Apéndice D Drehmedium mit integrierter Drahtbremse Rotary interface with integrated wire brake Interfaz rotativa con freno de hilo integrado Einführen der Drahtführungsspirale Insert liner Inserción de la espiral de guía de hilo 2. Ziehen Sie jetzt die Drahtführungsspirale 2.
- Page 48 6. Drehen Sie die Kontaktspitze mit dem 6. Tighten the contact tip (hand-tight) using 6. Apriete la punta de contacto con la llave DINSE Spezialschlüssel DIX SSL 1/2 fest the DINSE DIX SSL 1/2 special wrench. especial DINSE DIX SSL 1/2 (manual- (Handfest). mente).
- Page 49 Ensure that you insert liners cut to length Asegúrese de introducir las espirales de Achten Sie darauf, dass Sie bei von der by DINSE into the torch set with the guía de hilo cortadas por DINSE por el ground off side first.
- Page 50 Anhang D Appendix D Apéndice D Drehmedium mit integrierter Drahtbremse Rotary interface with integrated wire brake Interfaz rotativa con freno de hilo integrado Einführen der Drahtführungsspirale Insert liner Inserción de la espiral de guía de hilo 3. Drücken Sie die Drahtführungsspirale etwas 3.
-
Page 51: Anhang E
Anhang E Appendix E Apéndice E Korrektes Schneiden von Drahtführungs- Correct cutting of liners Corte correcto de la espiral de guía de hilo spiralen 1. Setzen Sie den Seitenschneider in der 1. Position the wire cutter on the groove to cut 1.
Need help?
Do you have a question about the DIX RET 360 and is the answer not in the manual?
Questions and answers