Table of Contents

Related Manuals for Davis Instruments WeatherLink 6510USB

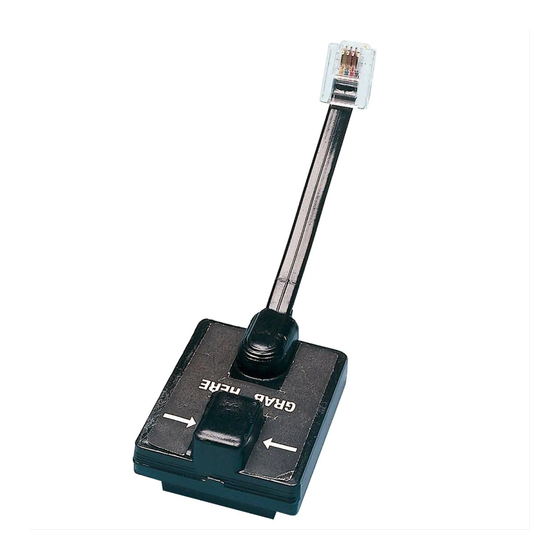
Summary of Contents for Davis Instruments WeatherLink 6510USB
- Page 1 GETTING STARTED GUIDE WeatherLink® Data Loggers For Vantage Pro2™, Vantage Vue®, and Weather Envoy™ Product number 6510USB and SER Davis Instruments, 3465 Diablo Avenue, Hayward, CA 94545-2778 U.S.A. • 510-732-9229 • www.davisinstruments.com...
- Page 2 • Connect the equipment into an outlet on a circuit different from that to which the receiver is connected • Consult the dealer or an experienced radio/TV technician for help. Changes or modifications not expressly approved in writing by Davis Instruments may void the user’s authority to operate this equipment.
- Page 3 ® Welcome to WeatherLink WeatherLink ® data loggers let you connect a Vantage Pro2 ™ or Vantage Vue ® console, or Weather Envoy ™ to your personal computer so you can store, view, plot, analyze, export, and print weather data collected by the weather station. You can also upload your data to your ownWeatherlink.com page.
-
Page 4: Computer Requirements
Pro+, but this is not necessary to download software. Click Get Started under the Basic column. 4. The WeatherLink Bulletin Dashboard will appear for Davis Instruments weather data. On the right side of the screen, your name will appear. Click the Account icon under your name. - Page 5 Install Your WeatherLink USB Data Logger in a Vantage Pro2 or Vantage Vue Console Note: For Weather Envoy: See the Weather Envoy User Guide instructions for opening the Envoy and installing the data logger. (The manual is available online at www.davisinstruments.com.) CAUTION: Failure to remove power to the console (or Envoy) before installing or uninstalling any data logger may cause damage to the data logger or console.
- Page 6 3. Firmly insert the data logger into the large receptacle marked EXPANSION inside the battery compartment. 4. Insert the USB - Mini B connector into the USB connector of the USB data logger. The connection between the console and the computer can be extended up to 16' (5 m) total length using a USB-to-USB connector cable.
- Page 7 Install your WeatherLink Serial Data Logger in a Vantage Pro2 or Vantage Vue console Note: For Weather Envoy: See the Weather Envoy User Guide instructions for opening the Envoy and installing the data logger. (The manual is available online at www.davisinstruments.com.) CAUTION: Failure to remove power to the console or Envoy before installing or uninstalling any data logger may cause damage to the data logger or console.
- Page 8 1. Enter the console’s Setup Mode by pressing and holding DONE, then pressing the down arrow (-). Entering Setup Mode ensures that the station is not writing any data and saves the current daily weather information to memory. 2. Power down your console or Envoy. Remove the battery cover, the batteries, and AC-power adapter, if present.
- Page 9 Set up and run the WeatherLink Computer Software Double click to open the software. 1. The License Agreement dialog box displays. Review the license agreement, click I Agree and click Next. The Select Installation Folder dialog box displays. 2. Select the default location to install WeatherLink or find another location by clicking Browse.
- Page 10 Set up your station in the software Each console/data logger connected to the computer must have its own “station” within the software. The software creates a database for the station and other station-specific information, and requires that the necessary communication settings (communication type, etc) be set. 1.
-
Page 11: Communication Port Settings
Communication Port Settings Use the Communications Port dialog box to select the communications type and to test communication between the computer and the console/data logger. Select Communications Port from the Setup menu or use the Walkthrough to display the dialog box. WeatherLink USB 1. - Page 12 3. Click Test to verify communication. 4. Click OK to save the Communications Port settings. Note: Leave the BAUD rate at 19200. The console BAUD rate should also be set to 19200. This is the default setting. See your console User Guide if it needs to be reset to 19200. WeatherLink SER 1.
- Page 13 Set Transceiver IDs Transceiver IDs tell the console/data logger which transmitting stations to “listen to.” Use the Set Transceiver dialog box to view and/or configure your station transmitter IDs and repeater ID assignments and to control the retransmit function. Note: For Weather Envoy, his dialog box is the only available tool for configuring the transmitter ID and repeater ID settings on your Envoy.
- Page 14 Set Up Uploads to WeatherLink.com Add your data logger to your account Note: Your computer must be on with WeatherLink Computer Software running in order to upload to WeatherLink.com. 1. On your WeatherLink.com page, click the green Add Devices button at the top of the page.
-
Page 15: Troubleshooting Guide
Troubleshooting Guide If you don’t find a solution here or in the online help files, please contact Technical Support. Communications Problems 1. If you are having trouble establishing communication between the weather station and the data logger, start by checking the console's own diagnostics. Put the console in Setup mode and then remove all power to the console and restart it by restoring power (with the data logger still attached). - Page 16 5. If the drivers is not listed, contact Technical Support for instructions on installing the necessary driver. USB emulating COM connection: 1. Open the Communications Port dialog box. Select SER if SER is not selected in the communications field and follow the prompts. 2.
- Page 17 still does not exist or if the loopback test identifies the same serial port you have selected, eliminate the following possibilities before contacting Technical Support: • Hardware device conflict—Check the Device Manager tab in the Windows System Properties dialog box to ensure that Windows recognizes the selected COM port.
-
Page 18: Program Problems
Program Problems The barometer graph on the Bulletin does not “fill in” completely. When you first load the bulletin, the barometer graph will only fill in completely when you have data in your database for the last six hours. Make sure of the following: •... -
Page 19: Contacting Davis Technical Support
The data I want to see, such as solar radiation, soil moisture, or Temp 2 does not display. Why? All optional sensors must be enabled in the Station Configuration dialog box before the data will be displayed in WeatherLink. If you are not seeing data from a sensor that is installed in your weather station, be sure check the Station Configuration in the Setup Menu and make sure the sensor has been selected. - Page 20 Vantage Pro2™, WeatherLink , and Vantage Vue are trademarks of Davis Instruments Corp. © 2019 Davis Instruments Corp. All rights reserved. Information in this document is subject to change without notice. Davis Instruments Quality Management System is ISO 9001 certified. ®...
Need help?
Do you have a question about the WeatherLink 6510USB and is the answer not in the manual?
Questions and answers