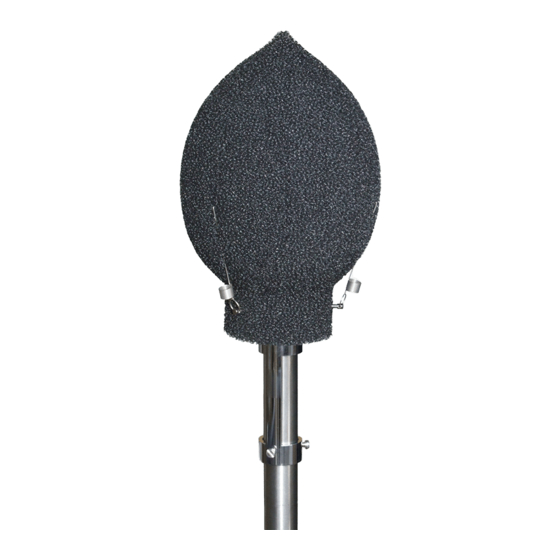
Summary of Contents for Rion WS-15
- Page 1 User Manual Windscreen for outdoor WS-15 in combination with RION sound level meters. 3-20-41 Higashimotomachi, Kokubunji, Tokyo 185-8533, Japan www.rion.co.jp Edition 2013-09...
- Page 2 1. Introduction The WS-15 wind screen is designed for outdoor installation. It helps to reduce wind noise and is equipped with rainproof features that satisfy the IPX3 water-resistant specifications. It is used with a microphone extension cable, which means that the microphone/preamplifier has to be separated from the sound level meter, before the wind screen can be mounted.
- Page 3 2. Parts The following parts are needed to mount the WS-15 windscreen onto a microphone/preamplifier combination: * WS-15 (WS150000): Windscreen for outdoors WS13S020, Inner cap WS130020 Base assembly WS15S010, Mounting stage for microphone WS15010Z * Microphone with preamplifier * Extension cable EC-04 series (various lengths)
- Page 4 Before using equipment such as the sound level meters and preamplifiers, carefully read the instruction manual for each device. The preamplifier models that can be mounted on the WS-15 are as follows: NH-21, NH-23, NH-24, NH-25, and NH-26.
- Page 5 4. Connect the extension cable EC-04 series to the preamplifier. Make sure the fastening screw is turned on hand-tight to ensure a good connection. IMPORTANT: When using WS-15, remove the windscreen slip-off prevention rubber: Windscreen slip-off protection rubber 5. Attach the mounting adapter for windscreen. The mounting adapter for windscreen has a slit along the side.
- Page 6 6. Insert the preamplifier into the mounting stage for microphone from the top. 7. Insert the preamplifier into the base of the WS-15 and rotate the base to securely fasten it to the mounting tube. Then insert the inner cap through the wires of the base and cover the preamplifier with the inner cap firmly.
- Page 7 8. Mount the windscreen. In the lower part of the windscreen, there are three slits. Align these slits with the hooks on the base and push the windscreen fully onto the base. See also the picture below for slit alignment: 9.Push each of the three tips of the springs attached to the hooks firmly into the windscreen, at about the middle section.
- Page 8 3. Use the / keys to select [Windscreen Correction] and press the MENU/ENTER key. The windscreen selection screen appears. 4. Use the / keys to select the model of windscreen (WS-15) and press the MENU/ENTER key. 5. Press the START/STOP key to return to the measurement screen.
-
Page 9: Technical Information
5. Technical Information I. Frequency response and windscreen correction Tab. 1a NL-42 Frequency response and windscreen correction Windscreen UC-52 Windscreen Windscreen Total Effect + Nominal Exact Frequency (WS-15) (WS-15) Expanded Windscreen Frequency Frequency response Effect Correction Uncertainty Correction (Hz) (Hz) - Page 10 Tab. 1b NL-52 Frequency response and windscreen correction Windscreen UC-59 Windscreen Windscreen Total Effect + Nominal Exact Frequency Expanded (WS-15) (WS-15) Windscreen Frequency Frequency response Effect Correction Uncertainty Correction (Hz) (Hz) (dB) (dB) (dB) (dB) (dB) 63,10 79,43 100,0 125,9...
- Page 11 Tab. 1b Continued Windscreen UC-59 Windscreen Windscreen Total Effect + Nominal Exact Frequency (WS-15) (WS-15) Expanded Windscreen Frequency Frequency response Effect Correction Uncertainty Correction (Hz) (Hz) (dB) (dB) (dB) (dB) (dB) 5000 5011,9 -0,5 5300 5308,8 -1,4 -0,6 5600 5623,4...
- Page 12 II. Directional characteristic 1kHz 2kHz 4kHz 8kHz -5,0 12.5kHz -10,0 -15,0 -20,0 Directional Characteristics of WS-15 - graphical presentation Edition 2013-09...
- Page 13 Tab. 2 Directional characteristic for WS-15 - Numerical data 1kHz 2kHz 4kHz 8kHz 12.5kHz -0.2 -0.1 -0.3 -0.2 -0.1 -0.4 -0.2 -0.3 -0.6 -0.7 -0.7 -0.1 -0.1 -0.6 -1.2 -1.2 -0.3 -0.2 -0.8 -1.8 -2.2 -0.5 -0.2 -1.2 -2.4 -2.9 -0.7...


Need help?
Do you have a question about the WS-15 and is the answer not in the manual?
Questions and answers