Table of Contents
Advertisement
Quick Links
Advertisement
Table of Contents

Related Manuals for Stage right 625888

Summary of Contents for Stage right 625888
- Page 1 USB MIDI Keyboard Controller P/Ns 625888, 625889, 625890, 625891 User's Manual...
-
Page 2: Table Of Contents
CONTENTS SAFETY WARNINGS AND GUIDELINES ..........................4 FEATURES ........................................5 CUSTOMER SERVICE ................................... 5 PACKAGE CONTENTS ..................................6 SYSTEM REQUIREMENTS ................................6 Windows® ......................................6 Mac® OS X®......................................6 PRODUCT OVERVIEW ..................................7 Top Panel ......................................... 7 Side Panel ......................................8 POWER SUPPLY ...................................... - Page 3 XG Mode ....................................... 16 Snap Shot ......................................16 Pedal Polarity ....................................16 Shift Button Groups..................................17 Reset .......................................... 17 PRESSURE PADS ....................................17 Pad Velocity Curve ..................................18 Pads Note Setting ..................................18 RGB Backlighting .................................... 19 MIDI MACHINE CONTROL ................................19 MIDI REFERENCE TABLES ................................
-
Page 4: Safety Warnings And Guidelines
SAFETY WARNINGS AND GUIDELINES Please read this entire manual before using this device, paying extra attention to these safety warnings and guidelines. Please keep this manual in a safe place for future reference. • This device is intended for indoor use only. •... -
Page 5: Features
FEATURES • Ideal for both stage and studio use • 37, 49, 61, or 88 velocity and pressure sensitive piano keys (the number of keys depends on the model) • Eight fully assignable velocity and pressure sensitive pads with RGB backlighting •... -
Page 6: Package Contents
PACKAGE CONTENTS Please take an inventory of the package contents to ensure you have all the items listed below. If anything is missing or damaged, please contact Monoprice Customer Service for a replacement. 1x USB MIDI Keyboard Controller 1x USB Data Cable 1x USB Power Cable SYSTEM REQUIREMENTS If using this keyboard with a computer, ensure that the computer has the following... -
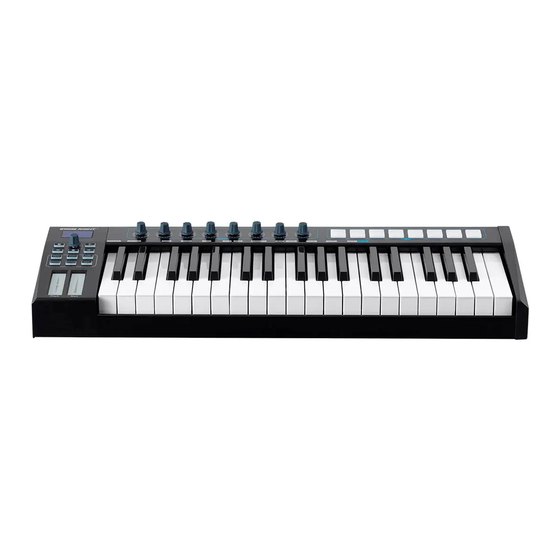
Page 7: Product Overview
PRODUCT OVERVIEW Top Panel 1. LED Display: Displays values and word fragments to indicate the keyboard status or function value. 2. Rotary Encoders: Eight fully assignable endless rotary encoders. 3. Transport/MMC Buttons: MIDI machine control (MMC) buttons for playback control of a sequencer. 4. -
Page 8: Side Panel
Side Panel 10. DC5V: Optional DC power input for connecting an AC power adapter (not included). The connector has a 5.5mm barrel diameter and a 2.1mm diameter center positive pin. 11. USB: USB Type-B jack for connecting a computer using the included USB cable. The keyboard draws all the power it needs from the USB bus. -
Page 9: Software Setup
SOFTWARE SETUP When connected to your computer with a USB cable, the keyboard will appear to your software as a simple MIDI device with one input port and one output port. You should select the keyboard input port as the MIDI input device in your software. Once this is set, your software will be able to receive notes and controller data from the keyboard. -
Page 10: Octave
1. Press the EDIT button in the section on the left to enter the Keyboard Multifunction Mode. 2. Press the key on the keyboard labeled VEL CURVE. The LED Display will show a number indicating the currently selected velocity curve. The default curve is 1. 3. -
Page 11: Midi Channel
MIDI Channel The MIDI interface supports 16 channels of MIDI data, each of which can be routed to a different device or instrument. The MIDI Channel function allows you to change the channel that the keyboard will use to send its notes and data. Perform the following steps to change the selected channel. -
Page 12: Bank Lsb And Msb
Bank LSB and MSB The original MIDI specification called for 128 different standard programs/voices. However, since that time the specification has been expanded to allow a myriad of additional sounds that can be produced by specialized MIDI devices. To accommodate these additional sounds, a 14-bit sound bank address is used. -
Page 13: Advanced Controls
The eight rotary knobs, eight pressure pads, two touch strips, and two pedals (which must be plugged in) can be assigned to any MIDI controller. Perform the following steps to assign a MIDI controller to a physical control. 1. Press the CTRL ASSIGN button in the section on the left. The LED Display will show CHO. -
Page 14: Split Mode
Split Mode Split Mode allows you to split the keyboard into two sections, each of which can have its own program/voice and MIDI channel. Perform the following steps to enable Split Mode. 1. Press the EDIT button in the section on the left to enter Keyboard Multifunction Mode. -
Page 15: Gm Mode
With Mute enabled, perform the following steps to disable Mute, so that the keyboard can send MIDI messages once again. 1. Press the EDIT button in the section on the left to enter Keyboard Multifunction Mode. 2. Press the key labeled MUTE. The LED Display will show OFF to indicate that Mute mode is disabled. -
Page 16: Xg Mode
XG Mode When XG Mode is enabled, the keyboard can send Program Change messages to select a voice on a Yamaha® XG compatible device. Perform the following steps to enable XG messages. 1. Press the EDIT button in the section on the left to enter Keyboard Multifunction Mode. -
Page 17: Shift Button Groups
2. Press the key labeled C.PEDAL.POL. The LED Display will show OFF, indicating that the pedal polarity is changed back to default. An alternative method of changing pedal polarity is to press and hold the pedal down while turning the keyboard on. The keyboard will detect the alternate state and will swap the Pedal On and Pedal Off messages. -
Page 18: Pad Velocity Curve
Pad Velocity Curve Each Pad is pressure sensitive in the same way that the regular piano keys are pressure sensitive. You can select one of six different velocity curves for the pressure pads by performing the following steps. 1. Press the EDIT button in the section on the left to enter Keyboard Multifunction Mode. -
Page 19: Rgb Backlighting
RGB Backlighting Each individual Pad can be set to have a different color of RGB backlighting. Perform the following steps to change the backlighting color for one of the Pads. 1. Press the EDIT button in the section on the left to enter Keyboard Multifunction Mode. -
Page 20: Midi Reference Tables
MIDI REFERENCE TABLES MIDI Implementation Chart Function Transmitted Recognized Remarks Default 1-16 Basic Channel Changed 1-16 Default Mode 3 Mode Messages Altered ***** 0-127 Note Number True Voice ***** Pitch Bend 0-127 Control Change True# ***** System *GM, GM2, Exclusive Song Position Pointer System... -
Page 21: General Midi Instruments
System Reset Mode 1: OMNI ON, POLY Mode 2: OMNI ON MONO 0: Yes Mode 3: OMNI OFF, POLY Mode 4: OMNI OFF MONO X: No General MIDI Instruments The following table shows the Program Change numbers for the 128 standard MIDI instruments. - Page 22 Percussive Organ Syn Sawtooth Wave Rock Organ Syn Calliope Church Organ Syn Chiff Reed Organ Syn Charang Accordion Syn Voice Harmonica Syn Fifths Tango Accordion Syn Brass Lead Guitar Synth Pad Nylon Acoustic New Age Syn Pad Steel Acoustic Warm Syn Pad Jazz Electric Polysynth Syn Pad Clean Electric...
- Page 23 Viola Banjo Cello Shamisen Contrabass Koto Tremolo Strings Kalimba Pizzicato Strings Bag Pipe Orchestral Harp Fiddle Timpani Shanai Ensemble Percussive String Ensemble 1 Tinkle Bell String Ensemble 2 Agogo Synth Strings 1 Steel Drums Synth Strings 2 Woodblock Choir Aahs Taiko Drum Voice Oohs Melodic Tom...
-
Page 24: Roland® Gs And Yamaha® Xg Nrpn Messages
Roland® GS and Yamaha® XG NRPN Messages NRPN NRPN Data Data CC99 CC98 CC06 CC38 08-00-7F (-64-0-+63) Vibrato Rate (relative change) 09-00-7F (-64-0-+63) Vibrato Depth (relative change) 0A-00-7F (-64-0-+63) Vibrato Delay (relative change) 20-00-7F (-64-0-+63) Filter Cutoff Freq. (relative change) 21-00-7F (-64-0-+63) Filter Resonance (relative change) (-64-0-+63) EG (TVF&TVA) Attack Time (relative... -
Page 25: Midi Controllers
(0 to Max Drum Instrument Chorus Send Level 00-7F-00-7F (absolute change) (0 to Max Drum Instrument Variation Send Level 1F** 00-7F-00-7F (absolute change) * Added by Yamaha® XG ** Changed from Delay to Variation by Yamaha XG MIDI Controllers 0-127 General Controller Pad Controller Pitch Bend... -
Page 26: Factory Presets
Finally, the Rotary Encoders and Pressure Pads can also be assigned any of the above MIDI Controllers. Factory Presets The following table shows the default MIDI Controllers assigned to each physical control on the keyboard. Physical Control MIDI Controller Number MIDI Controller Name Program Change Standard MIDI Controller... -
Page 27: General Midi Drums-Note Assignments
General MIDI Drums-Note Assignments MIDI Note Drum Sound MIDI Note Drum Sound Acoustic Bass Drum Ride Cymbal 2 Bass Drum 1 Hi Bongo Side Stick Low Bongo Acoustic Snare Mute Hi Conga Hand Clap Open Hi Conga Electric Snare Low Conga Low Floor Tom Hi Timbale Closed Hi-Hat... -
Page 28: Gm2 Chorus Types
0: Small Room 1: Medium Room 2: Large Room 3: Medium Hall 4: Large Hall 8: Plate GM2 Chorus Types 0: Chorus 1 1: Chorus 2 2: Chorus 3 3: Chorus 4 4: FB Chorus 5: Flanger TECHNICAL SUPPORT Monoprice is pleased to provide free, live, online technical support to assist you with any questions you may have about installation, setup, troubleshooting, or product recommendations. -
Page 29: Regulatory Compliance
REGULATORY COMPLIANCE Notice for FCC This device complies with Part 15 of the FCC rules. Operation is subject to the following two conditions: (1) this device may not cause harmful interference, and (2) this device must accept any interference received, including interference that may cause undesired operation. -
Page 30: Notice For Industry Canada
This Class B digital apparatus complies with Canadian ICES-003. Cet appareil numérique de la classe B est conforme à la norme NMB-003 du Canada. Monoprice™, Stage Right™, the Stage Right logo, and all Monoprice logos are trademarks of Monoprice Inc.
Need help?
Do you have a question about the 625888 and is the answer not in the manual?
Questions and answers