Table of Contents
Advertisement
Quick Links
Advertisement
Table of Contents

Summary of Contents for Cardinal SB500 Series
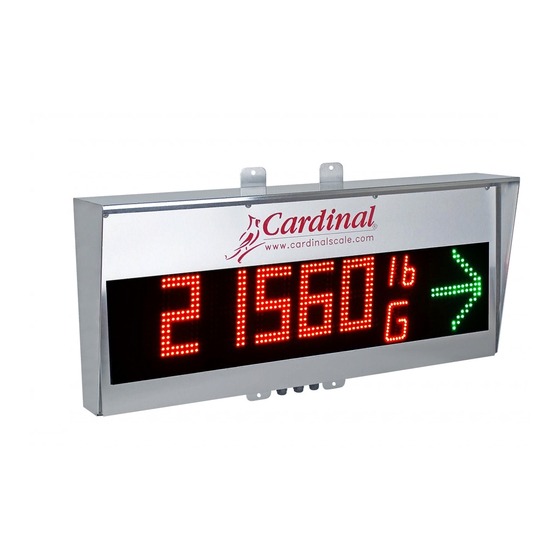
- Page 1 SB500 Series Remote Display INSTALLATION MANUAL 3601-M418-O1 Rev N 203 E. Daugherty, Webb City, MO 64870 USA Printed in USA Ph: 417-673-4631 • Fax: 417-673-2153 06/15 www.cardinalscale.com Technical Support: Ph: 866-254-8261 • tech@cardet.com 3601-M418-O1 Rev N • SB500 Series...
- Page 2 3601-M418-O1 Rev N • SB500 Series...
-
Page 3: Table Of Contents
DATE OF PURCHASE _________________ PURCHASED FROM __________________ ____________________________________ ____________________________________ RETAIN THIS INFORMATION FOR FUTURE USE PRECAUTIONS Before using this instrument, read this manual and pay special attention to all "WARNING" symbols: ELECTRICAL STATIC IMPORTANT WARNING SENSITVE 3601-M418-O1 Rev N • SB500 Series... - Page 4 Seller is not able to guarantee the result of any procedure contained herein. Nor can they assume responsibility for any damage to property or injury to persons occasioned from the procedures. Persons engaging the procedures do so entirely at their own risk. 3601-M418-O1 Rev N • SB500 Series...
-
Page 5: Introduction
INTRODUCTION Thank you for your purchase of our Cardinal SB500 Series Remote Display. It was built with quality and reliability. This manual will guide you through installation, and operation of your display. Please read it thoroughly before attempting to install your display. Also, make certain that you pay attention to the warnings that appear in this manual. -
Page 6: Instrument Compatibility
Character format all standard ASCII characters (SB500M/SB500MS Only) One user protocol can be entered into the display using the serial port and Cardinal software. MULTIPLE DISPLAYS The SB500 display has been designed to be linked or daisy-chained to other SB500 displays allowing multiple lines of weight data to be displayed while being driven by a single serial port on the weight indicating instrument. -
Page 7: Site Preparation
These sources of disturbances must be identified and steps must be taken to prevent possible adverse effects on the display. Examples of available alternatives include isolation transformers, power regulators, uninterruptible power supplies, or simple line filters. 3601-M418-O1 Rev N • SB500 Series... -
Page 8: Installation
Attach the display to the wall and securely tighten the retaining bolts. Power Supply Auto-Learn AC Power Controller Terminal Block Figure No. 2 3601-M418-O1 Rev N • SB500 Series... - Page 9 AC power terminal block and power supply mounted inside the enclosure. See Figure No. 2. Ambient Serial Cable In Antenna Light Sensor AC Power Serial Cable Out Figure No. 3 3601-M418-O1 Rev N • SB500 Series...
-
Page 10: Ac Power Connection
230VAC WIRING COLOR CODE TABLE Function U.S. Code International Code Black Brown Black Green Green/yellow striped • All 230VAC installations require an external dual pole protection device to interrupt L1 and L2. 3601-M418-O1 Rev N • SB500 Series... -
Page 11: Auto-Learn Controller Board
AUTO-LEARN CONTROLLER BOARD RS485 RS232 RS422 20mA Current Loop Figure No. 5 3601-M418-O1 Rev N • SB500 Series... -
Page 12: Status Led's And Display
S1 = (+) Used during programming to increment to the next parameter value. S2 = (−) Used during programming to decrement to the previous parameter value. S3 = (MODE) Press to begin Setup and Configuration mode. During setup, press to advance to the next setup parameter. 3601-M418-O1 Rev N • SB500 Series... -
Page 13: Serial Cable Installation
Figure No. 7 RS422 bus must have terminating jumpers installed, and the display in the middle of the bus must have terminating jumpers removed. 7. Install Receive mode jumper J4, ON the 422 pins. 3601-M418-O1 Rev N • SB500 Series... -
Page 14: Rs485
5. After all terminations have been made, remove any excess cable from the enclosure and securely tighten the cable gland connector. Finger-tighten only! DO NOT USE TOOLS! 6. Install the Receive mode jumper J4, ON the Figure No.9 CL pins. 3601-M418-O1 Rev N • SB500 Series... -
Page 15: 20Ma Current Loop Connections
SERIAL CABLE INSTALLATION, CONT. CURRENT Cardinal Indicators 20mA Current Loop Connections 190/190A (with 190-RS232 Option Card) CARD (PASSIVE) SB500 P4,6 P1, 8 P4,7 P1, 9 JUMPER P1, 6 to P1, 7 PORT 1 SB500 PORT 2 SB500 P3, 3 P1, 7... -
Page 16: Legacy Cardinal Indicators
SERIAL CABLE INSTALLATION, CONT. LEGACY Cardinal Indicators 20mA Current Loop Connections 205, 210, 210FE, 212/212X, 212G/212GX (without USB) PORT 1 SB500 PORT 2 SB500 P11, 3 P1, 7 P11, 6 P1, 7 P11, 4 P1, 8 P11, 7 P1, 8... -
Page 17: Multiple Display Connections
The figure below illustrates a typical RS-232 installation consisting of four displays to show the weight from each of three platforms and a total weight driven by a single serial port on the weight indicating instrument. Figure No. 10 3601-M418-O1 Rev N • SB500 Series... -
Page 18: Setup And Configuration
MODE switch to save it and advance to the next setup parameter. Values from 0 to 9 may be selected. 0 = Dim 9 = Bright 3601-M418-O1 Rev N • SB500 Series... - Page 19 RS485 protocol is used. • In daisy chain operation, if the address is greater than 0, the scoreboard will decrement the address and send the data out the serial port to another daisy- chained scoreboard. 3601-M418-O1 Rev N • SB500 Series...
- Page 20 (space) = no lights on <CR> = Carriage Return The SB500 scoreboard (with rectangle display image) together with SBImaging software allows the user to design up to 8 configurable images to display on the scoreboard. 3601-M418-O1 Rev N • SB500 Series...
- Page 21 CL pins. In addition, on the P1 terminal connector, jumper terminals 6 and 7 together and then connect the operation toggle switch across terminals 8 and 9. Refer to Figure No. 4 for the location of J4, P1 and the connection descriptions. 3601-M418-O1 Rev N • SB500 Series...
- Page 22 MODE switch to save it and advance to the next setup parameter. Values of 0 or 1 may be selected 0 = No suppression. The annunciator information is displayed (DEFAULT) 1 = Suppress the annunciator display 3601-M418-O1 Rev N • SB500 Series...
- Page 23 When operating with Toledo format, users must make sure there is NO checksum, NO Tare weight and there must be Start and Stop characters for the string (since Toledo indicators allow adjustments on those requirements). 3601-M418-O1 Rev N • SB500 Series...
- Page 24 MODE switch to save it and advance to the next setup parameter. Values from 0 to 9 and A may be selected. 0 = Disabled A = 10 Seconds 3601-M418-O1 Rev N • SB500 Series...
-
Page 25: Option Card Configuration
2XX-IP – Ethernet TCP/IP card 2XX-EIP – Industrial Ethernet/IP card 2XX-MODBUSTCP – ModbusTCP/IP card 2XX-DN – DeviceNet card. 2XX-SNAP – SnapStream card (not available for models SB500EU and SB500SEU) 3601-M418-O1 Rev N SB500 Series... -
Page 26: Part Identification
PART IDENTIFICATION 3601-M418-O1 Rev N • SB500 Series... - Page 27 SPACER #4-40 X .750 NYLON 6800-1069 POWER SUPPLY 5VDC @ 5.5A / 12VDC @ 2.8A OPEN FRAME 90-264VAC INPUT 6980-1030 POWER CORD 18/3 SVT CEE 6.3FT 8200-B104-08 LABEL: 205/210 TERM. BLOCK 8510-C346-0I LABEL CAUTION HIGH VOLTAGE 3601-M418-O1 Rev N • SB500 Series...
- Page 28 PART IDENTIFICATION, CONT. 3601-M418-O1 Rev N • SB500 Series...
- Page 29 WASHER FLAT #6 TYPE – (-) NYLON 6680-0040 WASHER LOCK EXT TOOTH #6 Z-PL 6680-0117 WASHER FLAT #8 BLACK FIBER 6680-1083 FASTNER, RIVNUT 10-32 X .781, CLOSED END 6680-2093 SPACER #6 X .500 SELF RETAINING NYLON 3601-M418-O1 Rev N • SB500 Series...
- Page 30 6560-0103 SILICON RUBBER SEALANT 6560-0310 RUBBER PLUG 7/16 X 11/16 X1” LG, SILICON 6610-2235 CONN GLAND .500-.625 GRIP .859 MTG GREY 6610-2248 CONN GLAND .187-.312 GRIP .599 MTG BLK 6910-0171 NUT CONDUIT 1/2 LOCK 3601-M418-O1 Rev N • SB500 Series...
- Page 31 6680-0003 WASHER FLAT #6 TYPE – (-) NYLON 6680-0040 WASHER LOCK EXT TOOTH #6 Z-PL 6680-0117 WASHER FLAT #8 BLACK FIBER 6680-1083 FASTNER, RIVNUT 10-32 X .781, CLOSED END 6910-0171 NUT CONDUIT 1/2 LOCK 3601-M418-O1 Rev N • SB500 Series...
- Page 32 3601-M418-O1 Rev N • SB500 Series...
Need help?
Do you have a question about the SB500 Series and is the answer not in the manual?
Questions and answers