
Related Manuals for Electrolux EQG4120BOG


Summary of Contents for Electrolux EQG4120BOG
- Page 1 EQG4120BOG, EN HOB USER MANUAL EQG4120BOZ DE KOCHFELD BENUTZERINFORMATION PT PLACA MANUAL DE INSTRUÇÕES...
-
Page 2: Table Of Contents
10. ENERGY EFFICIENCY..................16 WE’RE THINKING OF YOU Thank you for purchasing an Electrolux appliance. You’ve chosen a product that brings with it decades of professional experience and innovation. Ingenious and stylish, it has been designed with you in mind. So whenever you use it, you can be safe in the knowledge that you’ll get great results every time. -
Page 3: Safety Information
ENGLISH SAFETY INFORMATION Before the installation and use of the appliance, carefully read the supplied instructions. The manufacturer is not responsible if an incorrect installation and use causes injuries and damages. Always keep the instructions with the appliance for future reference. 1.1 Children and vulnerable people safety This appliance can be used by children aged from 8 •... -
Page 4: Safety Instructions
Metallic objects such as knives, forks, spoons and lids • should not be placed on the hob surface since they can get hot. Do not use a steam cleaner to clean the appliance. • If the glass ceramic surface / glass surface is cracked, •... - Page 5 ENGLISH • If the appliance is installed above installation. Make sure that there is drawers make sure that the space, access to the mains plug after the between the bottom of the appliance installation. and the upper drawer, is sufficient for •...
- Page 6 • Do not let the appliance stay • Make sure the flame does not go out unattended during operation. when you quickly turn the knob from • Set the cooking zone to “off” after each the maximum to the minimum position.
-
Page 7: Product Description
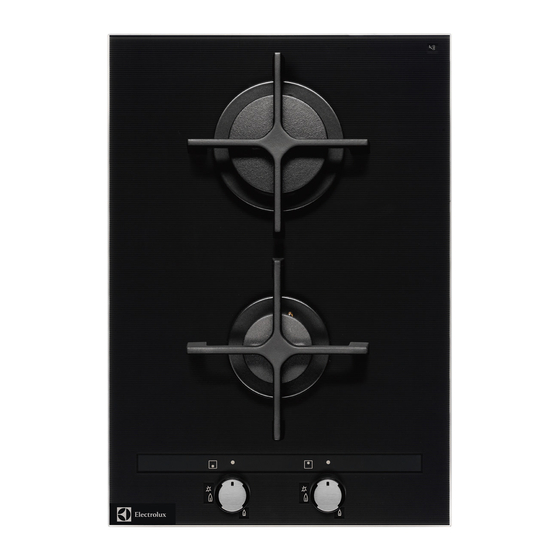
ENGLISH • Flat the external gas pipes. • Use original spare parts only. 2.7 Service • To repair the appliance contact an Authorised Service Centre. 3. PRODUCT DESCRIPTION 3.1 Cooking surface layout Rapid burner Semi - rapid burner Control knobs 3.2 Control knob Symbol Description... -
Page 8: Hints And Tips
C) Ignition candle CAUTION! In the absence of electricity 4.2 Ignition of the burner you can ignite the burner without electrical device; in Always light the burner before this case approach the you put on the cookware. burner with a flame, turn the... -
Page 9: Care And Cleaning
ENGLISH 5.2 Diameters of cookware CAUTION! Make sure that pot handles Use cookware with diameters are not above the front edge applicable to the size of of the cooktop. burners. CAUTION! Burner Diameter of Make sure that the pots are cookware placed centrally on the burner (mm) -
Page 10: Troubleshooting
6.4 Cleaning the spark plug • Do not use the scraper or sharp objects to clean the glass bar and the This feature is obtained through a ceramic space between it and glass ceramic. ignition candle with a metal electrode. -
Page 11: Installation
ENGLISH Problem Possible cause Remedy The flame extinguishes im- Thermocouple is not heated After lightning the flame, mediately after ignition. up sufficiently. keep the knob pushed for equal or less than 10 sec- onds. The flame ring is uneven. Burner crown is blocked Make sure that the injector with food residues. - Page 12 • the fastening clamps are not rusted; Make sure that the gas • expired term is not due. supply pressure of the If one or more defects are visible, do not appliance obeys the repair the pipe, but replace it.
- Page 13 ENGLISH 8.4 Adjustment of minimum level • This appliance is supplied with a mains cable and a plug. To adjust the minimum level of the • Always use a correctly installed burners: shockproof socket. • Make sure that there is an access to 1.
- Page 14 8.7 Assembly ON-TOP INSTALLATION min. 650mm min. 450mm R 5mm min. 55mm min. 30 mm min. 20 mm...
- Page 15 ENGLISH 8.8 Installation of more than one Supplied accessories: connection bar, heat-resistant silicone, rubber shape, sealing stripe. Use only a special heat- 8. Insert next hob into the worktop resistant silicone. cutout. Make sure that the front edges of the hobs are on the same level. The worktop cutout Distance minimum 50 mm...
-
Page 16: Technical Information
Rapid burn- 204 g/h Semi Rapid 1,9 kW 1,9 kW / Semi Rapid burner 138 g/h burner Total power 4,9 kW 4,7 kW / 342 g/h 10. ENERGY EFFICIENCY 10.1 Product information according to EU 66/2014 Model identification EQG4120BOG, EQG4120BOZ... - Page 17 ENGLISH Type of hob Built-in hob Number of gas burners Centre rear - Rapid 57.5% Energy efficiency per gas burner (EE gas burner) Centre front - Semi-rapid 58.0% Energy efficiency for the gas hob 57.8% (EE gas hob) EN 30-2-1: Domestic cooking appliances burning gas - Part 2-1 : Rational use of energy - General 10.2 Energy saving •...
- Page 18 9. TECHNISCHE DATEN..................33 10. ENERGIEEFFIZIENZ..................34 WIR DENKEN AN SIE Vielen Dank, dass Sie sich für ein Gerät von Electrolux entschieden haben. Sie haben ein Produkt gewählt, hinter dem jahrzehntelange professionelle Erfahrung und Innovation stehen. Bei der Entwicklung dieses großartigen und eleganten Geräts haben wir an Sie gedacht.
-
Page 19: Sicherheitsinformationen
DEUTSCH SICHERHEITSINFORMATIONEN Lesen Sie vor der Montage und dem Gebrauch des Geräts zuerst die Gebrauchsanleitung. Der Hersteller übernimmt keine Verantwortung für Verletzungen und Beschädigungen durch unsachgemäße Montage. Bewahren Sie die Gebrauchsanleitung griffbereit auf. 1.1 Sicherheit von Kindern und schutzbedürftigen Personen Das Gerät kann von Kindern ab 8 Jahren und Personen •... - Page 20 Kochen mit Fett oder Öl auf einem unbeaufsichtigten • Kochfeld ist gefährlich und kann zu einem Brand führen. Versuchen Sie nicht einen Brand mit Wasser zu • löschen, sondern schalten Sie das Gerät aus und bedecken Sie die Flamme mit einem Deckel oder einer Feuerlöschdecke.
-
Page 21: Sicherheitsanweisungen
DEUTSCH 2. SICHERHEITSANWEISUNGEN • Alle elektrischen Anschlüsse sind von Dieses Gerät ist für folgende Märkte einem geprüften Elektriker geeignet: DE PT HK vorzunehmen. • Das Gerät muss geerdet sein. 2.1 Montage • Vor der Durchführung jeglicher Arbeiten muss das Gerät von der elektrischen WARNUNG! Stromversorgung getrennt werden. - Page 22 • Falls die Steckdose lose ist, schließen • Nehmen Sie keine technischen Sie den Netzstecker nicht an. Änderungen am Gerät vor. • Ziehen Sie nicht am Netzkabel, wenn • Die Lüftungsöffnungen dürfen nicht Sie das Gerät von der abgedeckt werden.
- Page 23 DEUTSCH • Legen Sie keine Alufolie auf das Gerät. • Schalten Sie das Gerät vor dem • Kochgeschirr aus Gusseisen oder Reinigen aus und lassen Sie es Aluminiumguss oder mit beschädigten abkühlen. Böden kann die Glas-/ • Trennen Sie das Gerät vor Glaskeramikoberfläche verkratzen.
-
Page 24: Gerätebeschreibung
3. GERÄTEBESCHREIBUNG 3.1 Kochfeldanordnung Starkbrenner Normalbrenner Kochzonen-Einstellknöpfe 3.2 Kochzonen-Einstellknopf Symbol Beschreibung Symbol Beschreibung Zündstellung/maximale Gaszufuhr Keine Gaszufuhr/ausge- schaltet minimale Gaszufuhr 4. TÄGLICHER GEBRAUCH 4.2 Zünden des Brenners WARNUNG! Siehe Kapitel Brenner stets vor dem Sicherheitshinweise. Aufsetzen des Kochgeschirrs zünden. -
Page 25: Tipps Und Hinweise
DEUTSCH Andernfalls wird die Gaszufuhr Sollte der Brenner zufällig unterbrochen. ausgehen, drehen Sie den 3. Stellen Sie die Flamme ein, sobald sie Knopf in die Aus-Position und ruhig brennt. versuchen ihn nach einer Falls sich der Brenner nach Minute erneut zu zünden. einigen Versuchen nicht zünden lässt, überprüfen Sie, Nach dem Einschalten der... -
Page 26: Reinigung Und Pflege
5.2 Durchmesser des ACHTUNG! Kochgeschirrs Achten Sie darauf, dass sich die Topfböden nicht über Verwenden Sie nur dem Einstellknopf befinden, Kochgeschirr mit einem da anderenfalls die Flamme Durchmesser, der der Größe den Einstellknopf erhitzten der Brenner entspricht. könnte. ACHTUNG! -
Page 27: Fehlersuche
DEUTSCH 6.4 Reinigen der Zündkerze Seien Sie beim Wiederaufsetzen der Diese Funktion erfolgt über eine Topfträger vorsichtig, um Keramikzündkerze mit Metallelektrode. Beschädigungen der Halten Sie zur Vermeidung von Oberseite der Kochstelle Zündschwierigkeiten diese Bauteile immer zu vermeiden. sauber; kontrollieren Sie außerdem, ob die 2. -
Page 28: Montage
7.1 Was tun, wenn ... Problem Mögliche Ursache Abhilfe Es wird kein Funke erzeugt, Das Kochfeld ist nicht oder Prüfen Sie, ob das Kochfeld wenn Sie den Funkener- nicht ordnungsgemäß an ordnungsgemäß an die zeuger betätigen. die Spannungsversorgung Spannungsversorgung an- angeschlossen. - Page 29 DEUTSCH A) Schaftende Überzeugen Sie sich, dass das Gerät B) Beilagscheibe während der Montage vom Stromnetz getrennt ist. Ziehen Sie den Netzstecker C) Rohrbogen (falls erforderlich) aus der Steckdose oder drehen Sie die Anschluss mit flexiblem, nicht- Sicherungen heraus. Drehen Sie die metallischem Rohr: Hauptgaszufuhr zu.
- Page 30 8.3 Austauschen der Düsen 1. Nehmen Sie die Topfträger ab. 2. Nehmen Sie Brennerdeckel und Brennerkronen ab. 3. Entfernen Sie die Düsen mit einem Steckschlüssel 7 und ersetzen Sie sie durch für die verwendete Gasart geeignete Düsen (siehe Tabelle im Abschnitt „Technische Daten“).
- Page 31 DEUTSCH oder ein gleichwertiges Kabel. Kabeltyp: Schließen Sie den blauen H05V2V2-FT90. Nullleiter an die mit Vergewissern Sie sich, dass der „N“ gekennzeichnete Klemme Kabelquerschnitt für die Spannung und an. Schließen Sie das braune Betriebstemperatur geeignet ist. Der gelb- (oder schwarze) Phasenkabel grüne Erdleiter muss ca.
- Page 32 30 mm min. 20 mm 8.8 Montage von mehr als einem 4. Bringen Sie das mitgelieferte Dichtungsband umlaufend auf der Kochfeld Unterseite des Kochfelds entlang des äußeren Randes der Mitgeliefertes Zubehör: Glaskeramikplatte an. Verbindungsschiene, hitzebeständiges 5. Schrauben Sie die Silikon, Gummiprofil, Dichtungsband.
-
Page 33: Technische Daten
DEUTSCH 8.9 Einbaumöglichkeiten Die unter dem Kochfeld eingebaute Platte muss sich leicht entfernen lassen und einen einfachen Zugang ermöglichen, falls eine Reparatur erforderlich wird. Unterbaumöbel mit Tür 9. Ziehen Sie die Schrauben der Befestigungsplatten/Haltegriffe an. 30 mm 10. Dichten Sie die Spalte zwischen den Kochfeldern und zwischen den Kochfeldern und der Arbeitsplatte mit min 20 mm... -
Page 34: Energieeffizienz
Gesamte 4,9 kW 4,7 kW / Leistung- 342 g/Std. saufnahme 10. ENERGIEEFFIZIENZ 10.1 Produktinformationen gemäß EU 66/2014 Modellidentifikation EQG4120BOG, EQG4120BOZ Kochfeldtyp Einbau-Kochfeld Anzahl der Gasbrenner Mitte hinten - Starkbrenner 57.5% Energieeffizienz pro Gasbrenner (EE gas burner) Mitte vorne - Normalbrenner 58.0%... - Page 35 DEUTSCH Gesundheitsschutz elektrische und dem Hausmüll. Bringen Sie das Gerät zu elektronische Geräte. Entsorgen Sie Ihrer örtlichen Sammelstelle oder wenden Sie sich an Ihr Gemeindeamt. Geräte mit diesem Symbol nicht mit...
- Page 36 10. EFICIÊNCIA ENERGÉTICA................51 ESTAMOS A PENSAR EM SI Obrigado por ter adquirido um aparelho Electrolux. Escolheu um produto que traz com ele décadas de experiência profissional e inovação. Engenhoso e elegante, foi concebido a pensar em si. Assim, quando o utilizar, terá a tranquilidade de saber que obterá...
-
Page 37: Informações De Segurança
PORTUGUÊS INFORMAÇÕES DE SEGURANÇA Leia atentamente as instruções fornecidas antes de instalar e utilizar o aparelho. O fabricante não é responsável por lesões ou danos resultantes de instalação e utilização incorrectas. Guarde sempre as instruções junto do aparelho para futura referência. 1.1 Segurança para crianças e pessoas vulneráveis Este aparelho pode ser utilizado por crianças com 8 •... -
Page 38: Instruções De Segurança
Nunca tente extinguir um incêndio com água. Em vez • disso, desligue o aparelho e cubra as chamas com uma tampa de tacho ou manta de incêndio. Não coloque objectos sobre as zonas de cozedura. • Os objectos metálicos como facas, garfos, colheres e •... - Page 39 PORTUGUÊS 2.1 Instalação placa de características está em conformidade com a alimentação ADVERTÊNCIA! eléctrica. Se não estiver, contacte um A instalação deste aparelho electricista. tem de ser efectuada por • Certifique-se de que o aparelho é uma pessoa qualificada. instalado correctamente. Ligações de cabo de alimentação e ficha (se •...
- Page 40 O • Quando coloca alimentos em óleo dispositivo de isolamento deve ter uma quente, o óleo pode salpicar. abertura de contacto com uma largura ADVERTÊNCIA! mínima de 3 mm. Risco de incêndio e explosão.
-
Page 41: Descrição Do Produto
PORTUGUÊS • Utilize apenas os acessórios fornecidos • Não utilize jactos de água ou vapor com o aparelho. para limpar o aparelho. • Não instale um difusor de chama sobre • Limpe o aparelho com um pano macio um queimador. e húmido. -
Page 42: Utilização Diária
3.2 Botão de comando Símbolo Descrição Símbolo Descrição fornecimento de gás mín- sem fornecimento de gás/posição de desligado posição de ignição/forne- cimento de gás máximo 4. UTILIZAÇÃO DIÁRIA 1. Pressione o botão de comando e ADVERTÊNCIA! rode-o para a esquerda até à posição Consulte os capítulos... -
Page 43: Sugestões E Dicas
PORTUGUÊS CUIDADO! A ignição pode ocorrer Na ausência de electricidade, automaticamente ao ligar a é possível acender o corrente eléctrica, após a queimador sem o dispositivo instalação ou após um corte eléctrico; neste caso, de energia. Isso é normal. aproxime uma chama do queimador, rode o respectivo 4.3 Desligar o queimador botão no sentido anti-horário... -
Page 44: Manutenção E Limpeza
5.2 Diâmetros de tacho Queimador Diâmetro do Utilize tachos com diâmetro tacho (mm) adequado às dimensões dos Semi-rápido 140 - 240 queimadores. Queimador Diâmetro do tacho (mm) Rápido 160 - 240 6. MANUTENÇÃO E LIMPEZA Tenha muito cuidado ADVERTÊNCIA! quando voltar a colocar Consulte os capítulos... -
Page 45: Resolução De Problemas
PORTUGUÊS 6.4 Limpar a vela de ignição 6.6 Barra de vidro Esta funcionalidade é obtida através de uma vela de ignição de cerâmica com um eléctrodo de metal. Mantenha estes componentes bem limpos para evitar dificuldades ao ligar e verifique se os orifícios da coroa do queimador não estão obstruídos. -
Page 46: Instalação
7.2 Se não conseguir encontrar contrário, a manutenção efectuada pelo Técnico do Serviço de Assistência ou pelo uma solução... fornecedor não será gratuita, mesmo durante o período de garantia. As Se não conseguir encontrar uma solução instruções relativas ao Centro de para o problema, contacte o seu Assistência Técnica e as condições da... - Page 47 PORTUGUÊS Ligação de tubos flexíveis não 3. Com uma chave de porcas de 7 mm, metálicos: remova os injectores e substitua-os Caso seja possível controlar facilmente a pelos necessários para o tipo de gás ligação na respectiva extensão total, pode que vai utilizar (consulte a tabela no utilizar um tubo flexível.
- Page 48 • de gás natural G20 a 20 mbar para • Existe o risco de incêndio se o gás liquefeito, aperte totalmente o aparelho for ligado com uma extensão parafuso de bypass. eléctrica, um adaptador ou uma • de gás liquefeito para gás natural tomada múltipla.
- Page 49 PORTUGUÊS R 5mm min. 55mm min. 30 mm min. 20 mm 8.8 Instalação de mais de uma placa Largura soma das larguras de todas as placas que instalar, me- Suportes fornecidos: barra de ligação, nos 20 mm silicone resistente ao calor, molde em borracha, tira vedante.
- Page 50 4. Cole a tira vedante fornecida na parte inferior da placa, ao longo das extremidades da vitrocerâmica. 5. Aperte ligeiramente as placas de fixação, nos orifícios adequados da estrutura de protecção.
-
Page 51: Informação Técnica
4,9 kW 4,7 kW / 342 g/h 10. EFICIÊNCIA ENERGÉTICA 10.1 Informação de produto de acordo com a norma UE 66/2014 Identificação do modelo EQG4120BOG, EQG4120BOZ Tipo de placa Placa encastrada N.º de queimadores a gás Eficiência energética de cada Central traseiro - Rápido... - Page 52 10.2 Poupança de energia • Antes de utilizar, certifique-se de que os queimadores e os suportes para panelas estão bem instalados. • Utilize tachos com diâmetro adequado às dimensões dos queimadores. • Centre o tacho no queimador. • Quando aquecer água, utilize apenas a quantidade necessária.
- Page 53 PORTUGUÊS...
- Page 54 www.electrolux.com...
- Page 55 PORTUGUÊS...
- Page 56 www.electrolux.com/shop...
Need help?
Do you have a question about the EQG4120BOG and is the answer not in the manual?
Questions and answers