Advertisement
Item No.:MT101-SD
Accessory Package List
Note: The drawings below are only for reference and may be slightly different with the object, please in kind prevail. Any tool missing
or installation problem, please contact the customer service freely.
No.
Spare part
Qty. No.
Spare part
Qty. No.
1
1
2
1
Desktop component
Left desk leg
No.
Spare part
Qty. No.
Spare part
Qty. No.
6
4
7
2
Plastic decorative
Plastic cap
cover
4
9
2
3
Installation guide
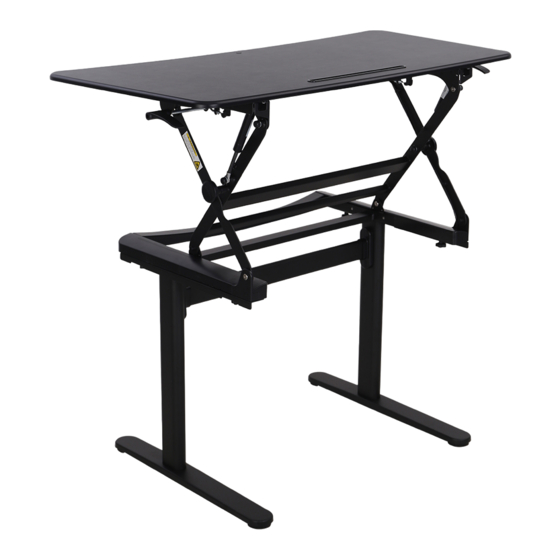
Technical Data
Desktop load-bearing:
Height range:
Spare part
Qty. No.
Spare part
Qty. No.
3
1
4
4
Knob
Right desk leg
Spare part
Qty. No.
Spare part
Qty.
8
4
9
1
Allen Key
Adhesive buckle
5x5mm
1
Max
22Kg
5
6
ASSEMBLY STEP 1
7
Buckle decorative cover
to the connecting arm.
ASSEMBLY STEP 2
Max:22KG
750-1100mm
5
Spare part
Qty.
5
1
Combined beam
No.
Spare part
Qty.
10
1
Cable management
ASSEMBLY STEP 3
6
3
4
1
6
Install the plastic caps
Connect the desk legs to the
desktop and tighten the knobs.
2
Attach to the
corresponding holes
9
Use the Allen key to tighten the screws
6
Advertisement
Table of Contents

Related Manuals for Loctek MT101-SD


Summary of Contents for Loctek MT101-SD
- Page 1 ASSEMBLY STEP 1 Connect the desk legs to the Item No.:MT101-SD desktop and tighten the knobs. Installation guide Attach to the corresponding holes Buckle decorative cover to the connecting arm. ASSEMBLY STEP 2 Technical Data Desktop load-bearing: Max:22KG 750-1100mm Height range: Accessory Package List Note: The drawings below are only for reference and may be slightly different with the object, please in kind prevail.
- Page 2 ASSEMBLY STEP 4 Press the handle grips both sides simultaneously to adjust the workstation to the proper height. Please make sure all installed equipments are on the table, and not sticking out of the edge, or it may harm or cause damage. Attention Please do not put hands near the supporting bars, as they...
Need help?
Do you have a question about the MT101-SD and is the answer not in the manual?
Questions and answers