Advertisement
Quick Links
ZyXEL G-162
802.11g Wireless CardBus Card
Quick Start Guide
4 Insert the included CD into your CD-ROM drive,
Version 2.10
select Search removable media (floppy, CD-
5/2005
ROM...) and then click Next.
English
Important Information
Federal Communications Commission (FCC)
5 After the driver has been installed successfully, click
Interference Statement
Finish to complete the installation.
The 802.11g Wireless LAN Adapter has been tested to
the FCC exposure requirements (Specific Absorption
ZyXEL Utility and Hardware Installation
Rate).
The installation procedures are similar for all supported
The equipment complies with FCC RF radiation
Windows versions.
exposure limits set forth for an uncontrolled environment,
under 47 CFR 2.1093 paragraph (d) (2).
Install the ZyXEL Utility before you insert the ZyXEL G-
162.
This Transmitter must not be co-located or operating in
conjunction with any other antenna or transmitter.
1 Insert the support CD into the CD-ROM drive on
Refer to the User's Guide for general FCC statements.
your computer. The CD automatically runs.
Otherwise, locate and double-click setup.exe.
Procedure to View a Product's Certification(s)
2 Select your language and click OK.
1 Go to www.zyxel.com
3 Click Install Utility to start installation.
2 Select your product from the drop-down list box on
4 A Welcome screen displays. Click Next.
the ZyXEL home page to go to that product's page.
5 Click Next to accept the default file location or click
3 Select the certification you wish to view from this
Browse to select an alternate folder.
page.
6 Click Finish to restart the computer.
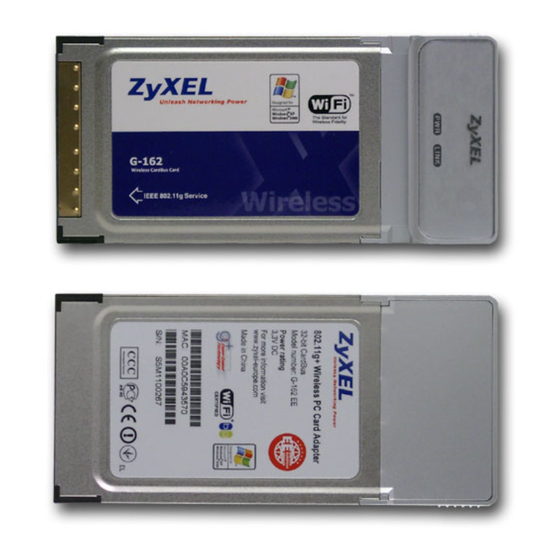
About Your ZyXEL G-162
7 Locate an available CardBus slot on the computer.
8 With the pin connectors facing
The ZyXEL G-162 is an IEEE 802.11g compliant
the slot and the LED side
wireless LAN PC card that fits into any CardBus slot.
facing up, slide the ZyXEL G-
With the ZyXEL G-162, you can enjoy the wireless
162 into the slot. The LEDs
mobility within the coverage area. The IEEE 802.11g
turn on if the ZyXEL G-162 is
technology provides greater range and offers
properly inserted.
transmission rate at up to 54 Mbps. Your ZyXEL G-162
can transmit at the proprietary transmission rates of
Never bend, force or twist the ZyXEL G-162 into the port.
22Mbps or up to 125 Mbps when connected to the
After you install the ZyXEL Utility and insert
ZyXEL g+ AP or wireless router. Actual speeds attained
the ZyXEL G-162, an icon appears in the
also depend on the distance from the AP, noise, etc.
system tray.
Installation Requirements
If the ZyXEL Utility icon displays, the ZyXEL G-162 is
installed properly. Refer to the User's Guide to configure
Before installation, make sure you have a computer with
the ZyXEL G-162.
the following:
• Pentium II 300MHz or above
Introduction to OTIST
• A minimum of 6 MB available hard disk space
• A minimum of 32 MB RAM
In a wireless network, the wireless clients must have the
• A CD-ROM drive
same SSID and security settings as the access point
• A CardBus slot
(AP) or wireless router (we will refer to both as "AP"
here) in order to associate with it. Traditionally this meant
• Windows 98 Second Edition (SE), Windows ME, Win-
that you had to configure the settings on the AP and then
dows 2000 or Windows XP
manually configure the exact same settings on each
• Windows 98 SE users may need the Windows 98 SE
wireless client.
CD
OTIST (One-Touch Intelligent Security Technology)
If you install the Funk Odyssey Client software on the
allows you to transfer your AP's SSID and WEP or WPA-
computer, uninstall (remove) it.
PSK security settings to wireless clients that support
OTIST and are within transmission range. You can also
Driver Installation for Windows XP
choose to have OTIST generate a WPA-PSK key for you
if you didn't configure one manually.
If you want to use the Windows XP Wireless Zero
Configuration (WZC) service to manage the ZyXEL G-
Enabling OTIST
162, follow the steps below to install the driver only.
You must enable OTIST on both the AP and wireless
1 Locate an available CardBus slot on the computer.
client before you start transferring settings.
2 With the pin connectors facing the slot and the LED
We use the Prestige 334WT and the G-162 screens in
side facing up, slide the ZyXEL G-162 into the slot.
The LEDs turn on if the ZyXEL G-162 is properly
this guide as an example. Screens may vary slightly for
your ZyXEL devices.
inserted.
The AP and wireless client(s) MUST use the same Setup
Never bend, force or twist the ZyXEL G-162 into the port.
key.
3 The Found New Hardware Wizard window
appears. Select Install from a list of specific
AP
location (Advanced) and click Next.
You can enable OTIST using the Reset button or the
web configurator. If you use the Reset button, the default
(01234567) or previous saved (through the web
configurator) Setup key is used to encrypt the settings
that you want to transfer.
Hold in the Reset button for one or two seconds.
4 If you change the SSID or the keys on the AP after
using OTIST, you need to run OTIST again or enter
If you hold in the Reset button too long, the device will
them manually in the wireless client(s).
reset to the factory defaults!
5 If you configure OTIST to generate a WPA-PSK key,
In the web configurator, go to the Wireless LAN main
this key changes each time you run OTIST.
screen and then select OTIST. To change the Setup key,
Therefore, if a new wireless client joins your
enter zero to eight printable characters. To have OTIST
wireless network, you need to run OTIST on the AP
automatically generate a WPA-PSK key, select the Yes
and ALL the wireless clients again.
check box. If you manually configured a WEP key or a
WPA-PSK key and you also selected this check box,
Troubleshooting
then the key you manually configured is used.
If Windows does not auto-detect the ZyXEL G-162, do
the following:
• Make sure the ZyXEL G-162 is inserted into the com-
puter CardBus slot properly and then restart your
computer. Check the LEDs on the ZyXEL G-162.
• Perform a hardware scan by clicking Start, Settings,
Control Panel and double-clicking Add/Remove
Hardware. (Steps may vary depending on the version
of Windows). Follow the on-screen instructions to
search for the ZyXEL G-162 and install the driver.
Wireless Client
• Check for possible hardware conflicts. In Windows,
click Start, Settings, Control Panel, System, Hard-
Start the ZyXEL Utility and click the Adapter tab. Select
ware and then click Device Manager. Verify the sta-
the OTIST check box, enter the same Setup Key as your
tus of the ZyXEL G-162 under Network Adapter.
AP's and click Save.
(Steps may vary depending on the version of Win-
dows).
• Install the ZyXEL G-162 in another computer. If the
error persists, you may have a hardware problem. In
this case, you should contact your local vendor.
Procèdure permettant de consulter une(les)
Certification(s) du Produit
1 Go to Allez sur www.zyxel.com.
Starting OTIST
2 Sèlectionnez votre produit dans la liste dèroulante
se trouvant sur la page d'accueil ZyXEL pour
You must click Start in the AP OTIST web configurator
accèder à la page du produit concernè.
screen and in the wireless client(s) Adapter screen all
3 Sèlectionnez sur cette page la certification que vous
within three minutes (at the time of writing). You can start
voulez consulter.
OTIST in the wireless clients and AP in any order but
they must all be within range and have OTIST enabled.
A propos de votre ZyXEL G-162
1 In the AP, a web configurator screen pops up
La ZyXEL G-162 est une carte PC LAN sans fil
showing you the security settings to transfer. After
reviewing the settings, click OK.
compatible IEEE 802.11g qui se place dans un bus
CardBus 32 bits quelconque. Avec la ZyXEL G-162,
vous pouvez profiter de la mobilité sans fil dans la zone
de couverture. La technologie IEEE 802.11g permet une
plus grande portée et offre des vitesses de transmission
pouvant atteindre les 54 Mbps. Votre ZyXEL G-162 peut
transmettre à des vitesses de transmission propriétaires
2 This screen appears while OTIST settings are being
de 22Mbps ou jusqu'à 125 Mbps lorsqu'il est connecté
transferred. It closes when the transfer is complete.
au routeur sans fil ou à l'AP ZyXEL g+. La vitesse réelle
dépend également de la distance de l'AP, des parasites,
etc.
Configuration requise
Avant l'installation, assurez-vous que vous avez un
ordinateur avec la configuration suivante:
• Pentium II 300MHz ou plus
• In the wireless client, you see this screen if it can't find
• Au minimum 6 Mo d'espace disponible sur le disque
dur
an OTIST-enabled AP (with the same Setup key).
Click OK to go back to the ZyXEL Utility main screen.
• An minimum 32 Mo de RAM
• Un lecteur de CD-ROM
• Un emplacement CardBus
• Windows 98 Second Edition, Windows ME, Windows
2000 ou Windows XP
• Il se peut que les utilisateurs de Windows 98 SE aient
• If there is more than one OTIST-enabled AP within
besoin du CD Windows 98 SE
range, you see a screen asking you to select one AP
to get settings from.
Si vous avez installè le logiciel Funk Odyssey Client sur
l'ordinateur, dèsinstallez-le (supprimez-le).
Notes on OTIST
Installation du Pilote pour Windows XP
1 If you enabled OTIST in the wireless client, you see
this screen each time you start the ZyXEL Utility.
Si vous voulez utiliser le service Wireless Zero
Click Yes for it to search for an OTIST-enabled AP.
Configuration (WZC) de Windows XP pour gèrer la
ZyXEL G-162, veuillez suivre les ètapes ci-dessous pour
installer uniquement le pilote.
1 Recherchez un emplacement CardBus disponible
sur l'ordinateur.
2 Avec les broches de connexion face à
l'emplacement et la face avec le témoin LED tourné
vers le haut, faites glisser la ZyXEL G-162 dans
2 If an OTIST-enabled wireless client loses its
l'emplacement. Les témoins LED s'allument si la
wireless connection for more than ten seconds, it
ZyXEL G-162 est insérée correctement.
will search for an OTIST-enabled AP for up to one
minute. (If you manually have the wireless client
Ne jamais courber, forcer ou tordre la ZyXEL G-162 pour
search for an OTIST-enabled AP, there is no
la faire entrer dans l'emplacement.
timeout; click Cancel in the OTIST progress screen
3 La fenêtre Assistant de Dètection du Nouveau
to stop the search.)
Matèriel (Found New Hardware Wizard)
3 When the wireless client finds an OTIST-enabled
apparaótra. Sèlectionnez Installer à partir d'une
AP, you must still click Start in the AP OTIST web
liste d'emplacements spécifiques (Avancé)
configurator screen or hold in the Reset button (for
one or two seconds) for the AP to transfer settings.
(Install from a list of specific location
(Advanced)) et cliquez sur Suivant (Next).
4 Insérez le CD livré dans votre lecteur de CD-ROM,
sélectionnez Rechercher le support amovible
(disquette, CD-ROM...) (Search removable media
(floppy, CD-ROM...)) puis cliquez sur Suivant
(Next).
5 Une fois le pilote installé avec succés, cliquez sur
Terminer (Finish) pour terminer l'installation.
Français
Installation de l'utilitaire ZyXEL et de
l'èquipement
Les procédures d'installation sont similaires pour toutes
les versions de Windows prises en charge.
NE PAS insérer la ZyXEL G-162 pour l'instant.
1 Placez le CD de soutien dans le lecteur de CD-ROM
de votre ordinateur. Le CD s'exècute
automatiquement. Sinon, recherchez et double-
cliquez sur setup.exe.
2 Sèlectionnez votre langue et cliquez sur OK.
3 Cliquez sur Installer l'utilitatire pour lancer
l'installation.
4 Un écran de bienvenue s'affiche. Cliquez sur
Suivant.
5 Cliquez sur Suivant pour accepter l'emplacement
des fichiers par dèfaut, sinon cliquez sur Parcourir
pour sèlectionner un autre dossier.
6 Cliquez sur Terminer pour redémarrer votre
ordinateur.
7 Recherchez un emplacement CardBus disponible
sur l'ordinateur.
8 Avec les broches de
connexion face à
l'emplacement et la face avec
le témoin LED tourné vers le
haut, faites glisser la ZyXEL
G-162 dans l'emplacement.
Les témoins LED s'allument si la ZyXEL G-162 est
insérée correctement.
Ne jamais courber, forcer ou tordre la ZyXEL G-162 pour
la faire entrer dans l'emplacement.
Aprës que vous avez installè l'Utilitaire ZyXEL
et insèrè la ZyXEL G-162, une icùne s'affiche
dans le casier systëme.
Si l'icône de l'utilitaire ZyXEL s'affiche, cela signifie que
la ZyXEL G-162 a été installée correctement. Veuillez
vous reporter au Guide de l'utilisateur pour configurer la
ZyXEL G-162.
Présentation d'OTIST
Dans un réseau sans fil, les clients sans fil doivent avoir
les mêmes paramètres SSID et de sécurité que le point
d'accès (AP) ou le routeur sans fil (nous les nommerons
tous deux "AP" ici) afin de s'associer à celui-ci.
Traditionnellement, cela signifie que vous devez
configurer les paramètres sur l'AP et configurer
manuellement exactement les mêmes paramètres sur
chaque client sans fil.
OTIST (One-Touch Intelligent Security Technology) vous
permet de transférer les paramètres de sécurité SSID,
WEP et WPA-PSK de votre AP vers des clients sans fil
prenant en charge OTIST et se trouvant dans les limites
de la plage de transmission. Vous pouvez aussi choisir
de faire générer une clé WPA-PSK par OTIST pour vous
si vous ne voulez pas la configurer manuellement.
Activer OTIST
Vous devez activer OTIST à la fois sur l'AP et le client
avant de commencer à transférer les paramètres.
Nous utilisons les écrans du Prestige 334WT et du
ZyXEL G-162 comme exemple dans ce guide. Les
écrans peuvent légèrement varier selon vos matériels
ZyXEL.
L'AP et le(s) client(s) sans fil DOIVENT utiliser la même
Setup key (Clé de configuration).
AP
Vous pouvez activer OTIST à l'aide du bouton Reset
(Réinitialiser) ou du configurateur web. Si vous utilisez
le bouton Reset (Réinitialiser), la Setup key (Clé de
configuration) par défaut (01234567) ou celle
précédemment enregistrée (à l'aide du configurateur
web) est utilisée pour coder les paramètres que vous
voulez transférer.
Appuyez sur le bouton Reset (Réinitialiser) pendant
une à deux secondes.
Si vous appuyez trop longtemps sur le bouton Reset
(Réinitialiser), le périphérique sera réinitialisé aux
paramètres d'usine!
Dans le configurateur web, allez à l'écran principal du
Wireless LAN (LAN sans fil) et sélectionnez OTIST.
Pour changer la Setup key (Clé de configuration),
entrez zéro à huit caractères imprimables. Pour
qu'OTIST génère automatiquement une clé WPA-PSK,
cochez la case Yes (Oui). Si vous avez configuré
manuellement une clé WEP ou une clé WPA-PSK et que
vous avez aussi cochez la case, alors la clé que vous
avez configuré manuellement est utilisée.
Client sans fil
Démarrez l'utilitaire de ZyXEL et cliquez sur l'onglet
Adapter (Adaptateur). Sélectionnez la case à cocher
OTIST, entrez la même Setup Key (Clé de
configuration) que pour votre AP et cliquez sur Save
(Enregistrer).
Démarrer OTIST
Vous devez cliquer sur Start (Démarrer) dans l'écran du
configurateur web OTIST de l'AP et dans l'écran
Adapter (Adaptateur) du (des) client(s) sans fil le tout
en l'espace de trois minutes (au moment de la
rédaction). Vous pouvez démarrer OTIST dans les
clients sans fil et l'AP dans n'importe quel ordre mais ils
doivent tous se trouver à portée et avoir OTIST activé.
1 Dans l'AP, un écran de configurateur web apparaît
vous indiquant les paramètres de sécurité à
transférer. Après avoir vérifié les paramètres,
cliquez sur OK.
2 Cet écran apparaît quand les paramètres OTIST
sont en cours de transfert. Il se ferme quand le
transfert est terminé.
• Dans le client sans fil, cet écran apparaît s'il ne trouve
pas d'APavec la fonction OTIST activée (avec la
même Setup key (Clé de configuration)). Cliquez
Advertisement

Subscribe to Our Youtube Channel
Related Manuals for ZyXEL Communications 802.11g Wireless CardBus Card ZyXEL G-162


Summary of Contents for ZyXEL Communications 802.11g Wireless CardBus Card ZyXEL G-162
- Page 1 ZyXEL G-162 802.11g Wireless CardBus Card Quick Start Guide 4 Insert the included CD into your CD-ROM drive, Version 2.10 select Search removable media (floppy, CD- 5/2005 ROM…) and then click Next. English Important Information Federal Communications Commission (FCC) 5 After the driver has been installed successfully, click Interference Statement Finish to complete the installation.
- Page 2 sur OK pour retourner à l'écran principal de l'utilitaire Abdeckungsbereich und eine höhere Transferrate von du ZyXEL. bis zu 54 MBps. Ihr ZyXEL G-162 kann mit den speziellen Übertragungsraten von 22Mbps oder bis zu 125 Mbps übertragen, wenn es mit dem ZyXEL g+ Zugangsknoten oder drahtlose Router verbunden ist.
- Page 3 Usamos las pantallas del Prestige 334WT y del G-162 • Si hay más de un PA con OTIST activado dentro del en esta guía como ejemplo. Las pantallas pueden variar alcance, verá una pantalla pidiéndole que seleccione ligeramente según los dispositivos ZyXEL. un PA desde el que obtener la configuración.
- Page 4 Точка доступа Вы может активировать OTIST с помощью кнопки перезапуска или Web-конфигуратора. Если Вы используете кнопку перезапуска, для шифрования параметров будет использован Установочный ключ, заданный по умолчанию (01234567), или ключ, предварительно сохраненный через Web- конфигуратор. Удерживайте кнопку перезапуска нажатой в течение одной...
- Page 5 低功率電波輻射性電機管理辦法 4 出現歡迎視窗,按下一步。 經型式認證合格之低功率射頻電機,非經許可,公司、 5 按下一步接受預設的安裝路徑或按瀏覽選擇其他目 商號或使用者均不得擅自變更頻率、加大功率或變更原 錄。 設計之特性及功能。 6 按結束完成安裝程序,如提示請重新啟動電腦。 低功率射頻電機之使用不得影響飛航安全及干擾合法通 7 在電腦上找出一個可用的 CardBus 插槽。 信;經發現有干擾現象時,應立即停用;並改善至無干 8 將 ZyXEL G-162 自保護盒中取 擾時方得繼續使用。 出,LED 顯示面朝上,插入 前項合法通信,指依電信法規定作業之無線電信。低功 CardBus 插槽。在 ZyXEL G- 率射頻電機須忍受合法通信或工業、科學及醫療用電波 162 正確的插入之後,LED 燈就 輻射信電機設備之干擾。 會亮起。 如何查閱產品的認證 請勿摺疊或彎曲 ZyXEL G-162 網卡,將之放入插槽中。 1 請到...
Need help?
Do you have a question about the 802.11g Wireless CardBus Card ZyXEL G-162 and is the answer not in the manual?
Questions and answers