Table of Contents
Advertisement
Quick Links
Assembly Instructions
Item #211-4794
Item #211-4795
Item #211-4796
Item #211-4797
USE AND CARE GUIDE
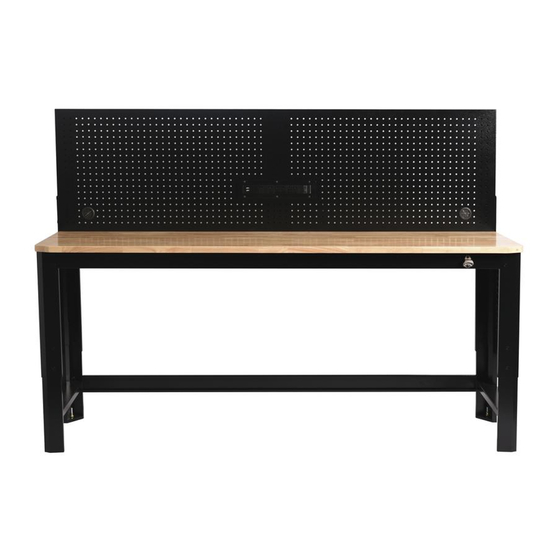
72 IN Adjustable Height Workbench With Pegboard
Questions, problems, missing parts?
Before returning to the store, call
1-866-441-5080
9 a.m – 5 p.m., CST, Monday-Friday
Model # M72WB
Model # M72WBTB
Model # M72WBTR
Model # M72WBW
Advertisement
Table of Contents

Related Manuals for Performax M72WB

Summary of Contents for Performax M72WB
- Page 1 Assembly Instructions Item #211-4794 Model # M72WB Item #211-4795 Model # M72WBTB Item #211-4796 Model # M72WBTR Item #211-4797 Model # M72WBW USE AND CARE GUIDE 72 IN Adjustable Height Workbench With Pegboard Questions, problems, missing parts? Before returning to the store, call 1-866-441-5080 9 a.m –...
-
Page 2: Table Of Contents
Table of Contents Table of Contents ..........2 Assembly ............... 6-8 ....... - Page 3 7. Extension cord WARNING: Changes or modifications to this unit not □ Follow all manufacturers' Warnings and Operating expressly approved by the party responsible for compliance could void the user’s authority to operate Instructions for your extension cord. the equipment. □...
-
Page 4: Warranty
Limited Lifetime Warranty PERFORMAX® Workbenches are warranted to be free from defects in materials and workmanship under normal use for the lifetime that you own the product. If any part of the product is found to be defective during normal use, the defective product or part will be replaced at our discretion. - Page 5 Package Contents (continued) Part Description Quantity Part Description Quantity Workbench Wood Table Back Rail Front Crossbar Pegboard Rear Crossbar L bracket Left Leg Panel Bottle Opener Right Leg Panel...
-
Page 6: Assembly
Assembly Two people are recommended for assembly. CAUTION: Unpacking instructions □ After opening shipping box, remove protective cardboard from the top of the wood table and place cardboard on the floor. □ With the aid of an assistant, remove wood table and lay topside down on cardboard to protect the wood from scratching. □... - Page 7 Attaching the Wood Table Table Front □ Determine the front and back of table. Leg Panels Underside of Workbench Table must be attached to the table with Back Rail attachment holes to the back of table. □ Attach the Left (D) and Right Leg Panels (E) to the underside of the Workbench Table (A): Table Back □...
- Page 8 Attaching the Back Rail □ Attach Back Rail (F) to back of Left and Right Leg Panel (D,E). Align Back Rail end holes with holes in back of Left and Right Legs. □ Install and tighten 4 Screws (AA) through Back Rail end holes into Leg holes as shown in figure below.
-
Page 9: Operation
Attaching the Bottle Opener □ Tighten 2 Screws (BB) through the Bottle Opener (I) holes into Front Crossbar (B) holes as shown in the figure. Operation Leveling Foot Adjustment □ Adjust leveling position by turning the foot nut left to raise and right to lower the foot. -
Page 10: Replacement Parts
Maintenance □ Periodically the surfaces should be cleaned with a mild detergent and water. Replacement Parts For assistance with replacement parts please call 1-866-441-5080. Part Description Quantity Leveling Feet L bracket M6x12 Screw Bottle Opener M4x12 Screw Power Strip...
Need help?
Do you have a question about the M72WB and is the answer not in the manual?
Questions and answers