Advertisement
Quick Links
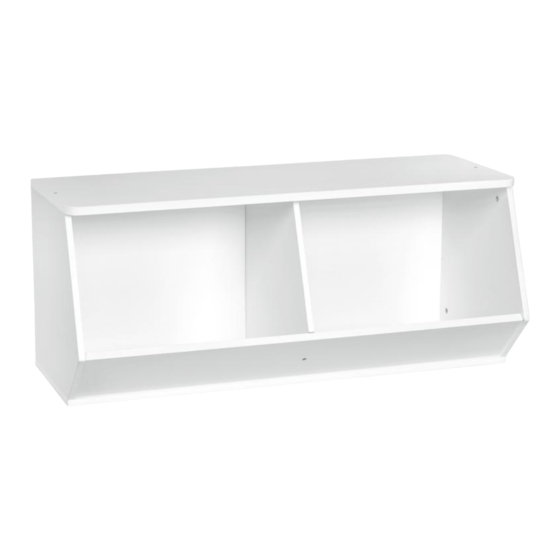
Angled 2 Bin
Bac doublement angulaire
2 recipientes angulados
01-85358-00
2/17
Items you will need to provide for assembly:
Articles que vous devrez fournir pour le montage:
Elementos que necesitará para el montaje:
© ClosetMaid Corporation 2016 | Ocala, FL 34471 | 1-800-874-0008 | www.closetmaid.com | www.closetmaid.ca
1
© ClosetMaid Corporation 2017 | Ocala, FL 34471 | 1-800-874-0008 | www.closetmaid.com | www.closetmaid.ca
1
Advertisement

Summary of Contents for Closet Maid 1621
- Page 1 Angled 2 Bin Bac doublement angulaire 2 recipientes angulados 01-85358-00 2/17 Items you will need to provide for assembly: Articles que vous devrez fournir pour le montage: Elementos que necesitará para el montaje: © ClosetMaid Corporation 2016 | Ocala, FL 34471 | 1-800-874-0008 | www.closetmaid.com | www.closetmaid.ca ©...
- Page 2 FOLLOW INSTRUCTIONS CAREFULLY OBSERVER SOIGNEUSEMENT LES INSTRUCTIONS SIGA LAS INSTRUCCIONES DETENIDAMENTE Please do not return product to the retail store. For product assistance and warranty information please call Consumer Affairs at 1- 800-874-0008. Manufacturer Warranty Manufacturer will replace any missing or damaged part due to manufacturer defect for one year after purchase.
- Page 3 SAFETY PRECAUTIONS | CONSIGNES DE SÉCURITÉ | PRECAUCIONES DE SEGURIDAD WARNING MISE EN GARDE ADVERTENCIA • Toutes les unités doivent être fixées individuellement • Todas las unidades deben fijarse a la pared de forma • All units must be secured individually to wall à...
- Page 4 HELPFUL HINTS | CONSEILS UTILES | CONSEJOS PRÁCTICOS We recommend you assemble on a soft surface to avoid damage to the unit or surface. Nous vous recommandons de faire l’assemblage sur une surface lisse afin d’éviter d’endommager l’unité ou la surface. Recomendamos realizar el ensamblaje sobre una superficie suave para evitar cualquier daño a la unidad o a la superficie.
- Page 5 PARTS | PIÈCES | PIEZAS Locate a sticker or a “stamp” on an Localiser un autocollant ou une estampe Localiser un autocollant ou une estampe unfinished edge to identify parts. servant à identifier les pièces sur une servant à identifier les pièces sur une bordure brute.
- Page 6 PLEASE NOTE: Cam post is secure when VEUILLEZ PRENDRE NOTE : Le boulon A CONSIDERAR: El cuerpo de la traba threads on screw are not showing. à tige est bien fixé lorsque le filetage de la estará asegurado cuando los filetes de la vis n’est plus visible.
- Page 7 PLEASE NOTE: Cam post is secure when VEUILLEZ PRENDRE NOTE : Le boulon A CONSIDERAR: El cuerpo de la traba threads on screw are not showing. à tige est bien fixé lorsque le filetage de la estará asegurado cuando los filetes de la vis n’est plus visible.
- Page 8 Insert cam lock and press to Insérer le boulon à verrou et l’enfoncer Introducir la traba y presionarla hasta bottom of hole. Ensure arrow au fond de le trou. Veiller à ce que el fondo del orificio. La flecha de la on camlock is pointing towards la flèche du boulon à...
- Page 9 Place bottom onto unit Placer le fond sur l’unité (en Ponga la parte inferior en la unidad (making sure the finished side s’assurant que le côté fini est orienté (asegúrese de que los bordes faces UP) and secure cams in vers le HAUT) et fixer les cames dans terminados miren hacia ARRIBA) y cam locks as shown.
- Page 10 Use threaded fastener to Se servir d’une fixation filetée pour Utilice un pasador con rosca para complete attachment of center fixer la paroi centrale. terminar la unión de la pared central. wall. Aligner le dessus de l’unité (s’assurer Alinee la parte superior de la unidad Align Top of unit (be sure the que le bord long fini est orienté...
- Page 11 Place back panel onto unit (making Placer le panneau arrière sur l’unité Colocar el panel trasero en la sure the finished side of backer faces (en veillant à ce que le côté fini du dos unidad (con el lado terminado hacia down) and center horizontally and soit face vers le bas), puis le centrer à...
- Page 12 Top side anchor Ancrage supérieur Anclaje superior Underside Anchor Ancrage inférieur Anclaje inferior Locate wall stud and note proper Localiser le poteau mural et Determinar la altura de la unidad en height for unit. déterminer la hauteur appropriée pour base a la ubicación del travesaño. l’unité.
- Page 13 To stack units, insert dowels into Pour empiler les unités, insérer les Para apilar las unidades introducir las both holes on top of the unit, and goujons dans les deux trous situés espigas en ambos orificios arriba de place second unit on top, securing on sur le dessus de l’unité, puis déposer la unidad y colocar la segunda unidad dowels.


Need help?
Do you have a question about the 1621 and is the answer not in the manual?
Questions and answers