
Related Manuals for VTX TV

Summary of Contents for VTX TV
- Page 1 VTX TV Manuel utilisateur VTX TV Kurzbedienungsanleitung VTX TV Quick User Guide Français page Deutsch Seite English page...
- Page 2 Page 2 of 110...
- Page 3 Documentation en ligne Retrouvez notre documentation sur VTX TV en ligne www.vtx.ch/tv-guide Page 3 of 110...
- Page 4 Bienvenue Merci d’avoir choisi VTX TV. Ce manuel utilisateur vous guidera à travers les étapes nécessaires à la mise en route de votre décodeur VTX TV afin de profiter de vos services le plus rapidement possible Contenu Veuillez vérifier que vous avez reçu tous les éléments ci-dessous : Décodeur VTX TV...
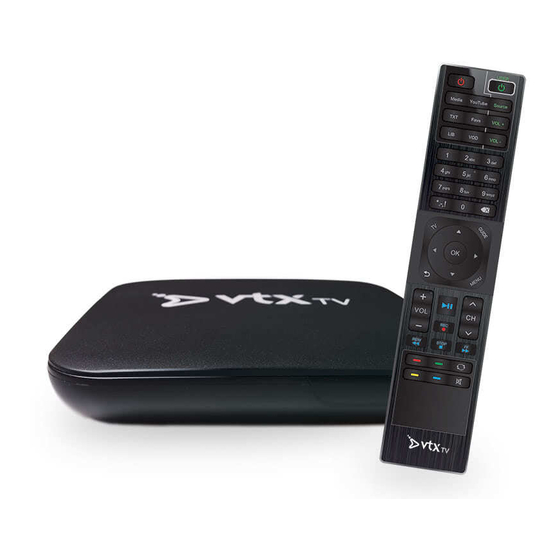
- Page 5 Découvrir votre décodeur VTX TV Page 5 of 110...
-
Page 6: Mise En Service
Mise en service Aperçu de l’installation: VTX TV Page 6 of 110... - Page 7 1. Téléviseur VTX TV Raccordez une extrémité du câble HDMI à votre décodeur VTX TV et l’autre à votre téléviseur. Si votre téléviseur dispose de plusieurs prises HDMI, configurez-le de manière à sélectionner le port adéquat. Notez que les signaux vidéo et audio sont transmis via le câble HDMI directement au téléviseur.
- Page 8 Si vous utilisez le câble réseau, branchez-le d’un côté sur le port Ethernet situé à l’arrière de votre décodeur TV et de l’autre sur l’un des ports Ethernet de votre modem/routeur (en général ils sont de couleur jaune avec la mention Ethernet ou LAN).
- Page 9 Télécommande Page 9 of 110...
- Page 10 Navigation La navigation dans les différents menus s’effectue grâce aux touches suivantes : • Les touches / et la touche permettent de naviguer dans l’écran pour sélectionner un élément particulier. • La touche MENU permet d’afficher les options disponibles. • La touche permet de sortir de la fonction courante et de revenir à...
-
Page 11: Mise En Route
à la demande Hollystar afin de commander films et DVD. Mise en route Votre décodeur VTX TV démarrera en mode direct TV et vous pourrez regarder la télévision. Appuyez d'abord sur le bouton pour voir l'OSD (Menu contextuel d’Information) avec les données sur le programme en... - Page 12 Ce menu OSD disparaîtra automatiquement après quelques secondes. Vous pouvez également utiliser la flèche de votre télécommande pour ouvrir l’OSD, accéder à la vue détaillée et y naviguer. Utilisez la flèche successivement pour fermer les différents écrans du menu OSD ouverts Utilisez le bouton pour fermer tous les écrans OSD à...
- Page 13 Si vous voulez voir plus d'informations sur le programme en cours, utilisez la flèche pour ouvrir une vue plus détaillée. La vue détaillée peut comporter plusieurs pages et de nombreuses informations comme le type de programme, les acteurs ou encore les réalisateurs (l’enregistrement est seulement possible avec l'abonnement Premium).
- Page 14 Si vous voyez le symbole de langue, cela signifie que l'émission en cours peut être écoutée en plusieurs langues. Utilisez le bouton vert pour modifier la langue. Page 14 of 110...
-
Page 15: Guide Des Programmes
Guide des programmes Appuyez sur la touche GUIDE pour afficher le guide des programmes. Appuyez sur la touche , la touche GUIDE ou la touche pour quitter le guide des programmes et revenir à votre programme télévisé. En appuyant sur l’émission en surbrillance, vous verrez beaucoup d’informations comme le genre, le titre, le nom de l’épisode et une Page 15 of 110... - Page 16 Toutes ces informations sont également disponibles dans le Guide, la Bibliothèque (LIB) et l’OSD (On Screen Display) sur Live TV. Appuyez sur pour regarder cette émission. Page 16 of 110...
-
Page 17: Utilisation De La Fonction Recherche
Utilisation de la fonction Recherche Vous avez la possibilité de rechercher des programmes par genre, période, chaîne ou mot-clé. Il existe 3 façons de commencer la recherche d’une émission: La touche bleue « Recherche » peut être utilisée pour commencer la recherche en regardant la télévision. - Page 18 Chaque champ de recherche peut être sélectionné indépendamment ou combiné à d'autres critères, ainsi qu'à un texte de recherche. La recherche cumule les critères et fournit les résultats correspondants. Page 18 of 110...
- Page 19 En appuyant sur la touche de recherche bleue dans le Guide du programme lorsque le curseur est sur une émission (par exemple *Journal*) cela affichera une fenêtre contextuelle pour effectuer la sélection suivante : « Recherche des émissions contenant par exemple *Journal 13h00* » ou «...
- Page 20 La liste des résultats de recherche / « Aucun résultat trouvé » Les résultats de recherche sont toujours triés chronologiquement. Le programme le plus proche de l'heure actuelle est mis en surbrillance. Vous pouvez utiliser les touches rouge, verte jaune pour trier les résultats comme suit : •...
- Page 21 • Le tri par « Programmes passés et d’aujourd’hui » affiche tous les résultats des programmes passés du plus proche au plus ancien. • « Enregistrements seuls » affiche uniquement les résultats de la liste de vos enregistrements. Si vous lancez plusieurs résultats de recherche en même temps, mais sur différentes chaînes de télévision, vos stations préférées seront affichées en premier.
- Page 22 L’achèvement automatique du mot après 2 caractères Lorsque vous entrez 2 ou plusieurs caractères dans la fenêtre contextuelle de recherche, une liste déroulante avec jusqu’à 6 propositions automatiquement remplies s’affiche. L’ajout de plus de caractères actualise automatiquement les propositions. Utilisez les touches / pour naviguer dans la liste déroulante et sélectionnez en appuyant sur OK.
- Page 23 Enregistrer les recherches / L’historique des recherches Les critères de recherche des derniers textes de recherche utilisés sont automatiquement sauvegardés pour raccourcir les recherches futures. En appuyant sur la touche bleue RECHERCHE SAUVEGARDÉE, cela indique les 6 dernières recherches, la plus récente est en haut de la liste. Page 23 of 110...
- Page 24 A noter : • Le champ de recherche couvre 14 jours et un maximum de 200 émissions peut être affiché. • Utilisez le bouton EFFACER LE TEXTE pour supprimer tout le texte. • Sélectionner « Tous genres », « Toutes heures » ou « Toutes chaînes »...
- Page 25 Liste par défaut. C’est la liste de tous les canaux inclus dans votre abonnement. Elle ne peut pas être altérée. • 3 listes de favoris supplémentaires sont disponibles pour stocker et éditer vos canaux TV préférés. Page 25 of 110...
- Page 26 Il existe deux possibilités d'édition après l'ouverture d'une liste de favoris : vous pouvez d’une part masquer les chaînes TV de votre liste de chaînes et d’autre part réorganiser l’ordre des chaînes à votre goût. Utilisez les boutons contextuels rouge, vert,...
- Page 27 Réduire la liste : utilisez le bouton rouge CACHER TOUT qui rendra tous les canaux invisibles puis sélectionnez vos chaînes favorites et appuyez sur la touche verte AFFICHER pour les rendre visibles. Terminez en appuyant sur la touche pour sauvegarder la liste. Toutes les chaînes visibles se déplaceront automatiquement en haut de la liste.
- Page 28 sélectionnés seront déplacés vers l'emplacement surligné et tous les autres canaux seront automatiquement réalignés. Déplacez les canaux vers le haut : en utilisant le bouton afin de sélectionner ou désélectionner un ou plusieurs canal/aux à déplacer puis appuyez sur le bouton bleu DÉPLACER AU DÉBUT.
- Page 29 Astuces • Le bouton vert AFFICHER TOUT permet d’afficher tous les canaux disponibles dans leur position actuelle • Le bouton permet de désélectionner un canal sélectionné • A droite, en haut de l’écran, vous voyez le nombre de canaux visibles et le nombre total de canaux disponibles •...
- Page 30 Configuration réseau : activer le Wi-Fi Si vous souhaitez connecter votre décodeur VTX TV à votre modem en Wi-Fi, voici les étapes à suivre : Appuyez sur la touche MENU de la télécommande fournie avec votre décodeur TV. A l’aide des flèches, sélectionnez Préférences...
- Page 31 Vidéo à la demande (VoD) Appuyez sur le bouton de la télécommande VTX TV pour accéder à l’interface. Déplacez-vous dans le menu de gauche avec les flèches de votre télécommande et appuyez sur OK. Les flèches de votre télécommande vous permettent de choisir un film dans une catégorie.
- Page 32 Positionnez le focus sur LOUER/ACHETER et appuyez sur OK. Vous aurez accès au prix et à la durée de disponibilité du film. Pour choisir ou changer la langue des sous-titres ou la langue de visionnage, appuyez sur la touche de votre télécommande au démarrage du film.
- Page 33 Application YouTube Cette application vous permet de regarder toutes les vidéos disponibles sur YouTube sur l’écran de votre téléviseur. Vous pouvez rechercher et lire vos vidéos préférées, consulter ou souscrire à des chaînes et obtenir des recommandations pour des vidéos avec un contenu similaire. Sur la page d’accueil, vous trouvez une sélection de vidéos les plus populaires d’un certain genre.
- Page 34 Radio et podcasts sur le Web Dans le menu principal, vous trouvez maintenant une icône Radio. Cliquez dessus pour accéder à la nouvelle application Radio & Podcasts. Lorsque vous la lancez pour la première fois, vous verrez la section Découvrir dans laquelle vous pouvez rechercher des radios et podcasts par pays, par genre, par humeurs et en utilisant la section de recherche textuelle.
- Page 35 Une fois que vous trouvez une radio ou un podcast que vous aimez, cliquez dessus et la lecture commencera. Utilisez le bouton BACK pour arrêter la lecture et revenir à l'écran précédent. Lorsque vous êtes sur l'écran d'accueil Radio & Podcasts, vous verrez les 8 dernières radios et les 8 derniers podcasts lus.
-
Page 36: Touches Programmables
2. Pointez votre télécommande TV d’origine vers la nouvelle télécommande VTX TV en vous assurant qu’elles sont face à face et espacées d’1 cm. 3. Appuyez pendant quelques secondes sur le bouton correspondant de votre télécommande TV d’origine. -
Page 37: Configuration Écran
Taille de l’affichage vous permet d’ajuster l’affichage aux bordures de l’écran de votre téléviseur. Suivez ensuite les instructions pour procéder aux ajustements. Le décodeur VTX TV redémarrera pour appliquer les modifications. Choix de la langue Vous pouvez changer la langue utilisée par le décodeur en sélectionnant MENU, puis Préférences, puis Langue. - Page 38 Online Dokumentation Unsere online Dokumentation zu VTX TV: www.vtx.ch/tv-guide Page 38 of 110...
- Page 39 Willkommen bei VTX TV Vielen Dank, dass Sie sich für VTX TV entschieden haben. Diese Kurzanleitung führt Sie schrittweise durch den Installationsprozess Ihrer VTX TV Set Top Box, damit Sie VTX TV rasch nutzen können. Lieferumfang (Sollte etwas fehlen, kontaktieren Sie bitte unverzüglich VTX) Bitte überprüfen Sie, ob alle Teile gemäss folgender Abbildung vorhanden...
- Page 40 Entdecken Sie Ihre VTX TV Set Top Box Page 40 of 110...
- Page 41 TV Set Top Box (STB) anschliessen Installationsschema: VTX TV Page 41 of 110...
- Page 42 1. Fernsehgerät VTX TV Verbinden Sie ein Ende des HDMI-Kabels mit Ihrer VTX TV Set Top Box, das andere Ende mit Ihrem Fernsehgerät. Falls Ihr Fernsehgerät über mehrere HDMI-Anschlüsse verfügt, wählen Sie bitte den gewünschten Anschluss. Beachten Sie bitte, dass das HDMI-Kabel Audio- und Videosignale überträgt.
- Page 43 «Ethernet» oder «LAN» beschriftet. Stromanschluss VTX TV VTX TV Stecken Sie das Kabel des Adapters in die Buchse der VTX TV Set Top Box und schliessen Sie dann den Adapter am Stromnetz an. Die Set Top Box startet sofort. Page 43 of 110...
- Page 44 Möglicherweise führt die Set Top Box bei der allerersten Verwendung ein Update durch, das einige Minuten (ca. 5-10) dauern kann. Warten Sie, bis das Update abgeschlossen ist. Page 44 of 110...
- Page 45 Fernbedienung Page 45 of 110...
- Page 46 Navigation Die Navigation erfolgt mittels der folgenden Tasten: • Die Pfeil-Tasten bewegen den Cursor auf dem Bildschirm, mit der OK-Taste wird ein bestimmtes Element ausgewählt. • Die MENU-Taste zeigt ein Menü mit den verfügbaren Optionen. • -Taste erlaubt das Verlassen der momentan angewählten Funktion und wechselt in den vorherigen Modus.
-
Page 47: Erste Schritte
Erste Schritte Ihre VTX TV Set Top Box startet im live TV Modus und Sie können sofort TV schauen. Drücken Sie zuerst die OK-Taste. Damit rufen Sie das OSD (On Screen Display) auf, das Informationen über die laufende und die nächste Sendung anzeigt. - Page 48 Taste schliessen Sie sofort das OSD. Sie können alternativ die -Tasten benutzen. Das gleiche OSD wird angezeigt und zusätzlich sehen Sie auch die Liste der TV Kanäle. Einen anderen Kanal wählen Sie dann schnell mit OK. Die Detailansicht öffnet sich mit zweimaligem Drücken der -Taste.
- Page 49 Diese Ansicht kann mehrere Seiten umfassen und zusätzliche Informationen wie Genre, Schauspieler, Regisseur usw. beinhalten. (Aufnahmen sind nur mit dem Premium Abonnement möglich) Falls Sie das «Sprachen»-Zeichen sehen bedeutet dies, dass die Sendung mehrere Sprachen haben kann. Mit der grünen Taste schalten Sie zwischen Sprachen um.
- Page 50 Elektronischer Programmführer (GUIDE) Drücken Sie die GUIDE-Taste, um den Programmführer auf dem Bildschirm einzublenden. Drücken Sie oder GUIDE oder TV, um den Programmführer zu verlassen und zu Ihrer Sendung zurückzukehren. Page 50 of 110...
- Page 51 Sendung angezeigt (falls vorhanden). Auf der Credits-Seite finden Sie die Namen der Schauspieler und des Regisseurs der Sendung. Alle diese Informationen sind sowohl im Elektronischen Programmführer (EPG) als auch in der Aufnahmeliste (LIB) und dem OSD im Live TV verfügbar. Drücken Sie um sich die Sendung anzuschauen.
- Page 52 Suchtaste drücken, während das On-Screen-Display (OSD) auf dem Bildschirm angezeigt wird, wird sofort nach der Sendung mit dem gleichen Namen in allen Genres, Zeiten und TV-Sendern gesucht und eine Liste mit Ergebnissen angezeigt. Benutzen Sie die GUIDE-Taste auf Ihrer Fernbedienung, damit der elektronische Programmführer auf dem Bildschirm angezeigt wird.
- Page 53 Jedes Suchfeld kann eigenständig ausgewählt oder mit anderen Kriterien sowie mit einem Suchtext kombiniert werden. Die Suche kumuliert die Kriterien und liefert die entsprechenden Ergebnisse. Page 53 of 110...
- Page 54 Drücken Sie die blaue Suchtaste im Programmführer, während eine Sendung hervorgehoben wird (z.B. *ECO*), wird zunächst eine Frage angezeigt, um folgende Auswahl zu treffen: „Suche nach Sendungen mit z.B. *ECO*“ oder „Bestehende Suchkriterien verwenden“. Die erste Auswahl öffnet direkt die Liste mit den Suchergebnissen für alle Sendungen mit *ECO*.
- Page 55 Liste der Suchergebnisse / „Kein Resultat gefunden“ Die Suchergebnisse werden immer nach der Zeit der Sendung sortiert. Die der aktuellen Zeit am nächsten liegende Sendung wird hervorgehoben. Mit der roten, grünen oder gelben Taste können Sie die Sendungen wie folgt sortieren: •...
- Page 56 Sendungen. (nur Premiumabo). Beginnen mehrere Suchergebnisse zur selben Zeit, aber auf verschiedenen TV-Sendern, werden zuerst Ihre Lieblingssender angezeigt. Erscheint das Popup „Keine Ergebnisse gefunden. Bitte versuchen Sie: …“, bedeutet dies, dass es Ergebnisse gibt, aber nicht für die Standardeinstellung „Künftige Sendungen und heute“.
- Page 57 Automatische Wortvervollständigung nach 2 Zeichen Wenn Sie 2 oder mehr Zeichen im Textfeld der Suchmaske eingeben, erscheint eine Dropdown-Liste mit bis zu 6 automatisch vervollständigten Vorschlägen. Mit jedem weiteren Zeichen erneuern sich die Vorschläge automatisch. Benutzen Sie die / -Tasten, um zu navigieren und drücken Sie für Ihre Auswahl.
- Page 58 Suche speichern & Suchhistorie Die Suchkriterien der letzten Textsuchen werden automatisch gespeichert, um zukünftige Suchen zu verkürzen. Drücken Sie die blaue Taste GESPEICHERTE SUCHE: Es erscheinen die 6 letzten Suchen, die Neuste zuoberst auf der Liste. Page 58 of 110...
- Page 59 Mit der Taste Favs können Sie die Favoriten öffnen. Sie haben folgende Möglichkeiten: • Eine Standardliste aktivieren, hier sind alle TV- Kanäle aus Ihrem Abonnement enthalten; diese Liste kann man nicht ändern. • 3 zusätzliche Favoritenlisten, welche verändert werden können. Sie können Ihre Lieblingssender hier speichern.
- Page 60 Am Anfang enthalten alle 4 Listen alle TV- Kanäle aus Ihrem Abonnement. Die aktuell aktive Liste ist mit einem grünen bezeichnet. Jede der Listen kann mittels der grünen Taste aktiviert werden. Jede 3 veränderbaren Listen kann mit der roten Taste wieder auf den Ausgangsstatus zurückgesetzt werden.
- Page 61 Favoriten 1 geändert. Sie können auch jede Liste umbenennen in dem Sie mit der -Taste in die Titelzeile navigieren. Es bestehen grundsätzlich zwei Anpassungsmöglichkeiten: TV-Kanäle wahlweise verbergen und TV-Kanäle in ihrer Reihenfolge anpassen. Dazu benutzen Sie die kontext-sensitiven Tasten rot, grün, gelb oder...
- Page 62 TV-Kanäle werden verborgen und auf das Ende der Liste verschoben. Die Liste mit der Taste speichern. Mit der Taste können Sie auch einen jeweils gewählten Kanal wieder abwählen. Eine kurze Liste erstellen: zuerst mit der roten ALLE VERBERGEN-Taste alle Kanäle verbergen. Anschliessend einige gewünschte Kanäle auswählen, und die grüne...
- Page 63 markieren, wohin die gewählten Kanäle verschoben werden sollen. Anschliessend die gelbe WAHL VERSCHIEBEN-Taste drücken. Die gewählten Kanäle werden zur markierten Position verschoben und alle anderen Kanäle werden automatisch umsortiert. Kanäle auf den Anfang verschieben: zuerst mit der Taste einen oder mehrere Kanäle auswählen.
-
Page 64: Netzwerk Einrichten
Netzwerk einrichten Um Ihre VTX Set Top Box über WLAN mit dem Modem zu verbinden, gehen Sie wie folgt vor: • Drücken Sie die Taste MENU auf der mit der Set Top Box mitgelieferten Fernbedienung. • Mit den Pfeiltasten wählen Sie «Einstellungen»... -
Page 65: Video On Demand (Vod)
Video on Demand (VOD) Drücken Sie auf der VTX TV-Fernbedienung, um auf die Benutzeroberfläche zu gelangen. Mit den Tasten Ihrer Fernbedienung können Sie sich durch das Menü links bewegen. Drücken Sie dann OK. Mit den Pfeiltasten der Fernbediendung können Sie einen Film aus einer Kategorie auswählen. - Page 66 Verwenden Sie die OK-Taste, um auf die Menüpunkte des ausgewählten Films zuzugreifen. Gehen Sie mit der Fernbedienung auf Leihen/Kaufen und drücken Sie OK. Der Preis und die Verfügbarkeitsdauer des Films können abgerufen werden. Um die Sprache für die Untertitel zu wählen oder zu wechseln oder wenn der Film in mehreren Sprachen erhältlich ist, können Sie nach Start des Films Taste Ihrer Fernbedienung drücken und Einstellungen vornehmen.
- Page 67 YouTube App Diese App erlaubt es Ihnen, alle auf YouTube verfügbaren Videos auf Ihrem Fernseher anzuschauen. Sie können Ihre Lieblingsvideos suchen und anschauen, Kanäle besuchen oder abonnieren und erhalten Empfehlungen für Videos mit ähnlichen Inhalten. Auf der Startseite finden Sie eine Auswahl der beliebtesten Videos eines bestimmten Genres.
- Page 68 Webradio & Podcasts Im Hauptmenü gibt es jetzt ein Radio-Symbol. Klicken Sie darauf, um auf die neue Radio- Podcasts-App zuzugreifen. Wenn Sie die App zum ersten Mal starten, sehen Sie den Bereich «Entdecken». Hier können Sie Radiosender und Podcasts nach Land, Genre, nach Stimmungen im Suchbereich suchen, wo Sie auch Suchtext eingeben können.
- Page 69 Ist ein ausgewählter Sender momentan nicht abspielbar, wird er nicht zum Bereich "Kürzlich gespielt" hinzugefügt. Versuchen Sie es später noch einmal, da einige Sender nicht immer senden. Der Suchbereich Über die alphanumerischen Tasten Ihrer Fernbedienung können Sie einige Buchstaben/Zeichen des gesuchten Sendernamens eingeben. Klicken Sie auf OK: Die Suchergebnisse werden angezeigt.
- Page 70 beiden (grüner Knopf) filtern, welches auch die erste Ansicht nach der erfolgten Suche ist. Page 70 of 110...
- Page 71 Tasten (z.B. Power). Jetzt leuchtet das rote LED-Lämpchen rechts: Die Fernbedienung ist nun im Lernmodus. 2. Halten Sie Ihre alte Fernbedienung und Ihre neue VTX TV- Fernbedienung in etwa 1 cm Abstand voneinander entfernt gegenüber (jeweils mit den Vorderseiten).
-
Page 72: Weitere Einstellungen
Display-Grösse können Sie Anpassungen vornehmen, falls Teile am Bildschirmrand abgeschnitten werden. Dazu befolgen Sie bitte die Instruktionen auf dem Bildschirm. Ihr VTX TV-Decoder wird anschliessend automatisch neu gestartet. Sprache wechseln Sie können die vom Decoder benutzte Sprache ändern. Hierzu wählen Sie... -
Page 73: Online Documentation
Online documentation Find our documentation on VTX TV on line: www.vtx.ch/tv-guide Page 73 of 110... - Page 74 Welcome to VTX TV Many thanks for your interest in VTX TV. This short document will guide you through the setup process of your new VTX TV Set Top Box so that you can start watching TV as quickly as possible.
- Page 75 Getting to know your VTX TV Page 75 of 110...
- Page 76 Connecting your TV Set Top Box (STB) Installation overview: VTX TV Page 76 of 110...
- Page 77 1. Television VTX TV Connect one side of the HDMI cable to your VTX TV box, and the other side to your TV. If your TV has multiple available HDMI inputs, please set your TV accordingly. Note that the HDMI cable carries both audio and video signals directly to your TV.
- Page 78 (see the “Network configuration” section for further details). If you are using the network cable, plug it into the Ethernet port located on the back of your VTX TV box and to one of the Ethernet ports of your modem/router (these are generally yellow and marked “Ethernet” or “LAN”).
- Page 79 4. Power VTX TV Connect the AC adapter to the VTX TV box, then insert the power plug into your wall socket. The VTX TV box will immediately turn on when power is connected. When used for the very first time, your VTX TV box may be required to update for several minutes (approx.
-
Page 80: Remote Control Buttons
Remote Control buttons Page 80 of 110... -
Page 81: Navigation Tips
There are also quick-jump shortcut buttons to go directly to the desired function. • shows the Live TV signal. • GUIDE shows the Program Guide • Media... -
Page 82: Getting Started
Hollystar Video on Demand service Getting started Your VTX TV Set Top Box will wake up in live TV mode and you will be able to watch TV. First, press the button to see the OSD (On Screen Display) with information about the program you are watching and the following program. - Page 83 This OSD will automatically disappear after a few seconds. You can also use the arrow on your remote control to open the OSD, and again to open the detailed view and navigate inside it, and use the arrow repeatedly to close the various OSD screens one by one. Use the button to close all OSD screens at once.
- Page 84 Alternatively, you can use the arrows on your remote control. This will open the same OSD and will also show the channel list. Select another channel and press to change channels quickly. If you want to see more information about the current program, use the arrow to open a more detailed view Page 84 of 110...
- Page 85 The detailed view may have multiple pages and additional information like genre, actors or director information, etc. (Recording is only possible with the Premium subscription). If you see the language icon, this means the current show may have multiple audio languages. Use the green button to switch languages.
-
Page 86: Program Guide
Press GUIDE button to leave Program Guide view and go back to Live TV. Pressing on the highlighted show will display lots of information like genre, title, episode name and a detailed description of the content of the show (if... - Page 87 On the credits page you can find the names of actors and director of the show. All this information is also available in the EPG, Library (LIB) and the OSD on Live TV. Press to watch this show. Page 87 of 110...
- Page 88 TV channels and will display the list of results. This mode makes it easy to e.g. quickly find more episodes from the past or in the future for the show you are currently watching.
- Page 89 Each search box can be selected on its own or be combined with other criteria and also be combined with any entered search text. The search will cumulate the criteria and produce results accordingly. Page 89 of 110...
- Page 90 Pressing the blue search button in the Program Guide when the cursor is on a show (e.g. *GMT*) will first show a request to make the following selection: “Search for shows containing e.g. * *” or “Use existing search settings”. The first selection directly opens the list of search results, containing all shows with *GMT*.
- Page 91 The second selection opens the search pop-up with the last used search settings, to be completed. Pressing the button will produce a list of search results. Search result list / “No results found” Search results are always sorted by time of the show. The show nearest to the current time is highlighted.
- Page 92 You can use the red, green yellow button to filter the results as follows: • “Future items & Today” is default and starts from “now” and lists all results from future shows, ascending by time. • “Past items & Today” starts from “now” and lists all results from past shows, descending by time.
- Page 93 Automatic word completion after 2 characters When typing 2 or more characters in the search pop-up screen, a drop- down list with up to 6 autocompleted proposals appears. Adding more characters refreshes the proposals automatically. Use / buttons to navigate the drop down list and select by pressing OK. Page 93 of 110...
- Page 94 Save searches & Search history The search criteria of the last search texts used are automatically saved to shorten future searches. Pressing the blue button SAVED SEARCH will show the last 6 searches, the newest at the top of the list. Page 94 of 110...
- Page 95 Tips: • The search range covers 14 days and a maximum of 200 programs will be displayed. • Use the CLEAR TEXT button to delete all text. • Selecting “All Genres”, “All Times” or “All Channels” will alternate between all checkboxes ON or OFF. This speeds up deselecting all boxes, so you don’t have to deselect each box one by one.
- Page 96 You will see the following: • Default List, the list of all channels included in your package; can not be edited • 3 additional Favorites Lists to edit and store your preferred TV channels Page 96 of 110...
- Page 97 There are two basic editing possibilities after opening a favorite list: you can hide TV channels from your channel list and you can reorder the channels to your liking. Use the contextual red, green,...
- Page 98 Make a short list by first using the red HIDE ALL button. This will make all TV channels invisible. Then select a few channels, press the green SHOW button to make them visible and save the list by pressing . All visible channels will automatically move to the top of the list.
- Page 99 Move channels to the top by first using the button to select or deselect multiple channels for reordering. With one or more channels selected, press blue MOVE TO TOP button. The selected channels will be moved to the top of the list and all other channels will be automatically shifted behind them.
- Page 100 Tips: • Use the green SHOW ALL button to show all available channels in their current position • Use the button to alternatively select or deselect a channel for editing • On the top right, you can see how many channels will be visible out of the total available channels •...
- Page 101 Network configuration: activate Wi-Fi If you wish to connect your VTX TV decoder to your modem using Wi-Fi, follow these steps: • Press the MENU button on the remote control supplied with your TV decoder • Using the arrows, select...
- Page 102 Video on Demand (VOD) Press the button on the VTX TV remote control to access the interface. Navigate within the menu on the left with the arrows on your remote control and press arrows on your remote control allow you to choose a film within a category.
- Page 103 Use the button to access the options for the selected film. Go to Rent/Buy and press OK. If the film is available in several languages, you can now choose the language in which to watch it. You will also have access to the film’s price and length of availability.
- Page 104 YouTube App This App allows you to watch all videos available on YouTube on your TV screen. You can search and play your favorite videos, visit or subscribe channels and get recommendations for videos with similar content. On the start page, you find a selection of the most popular videos of a certain genre.
- Page 105 Web-based Radio & Podcasts In the main Menu there is now a Radio icon. Click on it to access the new Radio and Podcasts App. When you first start it, you will see the Discover section in which you can search for Radios and Podcasts by Country, by Genre, By Mood and using the text-based Search section.
- Page 106 If a selected station is not playable at the moment, it will not be added to the Recently Played section. You can try the same station again later as some stations are not always broadcasting. The Search section Use the alphanumeric keys on your remote control to type in a few characters of a desired station’s name.
-
Page 107: Learning Keys
In this way you only need one single remote control for your STB and your TV set. For example, you can program it to switch your TV on or off, select the corresponding input (e.g. HDMI1) and control the audio volume of your How to learn the codes: 1. -
Page 108: Display Configuration
Display size. Scale lets you select between 720p, 1080i, 1080p or 4K mode, depending on your TV. Screen size lets you adjust for “overscan” compensation if parts of the screen edges are cutoff. Follow along the onscreen instructions to make these adjustments. - Page 109 Page 109 of 110...
- Page 110 Copyright © 2016 VTX Telecom SA et AVIQ Systems AG. Version 201610. Tous droits réservés. AVIQ et TIPc et les logos associés sont des marques déposées par AVIQ Systems AG. VTX et les logos associés sont des marques déposées de VTX Telecom SA. Ce produit contient du code source développé par des tierces parties, notamment du code logiciel soumis à...
Need help?
Do you have a question about the TV and is the answer not in the manual?
Questions and answers