Table of Contents
Advertisement
Quick Links
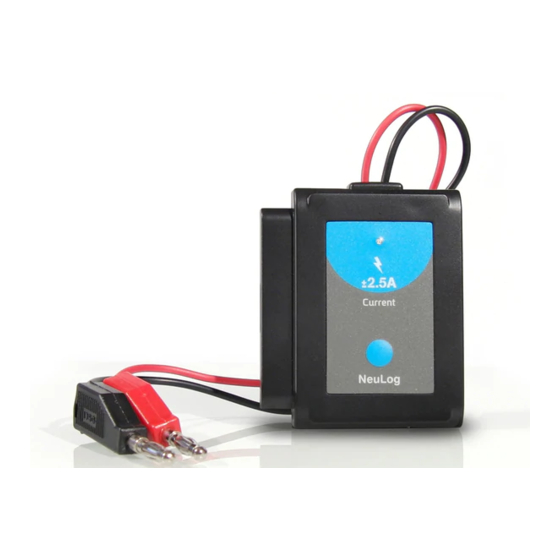
NeuLog current logger sensor
NUL-202
The NeuLog current sensor can be used for any science experiment which utilizes
current readings. It is used in the fields of Physics, Electronics, Chemistry, Biology,
etc.
The sensor comes pre-calibrated so you can start experimentation right out of the box
using this guide.
Just a few of the thousands of possible experimental subjects that can be studied with
the NUL-202 sensor are: Van de Graaff generators, fuel cells, battery chemistry,
human muscle physiology, parallel circuits and series circuits.
The current sensor's measurement units are:
Amperes (A): Amperes are the SI base unit of electric current.
Quick start procedure:
PC or Mac Computer
Materials needed:
NUL-202 Current Sensor
USB-200 USB Module
USB to mini USB cable (which comes with the USB-200)
Your current sensor needs to be connected to a USB-200 module. The USB-200
module then connects to a computer via a USB to mini-USB cable. Please note that
you cannot plug the current sensor directly into the computer.
Resident PC software and browser based application can be downloaded for free at
www.neulog.com/Download/SoftwareandApplication.aspx
user guide.
Note: Make sure not to download and install both types of software they will conflict
on the computer.
Procedure:
NEULOG CURRENT LOGGER SENSOR GUIDE
1.
2.
3.
4.
5.
6.
7.
8.
9.
10.
11.
12.
Tablet, smart phone device
Materials needed:
Your current sensor needs to be connected to a WiFi-201 module. The WiFi-201
module will create a closed NeuLog WiFi network which will stream the NeuLog data
to the device of your choosing. Once your device is wirelessly connected to the
NeuLog network you can run experiments and collect data through a browser of your
choosing.
Procedure:
1.
as well as a full software
2.
3.
Install the NeuLog software.
Connect the USB-200 module to the PC or Mac.
Connect the current sensor to the USB-200 module (they directly plug together).
Please note no calibration is required for this sensor.
Open the NeuLog software.
Once a current sensor logo appears on the left side of the screen, the probe has
been automatically identified and you can begin experimentation.
If the current sensor is not automatically identified, click the "Search for sensors"
icon to find the sensor.
Click the "On-line experiment" button; this will open a graph below.
Click on the "Module setup" button located on the current sensor icon in the
module window to change the sensor's settings if need be.
Click on the experiment set up button to change the experiment settings if need
be (experiment duration for example).
The current sensor will give a live reading in the box to the left of the screen
while plugged in.
To run an experiment and collect data, click "Run experiment".
To end data collection early, click "Stop experiment".
NUL-202 Current Sensor
WiFi-201 WiFi module
BAT-200 Battery Module
Connect the current sensor directly to the left side of a WiFi-201 module (no
wires required).
Connect a BAT-200 module to the right side of the WiFi-201 module.
Although not required, we recommend plugging the BAT-200 to an outlet using a
USB to mini USB charger (such as a typical cell phone charger). The WiFi-201
module will run for 15-75 minutes (depending on the sensor) without being
plugged in.
Advertisement
Table of Contents

Related Manuals for NeuLog NUL-202


Summary of Contents for NeuLog NUL-202
- Page 1 NUL-202 Current Sensor USB-200 USB Module module will create a closed NeuLog WiFi network which will stream the NeuLog data to the device of your choosing. Once your device is wirelessly connected to the USB to mini USB cable (which comes with the USB-200) NeuLog network you can run experiments and collect data through a browser of your choosing.
- Page 2 To run an experiment and collect data click the run button (little green person). Take your tablet or smart phone, go to the Wi-Fi settings and select the Neulog network which matches the WiFi Module ID found on the back of the WiFi-201 Off-line experiments device.
- Page 3 Resume from step 4. in each plastic NeuLog body. This technology allows the sensor to collect and then store the digital data in the correct scientific units ( F, Lux, %, ppm, for example).
- Page 4 NEULOG CURRENT LOGGER SENSOR GUIDE Warranty: We promise to deliver our sensor free of defects in materials and workmanship. The warranty is for a period of 3 years from the date of purchase and does not cover damage of the product caused by improper use, abuse, or incorrect storage. Sensors with a shelf life such as ion selective probes have a warranty of 1 year.
Need help?
Do you have a question about the NUL-202 and is the answer not in the manual?
Questions and answers