Advertisement
Quick Planting Guide
Simple Steps to Get Your AeroGarden Farm Up and Growing
Farm 12 | Farm 12 XL
Welcome to the World of In-Home Gardening!
Keep this Guide!
AeroGarden Farm 12 Model Number: 100022 - BLK / WHT
Electrical Rating: 120V, 60Hz, 0.56A
AeroGarden Farm 12 XL Model Number: 100023- BLK / WHT
Electrical Rating: 120V, 60Hz, 0.56A
Advertisement
Table of Contents

Related Manuals for AeroGarden Farm 12


Summary of Contents for AeroGarden Farm 12
- Page 1 Farm 12 | Farm 12 XL Welcome to the World of In-Home Gardening! Keep this Guide! AeroGarden Farm 12 Model Number: 100022 - BLK / WHT Electrical Rating: 120V, 60Hz, 0.56A AeroGarden Farm 12 XL Model Number: 100023- BLK / WHT...
-
Page 2: Important Safety Instructions
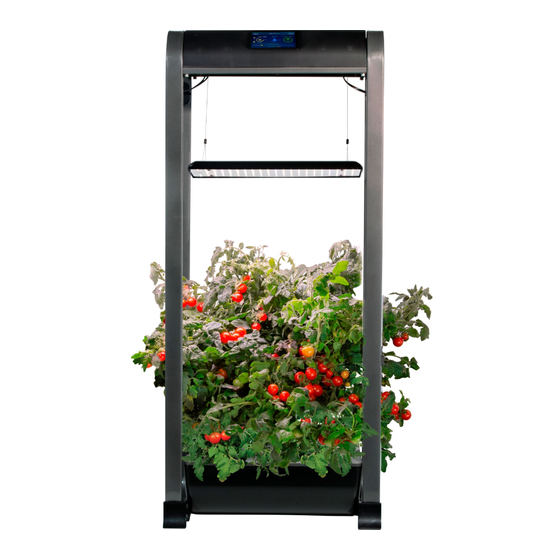
18. If supply cord is damaged, it must be replaced by manufacturer, its service agent, or similarly qualified technician 5. Never operate AeroGarden if it has a damaged cord or plug, if it is not working properly, if it has been dropped and damaged, or if it has been dropped in water. - Page 3 Welcome! Your AeroGarden Farm is a 12-Pod Indoor Garden that will grow large regular harvests of fresh and safe produce all year long. Download the Free AeroGarden App by searching for ‘AeroGarden’ in your mobile App store. AeroGarden Farm Planting Guide...
- Page 4 Quick Plant is the fastest and easiest path to starting a new garden. The pre-set Quick Plant option provides optimal growth based on the plant type you select. Follow the easy instructions on-screen. More detail is provided on the following pages. AeroGarden.com...
-
Page 5: Add Water
Plant Food Feeding Tip: Always top off water level when adding Liquid Plant Food. For best results, top off the water level in your garden regularly. Read and follow Seed Pod Kit Instructions booklet carefully! AeroGarden Farm Planting Guide... - Page 6 • Grow Domes rest on Seed Pods and may not ‘snap’ into place. Place Grow Domes Also, it is not necessary for Grow Domes to cover Removing Plant Spacers in your AeroGarden. Grow Domes ♻♳ • Leave Grow Domes on the Seed Pods until plants have sprouted and their leaves nearly touch the domes.
-
Page 7: Control Panel
Control Panel Touch Screen The AeroGarden Farm’s touch screen control panel makes it easy for anyone to grow indoors. Beginners get step-by- step instructions on the planting process and tips to improve gardening skills. It also allows advanced users to customize... -
Page 8: Control Panel Settings
Control Panel Settings WI-FI: The Wi-Fi icon allows you to access the Wi-Fi CLOCK: 8:14 Set your AeroGarden Farm’s clock to your setting of your AeroGarden Farm, as well local time. as connect your AeroGarden Farm to your AeroGarden App. - Page 9 Use this for the fastest and easiest path to planting a new garden. Wi-Fi – Connect your AeroGarden Farm to your preferred network and control your garden remotely on any device using the AeroGarden App.
- Page 10 Once your plants reach a height where they would benefit from extra support, attach the Trellis System to the Metal Frame of your AeroGarden Farm as pictured. The Trellis can be repositioned as plants grow. How to Assemble the...
- Page 11 Seed Pod Kits for large plants like Tomatoes and Peppers often receive fewer than 12 pods to compensate for the large plant size. Place Seed Pods in each back/side opening and in the center front opening. Put Plant Spacers in the remaining openings. AeroGarden Farm Planting Guide...
- Page 12 Also, a full, bushy garden looks much Diagram A Diagram B better than one giant, spindly plant surrounded by straggly, light starved neighbors. Pruning also releases a wonderful scent. So prune! AeroGarden.com...
- Page 13 Follow instructions for feeding amounts printed on the Plant water regularly. Food packaging. Plants grown in the AeroGarden Farm are designed to thrive Add Plant Food directly into the Bowl through the Water Port. with most municipal tap water. Plant Food requirements may change as plants grow.
- Page 14 ‘More Options’ button, select ‘More +’, then click on ‘Drain Garden’. Use our “Be the Bee Pollinator” to spread the pollen. “Be the Bee Pollinators” are available at AeroGarden.com. Follow the instructions on your Touch Screen. harvesting Many first-time growers are hesitant to harvest. Don’t be! Most gardens will produce more, for a longer period, with frequent harvests.
- Page 15 User Maintenance: Any servicing is to be performed by an authorized service representative. Use original packaging for storage when the appliance is not used. Disconnect power before servicing or replacing lights. Use only AeroGarden LED light replacement. DO NOT SUBMERGE HOUSEHOLD USE ONLY Do not immerse cord in water or other liquid, and unplug cord from outlet when not in use.
-
Page 16: Limited Warranty
WHAT IS COVERED – This warranty covers any defects in materials or workmanship, with the exceptions stated below. HOW LONG COVERAGE LASTS – This warranty runs for one (1) year on this AeroGarden and LED Grow Lights, from the date of original purchase, for the original purchaser/user.
Need help?
Do you have a question about the Farm 12 and is the answer not in the manual?
Questions and answers