Table of Contents
Advertisement
Quick Links
,;,
",
':i','
',':
",:a"""
',<:
HI.,':,
,
','
"F..",
:"',", O wrier;~sfManualc,
',,': ','J;\,:{/,:.:.s:e!e:::{c!;::';::.;~\;:t,/'-':.i,,:,,':",,;7'.,"':::':':':/',:'::-,,',
Yerf-Dog ATV's
4012 East Broadway Suite 3 10
Phoenix, AZ 85040
1-888-926-6554
DO NOT RETURN TO RETAILER
',:,"
"
"',,;';:",
,:
W2200
"";'"
.'
,,"
.i,'
-""
':':...e
",c,o:
1-888-926-6554
"
:,,'
".
'.-
Advertisement
Table of Contents

Related Manuals for Yerf-Dog W2200

Summary of Contents for Yerf-Dog W2200
- Page 1 ", ':i',' ',:," " "',,;';:", W2200 ',': ",:a""" "";'" " ',<: HI.,':, :,,' "F..", ,," .i,' -"" ':':...e ",c,o: ". :"',", O wrier;~sfManualc, ',,': ','J;\,:{/,:.:.s:e!e:::{c!;::';::.;~\;:t,/'-':.i,,:,,':",,;7'.,"':::':':':/',:'::-,,', Yerf-Dog ATV's 4012 East Broadway Suite 3 10 Phoenix, AZ 85040 1-888-926-6554 DO NOT RETURN TO RETAILER...
- Page 2 Dear customer, Thank you very much for selecting Yerf Dog ATV! The Yerf Dog Model 23000 are manufactured in accordance with enterprise standard Q/XDZ JC 62. Yerf Dog Model 23000 will bring you the greatest pleasure and convenience with their superio performance and elegant style.
-
Page 3: Table Of Contents
CONTENTS NOTES FOR SAFETY Parking DESCRIPTION Turning PartsLocation MAINTENANCE SerialNumber Maintenance Schedule..15 PartsFunction Spark Plug Fuel......7 AirCleaner Brakes EngineOil... -
Page 4: Notes For Safety
NOTES FOR SAFETY This vehicle is designed for junior riders. The Maintain a safe distance between your vehicle and other off-road vehicles. designedweightis 68kgs (150 pounds)or less. Both the parent and their children must fully ALWAYSwear a helmet, face shield, boots, gloves, and protective clothing. -
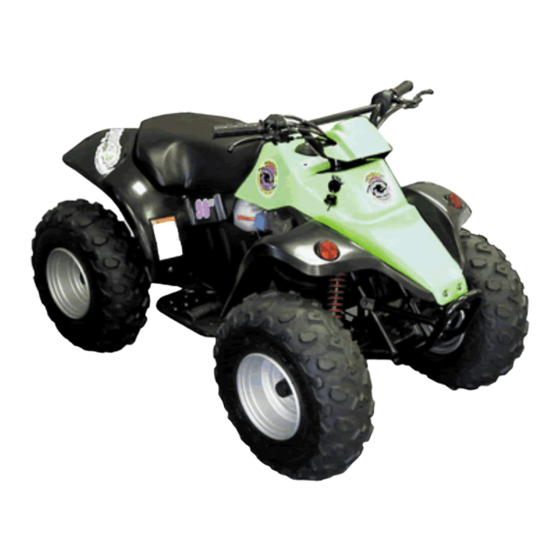
Page 5: Description
DESCRIPTION PARTS LOCATION (1) Fuel tank (2) Front valve (3) Front brake lever (4) Throttle lever (5) Rear brake / parking brake lever (6) Engine stop switch... -
Page 6: Serialnumber
SERIAL NUMBER The engine serial number is stamped Please record the frame and engine serial numbers for future reference. The frame on the left side of the crankcase. serial number is stamped on the front of the frame. ENGINE NO. FRAME NO. -
Page 7: Partsfunction
PARTS FUNCTION Throttle Lever Engine Stop Switch The engine stop switch is on the left The throttle lever is beside the right handlebar handlebar. When the switch is in the "OFF" grip and is activated by the right hand thumb. position, the engine will not operate. - Page 8 Rear Brake The rear brake is the lever located on the left handlebar. When braking, squeeze this lever. This applies the brake to the rear wheels. This brake also has a locking feature and allows the rear brake to be used as a parking brake.
- Page 9 Safety Switch This vehicle is equipped with a rider safety system. The safety switch is located on the rear fender. To operate the vehicle, the switch cap must be connected to the safety switch. The switch cap is attached to a rope. The safety switch rope should NEVER be attached to the rider.
-
Page 10: Fuel
FUEL Fuel Valve The three way fuel valve is on the left side of the vehicle. With the fuel valve at "OFF", gasoline cannot flow into the carburetor. With the fuel valve at "ON", fuel will flow out from the tank. With the fuel valve at "RES", fuel will flow from the reserve fuel supply to the engine. - Page 11 Fuel Tank Fuel tank capacity is 4.5 liter including 0.8 liter in the reserve supply. Automotive gasoline with octane level of 91 or higher may be used. After refueling, be sure to tighten the tank cap firmly.
-
Page 12: Engineoil
ENGINE OIL The oil tank is located under the seat. Look at the oil level before each use. When the oil level gets to the warning level (about 1/2 inch from the bottom of the tank), add oil to the tank. To add oil, remove the seat assembly and lift off the rear seat. -
Page 13: Tires
TIRES Check tire pressure frequently with the air pressure gauge. Tires should be inflated to the recommended pressure. * The recommended pressure: 2.2 psi (15 kPa) Max. Pressure 2.6 psi (18 kPa) Min. Pressure 1.8 psi (12 kPa) * The pressure should be checked when the tires are "cold", before running the vehicle. -
Page 14: Operation
OPERATION - INSPECTION Inspect your vehicle every day before you run it. It only tak be well save your life. * Check oil level in oil tank. * Check fuel level in fuel tank. * Check brake operation. Check tires condition and pressure. Check drive chain condition and slack. -
Page 15: Starting Procedure
BREAK-IN STARTIN G PR aCED URE 1. Parking the vehicle on a level surface During the first two weeks of riding, run and lock the parking brake. your new vehicle tenderly. Don't run very 2. Insert the ignition key into its switch and fast and don't approach maximum rpm. -
Page 16: Riding
RIDING PARKING For your initial, select a safe area free of 1. Parking at a level surface. obstacles with a level surface. 2. Stop the vehicle, move the engine stop switch OFF. Under nonnal riding conditions, it is not 3. Lock the parking brake at the left handle necessary to touch the ground for balance. -
Page 17: Turning
TURNING The rider must learn to move his weight and control the throttle to allow the rear tires to get the turn. When turning, the wheel on the outside of the turn must travel a wider radius and thus a greater distance than the inside wheel. As the rear axle does not permit a differing rate of wheel rotation, it is not enough to merely steer this vehicle into a turn. -
Page 18: Maintenance
MAIN TEN AN CE MAINTENANCE SCHEDULE The maintenance intervals in the following table are based upon average riding conditions. Riding in unusually dusty areas, require more frequent servicing. EVERY YEAR REGULAR SERVICE INITIAL SERVICE (First week) (Every 30 operating days) FUEL LINE THROITLE OPERATION AIR CLEANER... -
Page 19: Spark Plug
SPARK PLUG Standard spark plug: NGK BPR7HS or BP7HS 1. Disconnect the spark plug cap. 2. Clean up dirt from around the spark plug base. 3. Remove the spark plug. 4. Inspect the plug electrodes for wear. If the electrodes and insulator tip appear unusually fouled or burned, change to a new one. -
Page 20: Aircleaner
AIR CLEANER The air cleaner will accumulate dust and must be cleaned periodically. If riding in very dusty area, the filter must be cleaned more frequently. To clean the filter 1. Remove the air cleaner cover. 2. Take out the filter from the air cleaner case. 3. -
Page 21: Brakes
BRAKES DRIVE CHAIN The drive chain will wear with use and Check the brake cable for kinks or signs of requires periodic adjustment. Remove the wear that could cause sticking or failure. chain cover, measure the amount of chain Lubricate the brake cable with an available slack to check the chain tension. -
Page 22: Throttlecable
BATTERY THROTTLE CABLE Inspect throttle cable condition and operation. When reinstalling the battery, be sure to Replace the cable if it has become worn or connect the red cable to the positive (+) kinked. Lubricate the cable with lubricant to lead and the black cable to the prevent premature wear or corrosion. -
Page 23: Specifications
SPECIFICATIONS Item Specifications Model: XDZIPE40QMB - 3 Type: Air - cooled 2 - stroke Bore XStroke: 40.0 X39.2 mm Displacement: 49.3 C.c The engine Compression ratio: 7.5: 1 Oil tank capacity: 1.0 liter TransmIssion: Automatic (c. V. T. V - belt) XDZ50QST XDZ50QST Overall Length: 1330 mm... -
Page 24: Wiring Diagram
WIRIN G D IA G RAM Safety swnch r------------ Fuso box Starter bunon Enricher Resistor Loft handlebar swncho. assy 8ano r;;,o' l:~a_~::~~c_~ Igndion switch :~rako swnch '")1... - Page 25 Follow-up Dear customer, All the materials and diagrams of this manual are in accordance with the newest products at the publishing time. Due to revision and other change, the information described in this manual may be a little different from the actual status. Yerf Dog will reserve the right to revise at any time.
Need help?
Do you have a question about the W2200 and is the answer not in the manual?
Questions and answers