Table of Contents

Related Manuals for Bestron SUMMER BREEZE ASV45ZR


Summary of Contents for Bestron SUMMER BREEZE ASV45ZR
- Page 1 SUMMER BREEZE ASV45ZR INSTRUCTION MANUAL Watts Volts Bedienungsanleitung Instruction manual Mode d’emploi Istruzioni per l’uso Handleiding Manual del usuario...
-
Page 2: Herzlichen Glückwunsch
HERZLICHEN GLÜCKWUNSCH! Herzlichen Glückwunsch zum Erwerb dieses Bestron-Produktes. In dieser Gebrauchsanweisung erläutern wir die Funktion und die Benutzung. Lesen Sie somit diese Gebrauchsanweisung aufmerksam durch, bevor Sie das Gerät benutzen. Verwenden Sie das Gerät nur so, wie es in der Gebrauchsanweisung beschrieben ist. Bewahren Sie die Gebrauchsanweisung danach sorgfältig auf. - Page 3 ausreichend frei ist und nicht mit brennbarem Material in Kontakt kommen kann. Elektrogeräte dürfen nie bedeckt werden. • Sorgen Sie dafür, dass Elektrogeräte, Kabel oder Stecker nicht mit Wasser in Berührung kommen. • Tauchen Sie Elektrogeräte, Kabel oder Stecker nie in Wasser oder eine andere Flüssigkeit.
-
Page 4: Ce-Konformitätserklärung
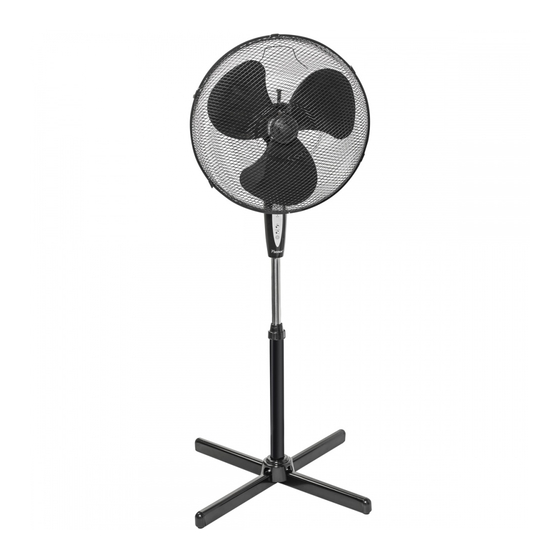
UMWELT • Werfen Sie Verpackungsmaterial, wie zum Beispiel Plastik und Karton, in die dazu bestimmten Container. • Dieses Produkt am Ende der Nutzungsdauer nicht als normalen Haushaltabfall entsorgen, sondern bei einer Sammelstelle zur Wiederverwendung von elektrischem und elektronischem Gerät. Achten Sie auf das Symbol auf dem Produkt, der Gebrauchsanweisung oder Verpackung. - Page 5 FUNKTION - Allgemein Das Gerät ist nur für den Hausgebrauch vorgesehen und nicht für die professionelle Verwendung. 1. Ventilatorflügel 2. Ventilatorkorb 3. Motorgehäuse 4. Schwenksperre 5. Bedienfeld 6. Ausziehbares Stativ 7. Höhensperre 8. Blockierung des Ventilators am 9. Fernbedienung 10. Kabel mit Stecker FUNKTION - Vor der ersten Verwendung Nehmen Sie den Ventilator aus der Verpackung und entfernen Sie das Verpackungsmaterial.
- Page 6 4. Drehen Sie die Höhensperre wieder auf das Stativ. 5. Drehen Sie den Befestigungsknopf (2C) auf der Achse des Motorgehäuses rechts herum (im Uhrzeigersinn) und nehmen Sie den Knopf von der Achse. 6. Bringen Sie die Rückseite des Ventilatorkorbs auf das Motorgehäuses an. Die Aussparungen müssen genau sich über den Nocken des Motorgehäuses und der Schaft an der Oberseite befinden (2D).
-
Page 7: Reinigung Und Wartung
2. Drücken Sie auf dieselbe Taste, um zwischen niedriger, mittlerer und hoher Geschwindigkeit wählen zu können (low, mid, high). 3. Drücken Sie auf die Taste “OFF”. Der Ventilator stoppt. Timer mode Dieses Gerät ist jedoch auch mit einem Zeitschalter versehen, mit dem Sie den Ventilator am Ende der eingestellten Zeit ausschalten lassen können. - Page 8 GARANTIEBESTIMMUNGEN Bestron handhabt unter den folgenden Bedingungen eine Garantie von 60 Monaten ab Kaufdatum gegen Defekte, die durch Herstellungs- und/oder Materialfehler entstanden sind. 1. Im genannten Garantiezeitraum werden keine Kosten für Arbeitslohn und Material berechnet. 2. Die unter der Garantie ausgeführte Reparatur verlängert nicht die Garantiefrist.
- Page 9 FÉLICITATIONS ! Nous vous félicitons pour l’achat de votre produit Bestron. Dans le présent manuel d’utilisation, nous vous expliquons comment celui fonctionne et comment vous devez l’utiliser. Nous vous invitons par conséquent à lire attentivement les instructions d’utilisation avant d’utiliser l’appareil. Lorsque vous l’utilisez, prenez soin de suivre parfaitement les instructions d’utilisation.
- Page 10 • Les appareils électriques doivent pouvoir libérer la chaleur qu’ils produisent de sorte à éviter tout risque d’incendie. Vérifiez par conséquent s’il y a suffisamment d’espace autour de l’appareil et faites en sorte que celui-ci ne puisse entrer en contact avec du matériel inflammable.
-
Page 11: Déclaration De Conformité Ce
ENVIRONNEMENT • Débarrassez-vous du matériel d’emballage comme le plas- tique et les boîtes dans les containers destinés à cet effet. • À la fin de sa durée de vie, ne jetez pas ce produit comme un simple déchet ménager mais remettez-le à un centre de collecte de recyclage des produits électriques et électroniques. - Page 12 FONCTIONNEMENT - Généralités L’appareil est destiné uniquement à l’utilisation domestique, et non à l’usage professionnel. 1. Pales du ventilateur 2. Corbeille du ventilateur 3. Bloc moteur 4. Verrouillage de pivotant 5. Boîtier de commande 6. Pied télescopique 7. Verrouillage de hauteur 8.
- Page 13 3. Enfilez la protection par-dessus le montant et mettez-la en place sur les barres d’appui. 4. Revissez le verrouillage de hauteur sur le montant du pied télescopique. 5. Tournez vers la droite (dans le sens des aiguilles d’une montre) le bouton de fixation de l’arbre du bloc moteur (2C), et détachez le bouton de l’arbre.
-
Page 14: Nettoyage Et Entretien
1. Appuyer sur le bouton “ON/SPEED” (Marche/Vitesse). Le ventilateur commence à tourner à faible vitesse. 2. Appuyer sur ce même bouton pour choisir entre trois vitesses : lente, moyenne ou rapide (low, mid, high). 3. Appuyer sur le bouton “OFF” (Marche/Vitesse). Le ventilateur s’arrête. Timer mode Vous pouvez arrêter le ventilateur à... - Page 15 DISPOSITIONS CONCERNANT LA GARANTIE Le présent produit Bestron bénéficie – aux conditions ci-après – d’une garantie de 60 mois suivant la date d’achat et couvrant toute panne résultant d’un défaut/vice de fabrication et/ou de fonctionnement. 1. Pendant la période de garantie précitée, aucun frais ne sera facturé au titre des coûts de main-d’œuvre et de matériel.
- Page 16 PROFICIAT! Proficiat met de aankoop van dit Bestron-product. In deze gebruiksaanwijzing leggen we de werking en het gebruik uit. Lees de gebruiksaanwijzing dus aandachtig door vóór u het apparaat gaat gebruiken. Gebruik het apparaat alleen zoals beschreven in de gebruiksaanwijzing. Bewaar de gebruiksaanwijzing daarna zorgvuldig.
- Page 17 • Zorg ervoor dat elektrische apparaten, snoeren of stekkers niet in aanraking komen met water. • Dompel elektrische apparaten, snoeren of stekkers nooit onder in water of een andere vloeistof. • Pak elektrische apparaten niet op wanneer ze in het water zijn gevallen.
-
Page 18: Eu Conformiteits Verklaring
MILIEU • Werp verpakkingsmateriaal zoals plastic en dozen in de daarvoor bestemde containers. • Dit product aan het eind van de gebruiksduur niet inleveren als normaal huishoudelijk afval, maar bij een inzamelpunt voor hergebruik van elektrische en elektronische apparatuur. Let op het symbool op het product, de gebruiksaanwijzing of de verpakking. - Page 19 WERKING - Algemeen Het apparaat is alleen bedoeld voor huishoudelijke doeleinden, niet voor professioneel gebruik. 1. Ventilatorvinnen 2. Ventilatorkorf 3. Motorhuis 4. Zwenkvergrendeling 5. Bedieningskast 6. Uitschuifbaar statief 7. Hoogtevergrendeling 8. Vergrendeling ventilator op statief 9. Afstandsbediening 10. Snoer met stekker WERKING - Vóór het eerste gebruik Haal de ventilator uit de verpakking en verwijder alle verpakkingsonderdelen.
- Page 20 4. Draai de hoogtevergrendeling weer op het statief. 5. Draai de bevestigingsring (2C) van het motorhuis linksom (tegen de klok in) en verwijder de ring het motorhuis. 6. Plaats de achterkant van de ventilatorkorf op het motorhuis, met de uitsparingen precies over de nokken van het motorhuis en het handvat aan de bovenkant (2D).
-
Page 21: Reiniging En Onderhoud
Timer mode Dit apparaat is voorzien van een tijdschakelaar waarmee u de ventilator automatisch kunt laten uitschakelen aan het einde van een ingestelde tijd. Door meermaals op de TIMER-knop te drukken verhoogt u de uitschakeltijd steeds met een half uur. Voorbeeld Wilt u de ventilator over 3,5 uur automatisch laten uitschakelen, druk dan meermaals op de ‘TIMER’-knop totdat de lampjes 0,5h, 1h en 2h tegelijkertijd oplichten. - Page 22 9. Aanspraak op garantie kan alleen bij uw (web-)winkelier of rechtstreeks bij de Bestron Service Dienst. Stuur echter nooit zomaar iets op. Het pakket kan dan namelijk geweigerd worden en eventuele kosten zijn voor uw rekening.
- Page 23 CONGRATULATIONS! Congratulations with the purchase of this Bestron product. These instructions tell you how the product works and how to use it. Read the instructions carefully before you start using the appliance. Only use the appliance in the manner described in the instructions. Keep these instructions in a safe place for future reference.
- Page 24 Never immerse electrical appliances, cords or plugs in water or any other liquid. • Do not touch electrical appliances if they have fallen in the water. Immediately pull the plug out of the socket. Stop using the appliance. • Make sure that electrical appliances, cords and plugs do not come into contact with heat sources, such as a hot hob or open fire.
-
Page 25: Ce Declaration Of Conformity
ENVIRONMENT • Dispose of packaging material such as plastic and cardboard boxes in the designated containers. • Do not dispose of this product as normal domestic waste at the end of its life, but hand it in at a collection point for the reuse of electric and electronic equipment. - Page 26 OPERATION - General The appliance is intended only for domestic use, not for professional use. 1. Fan blades 2. Fan housing 3. Motor housing 4. Swivel button 5. Control unit 6. Telescopic stand 7. Height lock 8. Stand lock 9. Remote control 10.
- Page 27 4. Fit the height lock to the upright. 5. Unscrew the locking ring (2C) from the motor-housing (by turning it counterclockwise) and remove the ring from the motor housing. 6. Fit the rear of the fan housing (2D) onto the motor-housing, making sure that the openings are aligned precisely with the lugs on the motor housing and that the grip is at the top.
-
Page 28: Cleaning And Maintenance
Timer mode The appliance can be turned off manually by pressing the OFF button. However this appliance is fitted with a timer with allows you to shut off the appliance at the end of a pre determed time. By pressing the TIMER button repeatedly you increase the time in increments of 0.5 hours. -
Page 29: Warranty Conditions
8. The warranty does not entitle the purchaser to compensation for any damage other than replacement or repair of the faulty parts. Bestron cannot in any event be held liable for any indirect or consequential losses caused by or in relation to the equipment it has provided. - Page 30 COMPLIMENTI! Congratulazioni per l’acquisto di questo prodotto Bestron. Nelle presenti istruzioni per l’uso viene spiegato il funzionamento e l’impiego dell’apparecchio. Pertanto, prima di utilizzarlo, leggerle attentamente. Utilizzare l’apparecchio esclusivamente come di seguito descritto. Conservare queste istruzioni in luogo sicuro. In caso di guasto: Nel caso indesiderato in cui l’unità...
- Page 31 • Mai immergere apparecchi elettrici, cavi o spine in acqua o in altri liquidi. • Se gli apparecchi elettrici dovessero cadere in acqua, mai tentare di raccoglierli. Scollegare immediatamente la spina dalla presa elettrica e non riutilizzare l’apparecchio. • Assicurarsi che gli apparecchi elettrici, i cavi e le spine non entrino in contatto con fonti di calore, come piastre calde o fiamme libere.
-
Page 32: Dichiarazione Di Conformità Ce
DISPOSIZIONI AMBIENTALI • Smaltire i materiali di imballaggio, come plastica e scatole di cartone, negli appositi contenitori. • Al termine della sua vita utile, non smaltire il prodotto come un normale rifiuto domestico, ma conferire presso un punto di raccolta per il riciclaggio di apparecchiature elettriche ed elettroniche. - Page 33 FUNZIONAMENTO - Avvertenze generali Questo apparecchio è concepito esclusivamente per l’impiego domestico e non per l’uso professionale. 1. Pale del ventilatore 2. Griglia di protezione 3. Vano motore 4. Dispositivo per il blocco direzionale 5. Blocco comandi 6. Piantana estraibile 7.
- Page 34 2. Svitare e rimuovere dalla piantana il dispositivo di blocco della regolazione dell’altezza. 3. Inserire il cappuccio di protezione sulla piantana e posizionarlo correttamente sulle zampe. 4. Ricollocare e serrare sulla piantana il dispositivo di blocco della regolazione dell’altezza. 5. Ruotare verso sinistra (in senso antiorario) l’anello di fissaggio presente sull del vano motore e rimuovere l’anello dall del vano motore (2C).
-
Page 35: Pulizia E Manutenzione
1. Premere il tasto “ON / SPEED”. Al primo avvio il ventilatore funziona a bassa velocità. 2. Premere lo stesso tasto per scegliere tra bassa, media ed alta velocità (low, mid, high). 3. Premere il tasto “OFF”. Il ventilatore si ferma. Timer mode L’apparecchio può... - Page 36 DISPOSIZIONI DI GARANZIA In base alle seguenti condizioni, Bestron garantisce questo apparecchio per la durata di 60 mesi dalla data di acquisto contro i guasti causati da difetti di fabbricazione e/o del materiale. 1. Durante il periodo di garanzia non verranno addebitati costi di manodopera e per i materiali necessari.
- Page 37 ¡FELICIDADES! Felicidades por la compra de este producto Bestron. En estas instrucciones le explicamos su funcionamiento y cómo usarlo. Antes de usar el aparato, lea bien el manual de instrucciones. Utilice el aparato únicamente tal y como se describe en el manual de instrucciones.
- Page 38 • Nunca sumerja los aparatos eléctricos, cables o enchufes en agua ni en ningún otro líquido. • No toque los aparatos eléctricos si se han caído al agua. Desenchúfelo inmediatamente de la toma de corriente. No vuelva a usar el aparato. •...
-
Page 39: Medio Ambiente
MEDIO AMBIENTE • Tire el material de embalaje, como plástico y cajas, en el contenedor apropiado. • Al final de su vida útil, no se desprenda de este producto como un residuo normal. Llévelo a un punto blanco de su ciudad para el reciclaje de aparatos eléctricos y electrónicos. - Page 40 FUNCIONAMIENTO - General Este aparato está concebido únicamente para uso doméstico, no para uso profesional. 1. Aspas 2. Rejilla 3. Alojamiento del motor 4. Bloqueo de la función de rotación 5. Caja de mando 6. Pedestal extensible 7. Anillo para fijar la altura 8.
- Page 41 4. Vuelva a colocar el anillo de fijación de la altura del pedestal. 5. Gire el anillo de fijación del alojamiento del motor hacia la izquierda (en dirección opuesta a las agujas del reloj) y retírelo (2C). 6. Coloque la parte posterior de la rejilla en el orificios exactamente sobre los topes del alojamiento del motor y la empuñadura hacia arriba (2D).
-
Page 42: Limpieza Y Mantenimiento
2. Pulse el mismo botón para elegir entre bajo, medio y de alta velocidad (low, mid, high). 3. Pulse el botón “OFF”. El ventilador se detiene.. Timer mode Aaparato se puede desactivar manualmente pulsando el botón de apagado. Sin embargo, este aparato está dotado de un temporizador con le permite apagar el aparato al final de una época pre determed. - Page 43 DISPOSIZIONI DI GARANZIA In base alle seguenti condizioni, Bestron garantisce questo apparecchio per la durata di 60 mesi dalla data di acquisto contro i guasti causati da difetti di fabbricazione e/o del materiale. 1. Durante il periodo di garanzia non verranno addebitati costi di manodopera e per i materiali necessari.
- Page 44 v200922-02 NEED HELP? CHAT WITH US! WHATSAPP CUSTOMER SERVICE B E S T R O N . C O M / W H A T S A P P...
Need help?
Do you have a question about the SUMMER BREEZE ASV45ZR and is the answer not in the manual?
Questions and answers