Table of Contents
Advertisement
Advertisement
Table of Contents

Related Manuals for Doro 780X


Summary of Contents for Doro 780X
- Page 1 Doro 780X English...
- Page 3 You can obtain addition- al accessories from your local Doro dealer. The supplied accessories pro- vide the best performance with your phone.
-
Page 4: Table Of Contents
Make a call ................... 12 Receive a call..................12 Loudspeaker mode................13 Call information..................14 Call options................... 14 Assistance button..................14 Response by Doro ..................15 For the Responder ................16 For the senior ................. 17 Response Premium by Doro .............. - Page 5 English Advanced settings ................... 22 Phonebook settings................22 Settings....................24 Additional functions ..................47 Display status symbols ................. 47 Display main symbols................47 Safety instructions..................48 Network services and costs ..............48 Operating environment ............... 48 Medical units..................48 Areas with explosion risk ..............49 Li-Ion battery ..................
-
Page 6: Congratulations On Your Purchase
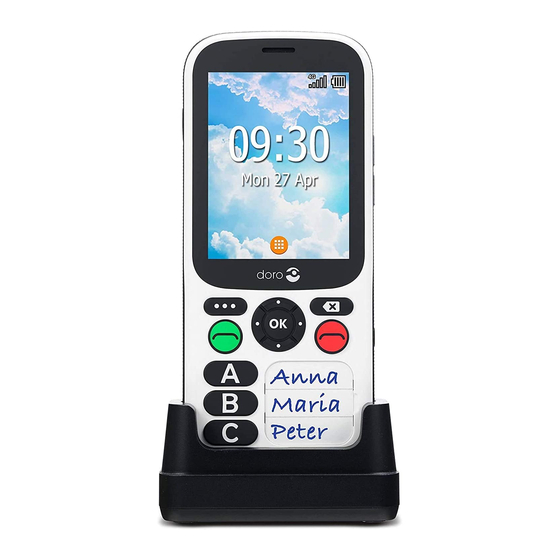
English Congratulations on your purchase The water-resistant, easy-to-use Doro 780X makes staying safe a whole lot simpler with three speed dial keys for easily calling one's most relied on contacts. Excellent safety features include an assistance button and safety timer function that can automatically send an alarm with GPS location to preset contacts via the service Response by Doro ™... -
Page 7: Insert Sim Card, Memory Card And Battery
English Insert SIM card, memory card and battery The SIM and memory card holder’s are located inside the battery compartment. Tip: Take care not to scratch the metallic contacts on the cards when inserting them into the card holders. Remove the battery cover IMPORTANT! Turn off the phone and disconnect the charger before removing the... - Page 8 English Insert the SIM and memory cards Insert the micro-SIM (3FF) card by gen- tly sliding it into the SIM card slot. Make sure that the SIM card’s contacts are facing inwards and that the cut off cor- ner is as shown. You can insert a second SIM card so you can have two phone numbers or service providers on a single device.
-
Page 9: Charge The Phone
English Insert the battery Insert the battery by sliding it into the battery compartment. Replace the back cover. Charge the phone While it’s possible that your phone will already come with enough power to be turned on right out of the box, we recommend charging the device fully before using it. -
Page 10: Save Energy
English A. Connect the small head of the USB charging cable to the charging socket y on the phone. B. You can also charge the phone using the cradle. Connect the small head of the USB charging cable to the cradle. Place the phone in the cradle. C. -
Page 11: Turn The Phone On And Off
For easier handling, the SIM card PIN lock may be deactivated, see SIM card lock, p.43. If the SIM card is lost or stolen it is unprotected for fraudulent use. Doro is not responsible for any incurred costs due to lost or stolen SIM card that is unprotected. -
Page 12: Get To Know Your Phone
English Re-enter the new PIN code and confirm with Note! If PIN and PUK codes were not provided with your SIM card, please contact your service provider. If you enter the wrong PUK code more than 10 times the SIM card gets permanently locked. Get to know your phone Assistive functions Use the symbols below to guide you through supporting sections in the... -
Page 13: Phone Indicators
English Phone indicators Lights on the phone: Green light when you have a new notification for a message, missed • call, etc. Red light when the battery is running low and during charging. • Notification panel and status bar At the top of the main screen to the left you can see if there are any notifi- cations. -
Page 14: Basic Phone Operations
English Basic phone operations Power on and off Long press to power on or off. • Call • Dial a number or answer incoming call. Enter the call log. • End call/back End calls or return to the start screen. •... -
Page 15: Enter Characters
English Standby (idle mode) When the phone is ready to use, and you have not keyed in any characters, the phone is in standby. Press to return to standby mode. • Press the options button to access the notices, if there’s any. •... -
Page 16: Hearing Aid Compatible
English Press to access the character input mode. • Use the Four-way navigation key to select the wanted character and • press to select it. Press Mode to change input mode. Select between capital letters, • small letters, numbers and special characters. The space character ( ) is found firstly among the special characters. -
Page 17: Calls
English Calls Make a call Note! The speed dial keys A , B and C must have numbers configured before it’s possible to dial. See Phonebook settings, p.22. Tip: For international calls, always use + before the country code for best operation. -
Page 18: Loudspeaker Mode
English Tip: Press and hold the volume keys + or – to temporarily switch off the ringtone. Note! You can also let the phone automatically answer calls within a set time from specific numbers. See Auto answer, p.38. Loudspeaker mode The loudspeaker allows you to speak without holding the phone closely to the ear. -
Page 19: Call Information
English Call information During a call, the outgoing or incoming phone number and the elapsed call time is displayed. If the identity of the caller is withheld or unknown, Pri- vate number or Unknown are displayed. Call options Options During a call the options button ( ) give access to additional functions. -
Page 20: Response By Doro
You need an Internet connection to use this service. Contact your service provider for detailed data subscription costs before activating. Before the assistance button can be used, the user of the Doro 780X (called Senior) need at least one relative/helper (called Responder) that has created an account and connected with you. -
Page 21: For The Responder
Admin for the Group of Responders. Start the app and grant the required privileges. Note! If needed, you should also grant Response by Doro access when your phone is set to “Do Not Disturb”. Press back to return. -
Page 22: For The Senior
The Senior will receive an invitation text message/SMS for the service Response by Doro and how to set it up and accept your invi- tation. Always inform the Senior user that you will start the service as it will require actions from the Senior user also. -
Page 23: Response Premium By Doro
English Senior and Responder are now connected and the Senior can make an alarm with the assistance button on the back of the Doro phone to test the service. The Responder can now also use the app Response to check the status of the Doro phone and quickly assist with some basic phone settings, like sound and display settings. -
Page 24: Sos Calls
Safety timer The safety timer is used to the alert your predefined Responders (family and friends) via Response by Doro or a possible Alarm receiving centre if the timer isn't deactivated within a set time. For example, before taking a shower activate the safety timer and if not deactivated within a set time, your predefined help Responders are notified. -
Page 25: Messaging (Sms)
English Activate the safety timer Press Menu Safety Timer. Select Set the timer and press to enter time, maximum 120 minutes. Press Start to activate the timer. Deactivate the safety timer Press Cancel to stop and deactivate the timer before the set time have expired. -
Page 26: Call Log
English Messaging options Settings Text message (SMS) SMS Service centre Text messages requires a message center number, this is normally auto- matically set on your phone. The number can be obtained from the mobile carrier. Press Menu Messaging Settings Text select SIM card (if ap- message (SMS) SMS Service centre... -
Page 27: My Number
English Press Clear call history to delete all entries in the call log. My number The phone number assigned to your SIM card is saved as My number. The number might already be saved on your SIM card from the beginning, if not you may add it. - Page 28 English Press Edit to add or edit information in each entry. Name: enter your name. • Birth date: enter your date of birth. • • Height: enter your height. • Weight: enter your weight. • Address: enter your home address. Language: enter your preferred language.
-
Page 29: Settings
English Press and hold Phonebook Emergency call. Press for the options: Edit to edit the number. When done, press OK. • • Delete to delete the selected number. Press OK to confirm. Settings Network & Internet Aeroplane mode In Aeroplane mode you can’t make or receive calls, initiate assistance alarms or do anything that requires an Internet connection, this is to pre- vent disturbance to sensitive equipment. - Page 30 English Set the switch to to activate it. Set the switch to deactivate. Connect to available networks Press and hold Settings Network & Internet If Wi-Fi is activated a list of available Wi-Fi networks will be displayed after a moment. Note! If nothing is displayed although you know that there should be available networks, set the switch to off and then...
- Page 31 English • WPS Pin Entry: Enter the given PIN code on the router/access point. The setup can take up to two minutes to complete. Saved networks View your saved networks. Select it and press . Press Forget if it’s an un- wanted network, to disconnect from it and stop connecting to it automatically.
- Page 32 English IMPORTANT! If you set your phone to use 2G or 3G, you will not be able to make any calls, including emergency calls, or use other features requiring a network connection, if the selected network type is unavailable. Enhanced 4G LTE Mode Set if voice calling over LTE network should be enabled or disabled.
- Page 33 English To change and existing APN profile, select a profile and press If your service provider’s profile is not in the list, press APN to enter settings for your service provider: Name to enter a name for the APN. • APN to enter the APN address.
- Page 34 English Network operators Your phone automatically selects the network operator that you have a subscription with. When roaming or if you otherwise have no signal you can try to manually select a network. Press and hold Settings Network & Internet bile network Network operators.
- Page 35 English Enable/disable mobile data for services. Select off to avoid data charges. Press and hold Settings Network & Internet select SIM card (if applicable) ta usage Mobile data. Set the switch to on to activate it or off to deactivate. Mobile data usage The Mobile data usage counter gathers traffic information from all apps using mobile data.
- Page 36 English Hotspot & tethering IMPORTANT! Using mobile data services can be costly. We recommend that you check your data rates with your service provider. Allow other devices to share your phone’s Internet connection by connect- ing via USB, Bluetooth or Wi-Fi. Internet sharing only works if you phone is connected to the Internet over the mobile data network and it will disable any existing Wi-Fi connection on the phone while active.
- Page 37 English IMPORTANT! Always have the security turned on when your Wi-Fi hotspot is active to prevent unauthorized use of your internet connection. Turn off the Wi-Fi hotspot feature when you no longer need to share Internet access for other devices. When the feature is activated it will drain your phone's battery significantly.
- Page 38 English Dual SIM settings If you have more than one SIM card installed, you will be asked what SIM card to use. Here you can set the preferred SIM card for different types of mobile traffic. Press and hold Settings Network &...
- Page 39 Press and hold Settings Connected devices Bluetooth Device name. Doro DFB-0330 is displayed. Edit the new name. Press Rename to save and your new name should appear for other Bluetooth devices. Received files You can both send and receive files via Bluetooth. Here you can see the files received via Bluetooth.
- Page 40 English Press and hold Settings Connected devices Bluetooth Pair new device. Make sure that the device you want to connect with is visible and in pairing mode. Wait for the search to display the wanted device to select it and press to connect.
- Page 41 English Display Brightness level You can adjust the brightness of the display. Press and hold Settings Display Brightness level. Set the brightness to comfortable level and press when done. Note! The brighter the display is, the more batter power it will consume. Sleep Select the delay time for the display backlight.
- Page 42 English Press when done. Audio setup If you use a hearing aid or have hearing difficulties when using the device in a noisy environment, you can adjust the audio settings. Press and hold Settings Sound Audio setup: Normal for normal hearing in normal conditions. •...
- Page 43 English • SIM2 Phone ringtone to set the ringtone for incoming calls on SIM2. • Default notification sound to set the tone for new notifications. Press to confirm. Calls (call settings) Note! You might need to select the SIM card you want to handle for each setting.
- Page 44 English Press and hold select SIM card Settings Calls Fixed dialling numbers: enter PIN2 to enable the feature. • Enable FDN Change PIN2 to change the PIN2 code. • to add and enter the first allowed number. • FDN list You can add more numbers or edit or delete existing.
- Page 45 English Press and hold select SIM card Settings Calls Call barring. Mark the type of calls that you want to restrict: • All outgoing calls to answer incoming calls but not calling. • International outgoing calls to block calls to international numbers.
- Page 46 English Activate call waiting Press and hold select SIM card Settings Calls Additional settings. Set Call waiting switch to to enable call waiting. Tip: Set switch to to disable call waiting. Call blocking You can compile a blacklist of phone numbers so that any phone number on your blacklist is blocked when calling or texting you.
- Page 47 English Security & location Passwords Change phone code Press and hold Settings Security & location Passwords Phone code. Enter current code and press OK. Enter new code and press OK. Confirm new code and press OK. Note! The default phone code is 1234 and is used for e.g. resetting the phone.
- Page 48 English Press and hold Settings Network & Internet Location. Enable the switch to enable location positioning. Select mode: High accuracy: for best location accuracy. This uses every service • available: GPS, Wi-Fi, Bluetooth, and/or mobile networks in what- ever combination available. This is quite battery consuming. •...
- Page 49 Settings SIM Toolkit (if applicable) for the provided services. Response See Response by Doro, p.15. Messages settings Auto reply Set to automatically send an auto reply for all received text messages. Note! To avoid additional costs, make sure to disable the auto reply function.
- Page 50 English Select a language. Predictive text Press and hold Settings System Languages & input Predictive text. Set Predictive text on/off with Date & time Tip: The phone is set to automatically update time and date according to current time zone. To turn off, select Date & time Automatic date &...
- Page 51 English Press and hold Settings System Software update. Press Check for updates to manually check if there’s a software up- date available. Press Settings for software update settings: Automatically check for update to set how often the phone au- • tomatically should check for new updates.
-
Page 52: Additional Functions
English Press and hold Settings System Reset options Scheduled power on & off. Press On or Off for the following options. Time to set the time when the phone should be turned On or Off. • • Check Repeat to select what days the setting should be valid for. Press Done to confirm. -
Page 53: Safety Instructions
English Safety instructions CAUTION The unit and the accessories can contain small parts. Keep all of the equipment out of the reach of small children. The mains adapter is the disconnect device between the product and mains power. The mains socket outlet must be close to the equipment and easily accessible. Network services and costs Your device is approved for use on the 4G LTE FDD 1 (2100), 3 (1800), 7 (2600), 8 (900 MHz), 20 (800) MHz , WCDMA 1 (2100), 8 (900), 2 (1900) MHz, GSM 900/1800/1900 MHz... -
Page 54: Areas With Explosion Risk
English Areas with explosion risk Always turn off the unit when you are in an area where there is a risk of explosion. Follow all signs and instructions. There is a risk of explosion in places that include areas where you are normally requested to turn off your car engine. -
Page 55: Gps/Location Based Functions
English GPS/Location based functions Some products provide GPS/Location based functions. Location determining functionality is provided “As is”. No representation or warranty are made as to the accuracy of such lo- cation information. Use of location-based information by the device may not be uninter- rupted or error free and may additionally be dependent on network service availability. -
Page 56: Malware And Viruses
English Malware and viruses To protect your device from malware and viruses, follow these usage tips. Failure to do so may result in damages or loss of data that may not be covered by the warranty service. • Do not download unknown applications. •... -
Page 57: Warranty
Please note that this is a voluntary manufacturer’s warranty and provides rights in addi- tion to, and does not affect statutory rights of end-users. This guarantee does not apply if batteries other than DORO original batteries are used. Specifications Network bands (MHz) -
Page 58: Copyright And Other Notices
Doro reserves the right to revise this document or withdraw it at any time without prior notice. -
Page 59: Hearing Aid Compatibility
Malmö, Sweden. To be valid, such a request must be made within three (3) years from the date of the distribution of this product by Doro AB, or in the case of code licensed under the GPL v3 for as long as Doro AB offers spare parts or customer support for this product model. -
Page 60: Specific Absorption Rate (Sar)
English hearing aid’s built-in microphone. For the best results, try using the phone in differ- ent positions relative to your hearing aid—for example, placing the receiver slightly above the ear may result in better performance for hearing aids with microphones positioned behind the ear. -
Page 61: Declaration Of Conformity
Declaration of Conformity Hereby, Doro declares that the radio equipment type DFB-0330 (Doro 780X) is in compli- ance with Directives: 2014/53/EU and 2011/65/EU including delegated Directive (EU) 2015/863 amending Annex II. - Page 62 DFB-0330 (Doro 780X) (1011, 1021, 1031, 1041) English Version 1.0 ©2020 Doro AB. All rights reserved. www.doro.com REV 19510 — STR 20200910...
Need help?
Do you have a question about the 780X and is the answer not in the manual?
Questions and answers