Table of Contents
Advertisement
Quick Links
Advertisement
Table of Contents

Related Manuals for MotoCrane ULTRA Heavylift


Summary of Contents for MotoCrane ULTRA Heavylift
- Page 1 Heavylift Operation Manual v1.0 January, 2020 ...
-
Page 2: Safety Signal Words
To minimize risk of serious injury, death or damage, before using MotoCrane Heavylift, all drivers and operators must read this Operation Manual and all on-product labels. All practices and procedures stated herein are required for the proper and safe operation of ... -
Page 3: Table Of Contents
Contents Safety Signal Words 2 Contents 3 Before the First Drive 4 IMPORTANT PRODUCT AND SAFETY INSTRUCTIONS 5 Safety 5 IMPORTANT: Restricted Use Statement 5 Disclaimer and Limitations of Liability 5 Limited Warranty 6 Intellectual Property 6 Intended Use of Heavylift 7 ... -
Page 4: Before The First Drive
Do the following before using the Heavylift for the first time. 1. Read this Operation Manual 2. Read the Warranty in the Terms of Sale 3. Watch any available video tutorials at ww.motocrane.com/support 4. Recommended: Attend MotoCrane Training for in-person demonstration ... -
Page 5: Important Product And Safety Instructions
INSTRUCTIONS Safety The MotoCrane Heavylift is not a toy and can cause serious injury, death or damage if not used properly. You must exercise caution during use of the Heavylift to ensure a safe filming environment for everyone. This Operation Manual describes safe operation ... -
Page 6: Limited Warranty
3. MotoCrane, LLC has no control over the use, setup, assembly, modification or misuse of the Heavylift, and therefore no liability shall be assumed or accepted by MotoCrane, LLC for any resulting damage, death, or injury incurred directly or ... -
Page 7: Intended Use Of Heavylift
Intended Use of Heavylift Heavylift increases ULTRA’s maximum payload by 10 lbs; from 55lbs to 65lbs. It strengthens areas of high stress with mechanical braces and reinforcements. The use of Heavylift does not alter any other specs of ULTRA aside from maximum payload and All Up Weight (AUW). -
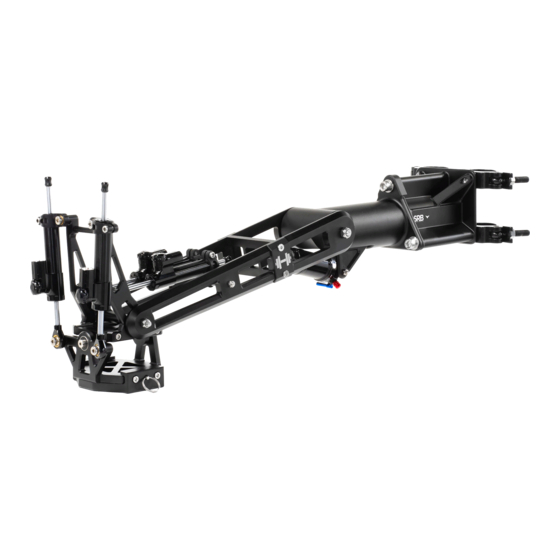
Page 8: Parts Of The Heavylift
Parts of the Heavylift ● 1 pc Heavylift Airshock Nose Mount ● 1 pc Heavylift Airshock Body Mount ● 2 pc Heavylift Isolator Badge ● 1 pc Heavylift Vertical Fulcrum Brace ● 2 pcs Heavylift Upper Vertical Brace Mount ●... -
Page 9: Installing Heavylift Isolator Components
Installing Heavylift Isolator Components Below is the proper setup sequence of the Heavylift Isolator. 1. Loosen and remove existing M6 fasteners to replace existing Steel Axle with M6 Lock Nut torqued to 8.7Nm. 2. Remove existing Aluminum Roll Damper Axle, and install Steel Axle with M6 Lock Nut torqued to 2.5 Nm. - Page 10 3. Remove 4 X M6 fasteners from Air Shock Nose Mount, and 1 X M6 Lock Nut from Air Shock Body Mount. 4. Carefully remove the Air Shock Assembly, and separate the air shock from the Nose Mount by removing the M6 Lock nut and removing the M6 Shoulder Bolt. ...
- Page 11 5. Remove 2 X M6 fasteners securing the existing Air Shock Body Mount. 6. Install the new Heavylift Air Shock Body Mount using the provided 4 X M6 fasteners. ...
- Page 12 7. Attach the air shock to the new Heavylift Air Shock Nose Mount using the M6 Shoulder Bolt and M6 Lock Nut. Torque M6 Lock Nut to 8.7 N-m. 8. Slide the Heavylift Air Shock Nose Mount into the Isolator, and secure using the provided M6 fasteners and Heavylift badges.
-
Page 13: Installing Heavylift Boom Components
Installing Heavylift Boom Components 1. Install the Heavylift Upper and Lower Vertical Brace mounts to the Middle boom, with 217mm of distance between the mount and Clip Receiver. 2. Install the Heavylift Lateral Brace mounts to the Middle boom, with 198mm of distance between the mount and Clip Receiver. ... - Page 14 3. Install the Heavylift Upper and Lower Vertical Brace mounts to the Rear boom, with 217 mm of distance between the mount and Clip Receiver. 4. Install the Heavylift Lateral Brace mounts to the Rear boom, with 198 mm of distance between the mount and Clip Receiver. ...
-
Page 15: Using The Heavylift Turret Shims
Using the Heavylift Turret Shims The 3 Heavylift Turret shims are designed to create a more secure and exact fit between the ULTRA Base and Turret. Follow these instructions for installation. 1. Place the Turret onto the Base Pedestal as normal and fasten 2x M12 Fasteners on ... -
Page 16: Installing Heavylift Braces
Installing Heavylift Braces 1. Assemble the Middle and Rear Booms to the Turret as usual, and attached the Heavylift Vertical Fulcrum Brace to the Mounts using the supplied M12 Fasteners and split-lock washers. Failure to secure the booms first can lead to a weak mounting point and could cause a mechanical failure in ULTRA. - Page 17 2. Attached the Heavylift Lateral Braces to the Mounts using the supplied M12 Fasteners and split-lock washers. Make sure split lock washers are used. You may loosen the mounts to make slight adjustments, making sure the braces are centered, and are not crooked. ...
-
Page 18: Heavylift Weight Chart
Heavylift Weight Chart Measure the All-Up Weight (AUW) of the payload then use the chart below to determine how much counterweight (CW) should first be installed before mounting the payload, and if any is needed after. “ P ayload” includes everything hanging from ULTRA including AVM’s like Tranquilizer, stabilized head, camera and accessories. -
Page 19: Known Hazards
Known Hazards The following list represents a list of known hazards that exist when operating the Heavylift. This is not exhaustive, but represents some common hazards to watch out for. ● Heavylift mounting. Make sure the Heavylift is secured and does not shift around during operation. -
Page 20: Transporting The Heavylift
Transporting the Heavylift The Heavylift Isolator is designed to fit into the existing Isolator case. Heavylift shims are stored in the air shock pump cut out and the hardware bag is packed under the PSU. ... - Page 21 The Vertical and Lateral Brace Mounts for the Middle Boom should always remain installed onto the Middle Boom, while the Vertical and Lateral Braces are designed to be removed and stowed with the Front Booms during transportation and/or while not in use. ...
-
Page 22: Maintenance
Maintenance None required - contact Customer Support if you believe the unit requires service or maintenance. Weather & Water Heavylift parts are weather resistant. After using Heavylift in wet or dusty conditions, wipe all components down with a soft dry cloth. ... -
Page 23: Revision History
This content is subject to change. Download the latest version from www.motocrane.com/support If you have any questions about this document, please contact MotoCrane, LLC by sending a message to c ontact@motocrane.com . ©2020 MotoCrane, LLC. All rights reserved. ...
Need help?
Do you have a question about the ULTRA Heavylift and is the answer not in the manual?
Questions and answers