Teletype 43 Service Manual
Teleprinter for buffered pedestal based and tabletop versions
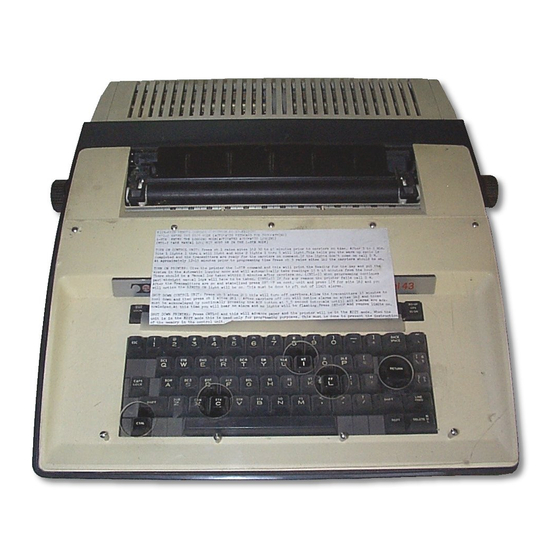
Hide thumbs
Also See for 43:
- Installation and servicing (23 pages) ,
- How to operate (24 pages) ,
- How to operate (26 pages)

Related Manuals for Teletype 43


Summary of Contents for Teletype 43
- Page 2 ©1978 and 1980 by Teletype Corporation All rights reserved Printed in U.S.A.
- Page 3 On the following page is a list of Teletype Corporation Product Service locations which provide maintenance service and repair on all Teletype Corporation products. For more information call toll free (US 800-323-4226) (IL 800-942-4192) 7:00A.M.- 4:00 P.M. CST. In addition, Teletype Corporation provides Customer Technical Training at its headquarters at 5555 W.
- Page 4 ALABAMA BIRMINGHAM 230 OXMOOR CIRCLE, SUITE 1113, HOMEWOOD, AL 35209 942·2574 (205) ARIZONA PHOENIX 2113 S. 48TH ST., SUITE 104, TEMPE, AZ 85282 18021 894-9891 TUCSON 2015 N. FORBES BLVD., SUITE 106, TUCSON, AZ 85705 16021 623-6419 CALIFORNIA LOS ANGELES 5445 SHEILA.
- Page 5 THE 43 TELEPRINTER BUFFERED KSR SERVICE MANUAL Comments concerning content, usability, and adequacy of this manual will be welcomed. This sheet may be removed and mailed directly to Teletype Corporation. Mail To: Teletype Corporation 5555 W. Touhy Avenue Skokie, illinois 60077...
- Page 7 This manual provides service information for the pedestal based and tabletop versions of the 43 Buffered KSR Teleprinter, Friction Feed or Sprocket Feed, used with customer provided switched network or private line Data Sets (Modem). The parts included in the...
- Page 8 TASK FLOW AND PAGE REFERENCES Service Manual406 Page 1-2 Page 1-8, Manual 387*or Manual 451 t Page 1-25, Manual 387*or Manual 451 t Page 1-43 Page 1-8 Manual386 t , Page 6-1 or Manual 430 Page 1-76, Manual 387 * or Manual 451 t...
- Page 9 Skokie, illinois, U.S.A. INDEX OF MANUAL PARTS PART DESCRIPTION · 43 BUFFERED KSR TELEPRINTER 43 PRINTER 43 BUFFERED OPERATOR CONSOLE 43 BUFFERED CONTROLLER 43 BUFFERED PAPER HANDLING AND ENCLOSURES ATTENDANT MANUAL (For FDX Tenninals) 386 or 430§ § HDX Tenninal...
- Page 11 F. TESTING ........
- Page 12 4 06 , 1-2 PART 1 - 43 BUFFERED KSR TELEPRINTER A. GENERAL DESCRIPTION CONTENTS 2.02 These 43 Buffered KSR Teleprinters are available in either sprocket feed or friction feed versions containing a 4K or 1 6 K (optional to GENERAL ....
- Page 13 PLATE LOCATION 4340/AAA FUSE 4340/AAB 4340/AAE 4340/AAF Fig. 2-Pedestal Based 43 Buffered KSR Teleprinter Identification 2.06 Paper for the Sprocket Feed printer must 2.08 The 43 Buffered KSR Teleprinter operates on 115 V ac ±.10 percent at 50 or 60 Hz.
- Page 14 CARD ASSEMBLY TELEPRINTER CODE 4K BUFFER (S) 4340 BAA 411903 411902 4340 BAB 16K BUFFER (S) 4K BUFFER (F) 411903 4340 BAC 16K BUFFER (F) 4340 BAD 411902 CODE PLATE LOCATION POWER SWITCH Fig. 4- Tabletop 43 Buffered KSR Teleprinter Identification...
- Page 16 406,1-6 A. GENERAL DESCRIPTION (Cont) 4.03 The basic keyboard layout is shown in ESC l (lower case L) (CRTL Sets left margin. Fig. along with brief descriptions on the keyboard printer operation of several special keys. (CTRL Clears left margin. CTRL also clears right margin.
- Page 17 Service Manual 406 provides all necessary Buffered Teleprinter Technical 5.01 Reference provides additional descriptions information for trained craft personnel to install, of the teleprinter components, features and inter maintain, and if necessary, service the 43 Buffered ing. Teleprinter using recommended lists maintenance spares.
- Page 22 406,1-12 B. INSTALLATION AND REMOVAL (Cont) INSTALLATION PROCEDURES Assemble the paper holder or paper supply 3.14 (Pedestal Based) (Cont) assembly as shown in Fig. Position terminal the location 3.12 Sprocket Feed: Attach the paper holder specified by the customer. A minimum of to the bustle cover by hooking in the end inches of space behind the terminal required...
- Page 25 .WANUAL 406,1-15 STATION REMOVAL (Pedestal Based) (Front) 4.01 Reverse the procedures in 3. INSTALLA TION PROCEDURE to remove the tele printer from service. 4.02 Before repacking the teleprinter, move the print head to the center of the printer and insert the packing detail removed in 3.05. 4.03 Tape the cover to the housing as shown in Fig.
- Page 26 406,1-16 B. INSTALLATION AND REMOVAL (Cont) STATION REMOVAL (Pedestal Based) (Cont) 4.12 Form 16936PK Detail "B" into a 4.18 Fold the flaps of 16936PK Detail "B" tube. Tightly tape flaps on bottom of over the KP set and tightly secure with Detail with two strips of tape (Fig.
- Page 27 MANUAL 406, 1-17 Sprocket Feed only. Secure 430318 (Early Design) or 430333 (Late Design) paper holder to detail with a strip of tape---- -- -- -- Secure unpacking instructions label Secure cable with here (Use copy of 21308PK bag of Fig.
- Page 28 406,1-18 UNPACKING INSTR UCTIONS I . REMOVE BACK OF PEDESTAL. 2. REMOVE _I WO OD S 5 CORRUGATED DETAILS. 3. CHECK TO BE SURE CIRCUIT CARDS ARE SEATED IN THEIR CONNECTORS. 4. REP LACE BACK OF PEDESTAL. 4340 KSR Fig.14...
- Page 29 {rom outside subzero temperatures. if paper with folded form lengths greater than 8-1/2 inches is used. 5. 0 3 The Tabletop 43 Buffered KSR Teleprinter is furnished in a single carton. Unpack the carton referring to instructions 5. 0 4 on the container.
- Page 30 5.09 Secure by using two captive screws on plug. To assembly as shown in Fig. 16. accomodate distances up to 50 feet, the following shielded EIA cables are available from Teletype Sprocket Feed: Attach the paper holder Corporation: to the bustle cover by sliding down over 3 Ft.
- Page 31 Line mode. Receipt of Dscnt Electrical Characteristics (Option) character or depression of EIA(RS232) Interface Term Ready if in Term Line mode To 43 From 43 turns off DTR for 50 ms. con Alarm dition turns off DTR if in Term V de...
- Page 32 Clear up the unpacking area, wipe off any 5.18 ments. To enable the options, refer to the How finger prints on the set, and turn the 43 To Operate Manual 386, Page 6-1. KSR Station over to the subscriber. STATE...
- Page 33 MANUAL 406, 1-23 5.19 Provide the customer with the How To Operate Manual 386. Advise the customer to order spare ribbons and paper soon possible (quantities depending on expected usage). Advise customer the "trouble 5.20 number" location on the directory card. 5.21 Place the Manual 451, Installation and ·Routine Servicing in the shipping con...
- Page 35 The 346392 static discharge ground strap is available for use by service personnel. All ordering numbers shown in this manual 1.05 are Teletype Corporation part numbers. Fig. 2-Standard Switch Positions 1.06 For additional servicing information refer TOOLS REQUIRED to Teleprinter Troubleshooting, Page 1-29.
- Page 36 406,1-26 C. ENGINEERING OPTIONS (Cont) ACTIVATING OPTION NO. 431 3.01 Turn off ac power to the teleprinter. Depress the two locking tabs on the lower front of the cabinet and open the cover. OPTION SWITCH SPB6 Lift rear edge of opcon and pivot it forward on front mounting bushings.
- Page 37 Refer to Check the appropriate type font square."See Fig. 5. Page 1-43 for Teleprinter Testing Procedures. OPTION SWITCH PACK LOCATION DEFINITION ON CIRCUIT CARD OPTION SUFFIX...
- Page 38 406, 1-28 C. ENGINEERING OPTIONS (Cont) OPTION CHECKOUT 4.01 Latch key in the down position and perform the following procedure. PROCEDURE RESPONSE OPTION 43 1a . key. 431b. Depress 43 1c . 43 1d . 431a. 431b. Depress key. 431c.
- Page 39 If there are no Note: ordering numbers shown this more directives provided, go to the last question. manual are Teletype Corporation part numbers. 1.1 1 Circuitry used in the operator console can 1.0 3 Component troubleshooting parts are: be damaged by high static voltage dis...
- Page 40 TROUBLESHOOTING FLOW DIAGRAM Replace NG PAGEl-S Teleprinter USIN Gl-8 Isolate Trouble Using TEST NOT OK 1-43 USING "20 Questions" Install and Test PAGE 1-29 TEST OK Correct Trouble Place in Service in Phone, or Lines,...
- Page 41 MANUAL 406, 1-31 TROUBLESHOOTING GUIDE (Pedestal Based) Go to la. Go to 2. Are any indicators on opcon lit? (Power available, ac and SSI cords plugged in, KP set power on, and cover closed.) With power off, check KP Go to lc. Is there any indication of power set Fl fuse.
- Page 42 406,1-32 D. TROUBLESHOOTI NG (Cont) TROUBLESHOOTIN G GUIDE (Pede stal Based ) (Cont ) Does RED lamp on power supply Go to lf. Replace logic card. still light? ---- Does RED lamp on power supply go Replace the SSI card, Intermittent short.
- Page 44 406 , 1-34 D. TROUBLESHOOTING (Cont) Based) TROUBLESHOOTING GUIDE (Pedestal (Cont) Go to 18a. Is sent data received by remote ter- Go to 19. minal? ---- --- � Check Controller Self-Test- Check data set cable. 18a. When teleprinter is sending, does send See Page 4-2.
- Page 45 1-35 MANUAL 406, TROUBLESHOOTING GUIDE (Tabletop) Aie any indicators on opcon lit? Go to 2. Go to la. (Power available, ac cord plugged in, power switch on, and cover closed.) Is there any indication of power Go to lc. With power off, check ac (See 1-39.) in the set? (Opcon lamps flash when...
- Page 46 406, 1-36 D. TROUB LESHO OTING (Cont) TROUBLE SHOOTIN G GUIDE (Tabletop) (Cont) Does RED lamp on power supply Go to lf. Replace logic card. still light? ---- ------ Does RED lamp on power supply go Intermittent short. Check for Replace the controller card out after the controller card assembly, assembly, opcon or the...
- Page 50 406, 1-40 (Cont) E. WIRING (Pedestal Based) (Cont) TERMINAL WIRING DATA SET CABLE CONNECTS BUSHING MOLE X CONNECTOR CONNECTOR OUTER DRAIN 8 � 15 <E ( '-i--- 341977 1 <E(�----------�B � L 341729 4 � +- SSI CABLE CONTROLLER INNER DRAIN OUTER DRAIN CONNECTS BUSHING...
- Page 51 MANUAL 406, 1-41 TERMINAL WIRING (Tabletop) JJOI CONTROLLER CARD ASSfMeLY � AP[R PAPER OUT SWITCH PIOI � Jl05 _,.-.- _ ..OPTION SWITCH SPB& P107 4304$0 INTtRLOCK SWITCH OPCOirl TOP VI(W...
- Page 52 406, 1-42 E. WIRIN G (Cont) TERMINAL WIRING (Tabletop) (Cont) P201 TO POWER SUPPY "TOP" MARKED CONNECTOR "TOP" MARKED CONNECTOR P304 J 301 TO CONTROLLER TO LOGIC CARD CONTROLLER CABLE 7 :) l 1 o KE Y "TOP" MARKED ON CONNECTOR 452811 CABLE ASSEMBLY INTERLOCK SWITCH...
- Page 53 Teletype Corporation. failing. Contact Teletype Corporation Sales Department, 312-982-2000 for availability of a Teleprinter 1.04 Following routine maintenance calls at a Interface Test Set CP 10.002.001-1...
- Page 54 4 06, 1-44 F. TESTING ( Cont) TESTING PROCEDURES 3.01 For testing purposes temporarily enable the following user programmable options. See How To Operate Manual 386, Page 6-1 or How To Operate Manual 430 for information on enabling the options. The following options are an example of these user programmable options. (Battery must be fully charged.) Speed •OJOO •...
- Page 55 MANUAL 406, 1-45 OFF-LINE TESTS (Installation And Trouble Call Checkout) (Cont) TEST STEP PROCEDURE RESPONSE Place CAPS LOCK key in latched down. position. Characters are printed as in Starting with top row and moving from left to Fig. 2. right, depress unshaded keys in Fig. 1. Fi g.
- Page 56 406,1-46 F . TESTING (Cont) TEST ING PROC EDUR ES (Cont ) OFF-LINE TESTS (Installation and Trouble Call Checkout) (Cont) TEST STEP PROCEDURE RESPONSE Depress RETURN and then LINE FEED key. Print head is returned left boundary and paper feeds to next line. Hold CTRL key depressed and depress SUB prints •...
- Page 57 MANUAL 406,1-47 TEST RESPONSE Form Paper feeds five lines Depress and hold CTRL key from character Feed (Cont) Vert Tab and depress key. (Vert. Tab) Depress and hold CTRL key and No response Clear (Cont) key. (Vert. Tab Clear) Paper feeds 20 liMs -- - Depress and hold CTRL key and to next form stop.
- Page 59 MANUAL 406, 1-49 RESPONSE ·� STEP PROCEDURE Margins Print head spaces to Space the Print head to column (Cont) Release Clear Depress the key. (A) The character A prints and (Cont) the Print head spaces to __£olumn 21.:_ Bell rings, B does not Depress the key.
- Page 60 406,1-50 F. TESTING (Cont) TESTING PROCEDURES (Cont) OFF-LINE TESTS (Installation and 1rouble·Call Checkout) (Cont) TEST STEP RESPONSE PROCEDURE Buffer Depress key. BUFFER ENTER key lights. Character ENTER Insert ---- ---------- !-- � E�x Depress then keys. (A A C Prints. &...
- Page 61 406, 1-51 MANUAL PROCEDURE RESPONSE TEST STEP key lights. Print Depress r-=-lkey. (Store) Message Store head returned to left boundary and paper feeds Recall one line. -- - ------- -+- - ------ key goes out. Paper Depress key. (Recall) RETuRN RECALL feed.
- Page 62 Turn off power to controller and connect the test arran g ement shown on page 1-31 to the data set cable extending from tb,e rear of the pedestal. If the 43 Teleprinter Interface Test Box is available, connect the test box to the data set cable. See instructions furnished with test box.
- Page 63 MANUAL 406, 1-53 RESPONSE PROCEDURE STEP TEST No response. Connect Ring Indicator to Data Term Ready. (Not Momentarily, Held On) ---- ---- -- AB MESSAGE printed. Hold CTRL key depressed and (DTR momentarily turns off. Simulates auto key. (Dscnt) answer AB) No response.
- Page 65 MANUAL 406, 1-55 RESPONSE STEP PROCEDURE TEST ke y on ly on c e . Depress :;� key lights. Reprint .E: •r (Cont) Received (Reprint Receive) Message (Cont) Two lines of M's are Depress key. � printed. REC MSG WTG "SG key goes out and key lights.
- Page 67 &ll retainers, etc. Most of these parts are common to 1.02 Disassembly /reassembly information other Teletype Corporation product lines and, if enclosures and paper handling parts is needed, may already be available in field repair provided in the following paragraphs:...
- Page 68 406,1-58 G. DISASSEMBLY/REASSEMBLY (Cont) GENERAL (Cont) 1.09 operator console circuitry can be Part No. Tools damaged by static discharge. The 346392 static discharge ground strap is available for use 129534 Wrench, Open End, 3/16 Inch and service personnel. Maintenance spares 1/4 Inch provided in antistatic bags which should be sav �...
- Page 69 MANUAL 406, 1-59 SSI INTERFACE OR CONTROLLER CIRCUIT CARD ASSEMBLY To remove the SSI interface circuit card or controller card assembly: 3.02 (a) Sprocket Feed CONTROLLER CARD ASSEMBLY Remove card assembly. Grasp each end and pull straight up. 452811 used on Tabletop only. Disconnect card plug from connector located on top of card.
- Page 70 406,1-60 G. DISASSEMBLY/REASSEMBLY (Cont) Friction Feed Remove card assembly . Grasp each end and pull · straight up and away from low paper sensor cable. Disconnect card plug from connector located on top of card. 452811 cable used on Tabletop only. LOW PAPER SENSOR Remove bustle cover.
- Page 71 MANUAL 406, 1-61 430700 POWER SUPPLY 3.03. To remove power supply: For Sprocket Feed: Remove paper holder and bustle cover. Perform 3.02 a., steps 1 through 4. For Friction Feed: Remove paper holder and bustle cover, Perform 3 .02 b. , ste p s 1 through 6. Disconnect 2 card cable plugs from connectors locQ.ted...
- Page 72 406, 1-62 G. DISASSEMBLY/REASSEMBLY (Cont) 43K202/GAB OPERATOR CONSOLE To remove the operator console: 3.05 If cover is being removed, disengage the button end of one of the arms from the dovetail slot by pushing inward. Dis engage the other side and remove cover. Depress locking tabs (part of cover) to release and lift cover.
- Page 73 MANUAL 406, 1-63 143307 LOGIC CARD FUSE 3.06 To remove the logic card fuse: For Sprocket Feed: Remove paper holder and bustle cQver. Perform 3.02a., Steps 1 through 4. For Friction Feed: Remove paper holder and bustle cover. Perform 3.02b., Steps 1 through 6. Disconnect cable plugs.
- Page 75 MANUAL 406, 1-65 PRINTER Removal 3.08 To remove the printer: LEFT PAPER GUIDE Sprocket Feed Remove paper holder. LEFT PAPER STRIPPER (Perform 3.02a., Step 2.) PAPER SEPARATOR Remove cover. (Perform 3.05, Steps 1 and 2.) R<mo" 119650 retmniDg ring from paper separator shaft.
- Page 76 406, 1-66 PRINTER (Cont) Removal (Cont) LEFI' PAPER STRIPPER Friction Feed PAPER SEPARATOR Remove cover. (Perform 3.05, Steps 1 and 2.) Remove 119650retaining ring from paper separator shaft. Slide paper separator to the LEFT SIDE right until it clears the FRAME left paper stripper, and remove.
- Page 79 MANUAL 406, 1-69 Replacement Verify that print head cover is attached securely to rubber grommets. (Push down until 3.11 To replace the print head: secure.) Caution: When handling loose print heads, care must be taken to prevent print head cable connec tor pins from being bent.
- Page 80 406,1-70 Replacement (Cont) Slowly push pnnt head rearward and further mto the carriage locking channel until the rear of the ribbon guide is even with center of roller shafts. Apply continuous leftward pressure to locking handle at its pivot shaft, while slowly pulling print head forward until collar drive key on handle engages (snaps) into slot in collar.
- Page 81 MANUAL 406, 1-71 CONTROLLER CIRCUIT CARDS (Pedestal Based) To remove circuit cards from the controller: 3.12 Lift out back panel. CIRCUIT CARD card extractors. EXTRACTOR R emove circuit card. In replacing circuit card be sure card is in guide slot and push in equally on top and bottom of Note: circuit card.
- Page 84 406,1-74 G. DISASSEMBLY/REASSEMBLY (Cont) DISASSEMBLY/REASSEMBLY (Cont) 406099 BATTERY (Tabletop) Removal 3.11 To remove the battery: Remove controller card assembly. Perform 3.01. Remove 410761 mounting screws (8). MOUNTING SCREWS (8) � :E3: eut cable strap. unsolder battery terminals from non com ponent side of circuit card.
- Page 85 MANUAL 406, 1-75 411952 Card Assembly, Program Removal 3.13 To remove the card: Remove controller card assembly. Perform3.01. Remove 410761 mounting screws (8). pen controller cards as shown. carefully remove the 411952 program card. INTER CONNECTING CABLE...
- Page 86 (See Page 1 -43 .) The routine 4.04 Interior areas should be examined with maintenance date should be filled out on the the cover opened and accumulations of bottom side of the directory card holder.
- Page 87 1 Information on maintenance spare parts 1.04 All ordering part numbers shown in this is provided in this part for the 43 Buffered manual Teletype Corporation part KSR Teleprinter. numbers.
- Page 88 406,1-78 I. PARTS (Cont) 410294 410627 410251 NUMERICAL INDEX (Pedestal Based) One spare should be available in each maintenance area. Note 1: Numbers in parentheses indicate a quantity of parts that is considered one maintenance spare. Note 2: Part Number or Unit Code ** 120139 (5) Fuse l.OA(KP Power Supply)F2...
- Page 89 MANUAL 406, 1-79 PARTS (Tabletop) 43K202GAB NUMERICAL INDEX (Tabletop) One spare should be available in each maintenance area. Note 1: Numbers in parentheses indicate a quantity of parts that is considered one maintenance spare. Note 2: Part Number Page No. Description or Unit Code 11 111 2 0139(5)
- Page 91 MANUAL 406, 2-1 PART 2-43 PRINTER PAGE INDEX TROUBLESHOOTING ............
- Page 92 1.07 Trouble analysis is presented in the form to its electrical interface to the logic card. The 43 of a "2 0 Questions" routine in 2. TROU Printer must be tested as part of a 43 Buffered BLESHOOTING GUIDE.
- Page 93 MANUAL 406, 2-3 A. TROUBLESHOOTING (Cont) TROUBLESHOOTING GUIDE (Cont) Does anything print or perform? Go to lc. Go to Teleprinter Troubleshooting. Does carr i age space and return Go told. Check for mechanical bind by properly? moving carriage manually with power off.
- Page 94 406,2-4 Go to lh. lg. Are any dots missing from printed Check continuity of asso- characters? ciated print magnet. Check PRINT HEAD ARMATURE adjustment. Replace print head or cable. - - - - - - - -- lh. Are any dots noticeably out of Go to li.
- Page 95 This section provides wiring information 1.05 All part numbers shown in this manual for the Pedestal Based or Tabletop are Teletype Corporation part numbers. printer. 1.02 Related wiring information and cable con nections to the logic card are shown on PRINTER WIRING Page 1 - 3 9, Teleprinter Wiring.
- Page 96 (Sprocket Feed Only) .... 1.03 All part numbers shown in this manual LEFT AND RIGHT PAPER are Teletype Corporation part numbers. GUIDES (Angular Positioning) (Friction Feed Only) ..... 1.04 After an adjustment is complete, tighten any screws or·nuts loosened to make the LINE FEED BELT TENSION adjustment.
- Page 99 MANUAL 406,2-9 LINE FEED BELT TENSION (Sprocket Feed Only) Note: This adjustment applies to Sprocket Feed (Early Design) only, without follower pulley. Requirement When the belt and sprocket system is at the point of least slack; a force of ounces applied with a spring scale midway between the sprockets the belt should deflect between Min 0.090 inch---Max 0.120 inch The point of least slack is the point where the set screws on the platen pulley and those on the motor...
- Page 100 406. 2-10 C. ADJUSTMENTS AND SPRING TENSIONS (Cont) PRINTER ADJUSTMENTS (Cont) LINE FEED MOTOR BELT TENSION (Floating Motor Only) Requirment: When the belt and sprocket system is at the point of maximum tension as shown (pulley screws facing out), there shall be some clearance between the top of the spacer and the top of the slot. Check by squeezing belt while observing upward motor movement.
- Page 101 MANUAL 406,2-11 PRINT HEAD TO PLATEN Requirement There should be Min 0.025 inch---Max 0.035 inch gap between the ribbon guide of the print head and the platen (without paper or ribbon) and at all positions of the carriage and platen, when platen play at the right end is biased down and to the rear and the print head is locked.
- Page 102 406,2-12 ADJUSTMENTS AND SPRING TENSIONS (Cont) PRINTER ADJUSTMENTS (Cont) RIBBON CARTRIDGE MAGNETIC LATCH Requirement The magnetic pole pieces of the magnetic latch should be firmly engaged with the cartridge lower metal plate when the cartridge is installed in the right-hand cartridge mounting bracket. To Adjust Loosen the two magnetic latch mounting screws.
- Page 103 MANUAL 406, 2-13 PRESSURE ROLLER BAIL (Friction Feed Only) Requirement With the paper release lever in the forward position and the right end of the carriage next to the right rear carriage wick located immediately under the arm of the pressure roller bail (between the two pres sure rollers) there should be from Min 0.050 inch---Max 0.080 inch gap between the carriage and the bail arm when measured at the closest point.
- Page 104 406,2-14 C. ADJUSTMENTS AND SPRING TENSIONS (Cont) PRINTER ADJUSTMENTS (Cont) PAPER GUIDE PLATE CLEARANCE (Sprocket Feed Only) Note: For sprocket feed (Early Design) with metal paper guide only. Requirement With no sprocket forms in the platen mechanism and the platen oriented with the slot, or rib, on the right platen hub in the top uppermost position there should be 0.008...
- Page 105 406, 2-15 MANUAL PLATEN ENDPLAY AND PRINTED LINE POSITION The following two requirements must be met: Requirement Platen Endplay -- With the platen biased to the right, there should be Min Some ---Max inch 0.008 clearance between the left bearing and the platen hub, at the closest point, and inch 0.030...
- Page 106 406,2-16 ADJUSTMENTS AND SPRING TENSIONS (Cont) PRINTER ADJUSTMENTS (Cont) PRINT HEAD ARMATURE RIBBON GUIDE PUSH ON ARMATURE TO RELEASE ADJUSTING CAM SLOT ----&� �!s/<1 1 FLAT LOWER ARMATURE EXTENSION INNER POLE PLATE (Right Side View) (Top View-Cover Removed) Requirement With a good ribbon installed and the print head positioned and locked toward the platen, no wires shall stick through the ribbon (will not retract) and no dots shall be missing or noticeably lighter than other dots on printed copy.
- Page 108 406,2-18 ADJUSTMENTS AND SPRING TENSIONS (Cont) SPRING TENSIONS (Cont) SPRING IDENTIFICATION...
- Page 109 GENERAL Fill with Poly Oil grease (use 430837 1.01 This part provides lubrication procedures injector with grease). for the Pedestal Based or Tabletop 43 Saturate felt oilers, washers, and Printer. wicks with oil. Keep dry, no lubricant permitted. Lubricate the printer at intervals indicated 1.02...
- Page 110 406,2-20 . LUBRICATION (Cont) LUBRICATION PROCEDURES (Cont) Pressure Roller Bail Spring - Two' drops of oil Nut Keying Arm - Lubricate by packing each end (2 places- Friction Feed only). carriage engaging slot with grease. Platen Tray Shaft - Two drops of oil each end at the side plates (2 places- Friction Feed only).
- Page 111 MANUAL 406, 2-21 Platen Tray Shaft LUBRICATION POINTS (Each End) Pressure Roller Bail Spring (Each End) Finger Pivots (Each Side) Pressure Roller Bail Pivot Points Platen Bearing (Each Side) Ribbon Rollers Carriage Wicks ( Spacing Tension Arm Pivot, Roller and Spring Screw Pulley Clip Ribbon Tension Arm GA Lead Screw...
- Page 113 These parts are common to other 1.01 This part covers disassembly /reassembly Teletype Corporation product lines and if needed procedures for the Pedestal Based or Table- may already be available in field repair kits or can 43 Printer.
- Page 114 406, 2-24 Part No. TOOLS REQUIRED 108285 Pliers, Long-Nose 2.01 The following tools may be required when 110271 Wrench, Hex Key performing printer disassembly 1 124682 Wrench, Hex Key reassembly procedures. Most of these items should 125752 Wrench, 3/16 Inch Socket normally be present in standard maintenance tool 129534 Wrench, Open End, 3/16 Inch...
- Page 117 MANUAL 406, 2-27 ROLLER SHAFTS Slowly push print head rearward and further into the carriage locking channel until the rear of the • ribbon guide is even with center of roller shafts. Apply continuous leftward pressure to locking REAR OF handle at its pivot shaft, while slowly pulling RIBBON GUIDE print h�ad forward until collar drive key on...
- Page 118 406, 2-28 SPACING MOTOR BELT remove spacing motor belt: 3.03 Push top of spring tension arm rearward to remove belt tension. SIGNAL BELL Remove 184055 and 198670 screws, To remove and disassemble the 3.04 and 121242 clamp. Remove bracket signal bell assembly: and 430113 coil assembly.
- Page 119 MANUAL 406, 2-29 SIGNAL BELL (Cont) Late Design Arrangement Remove 184055 screw and 181461 gong. Remove 184055 screw. Remove bell assembly from printer.
- Page 121 MANUAL 406,2-31 Motor with cable and encoder. 430441 • � by lifting upward. �---- _; Remove three screws. 184067 PRY POINT 12 )Remove encoder disc assembly. (Insert screwdriver under housing bridge and under bottom hub of encoder. Hold encoder disc with thumb and gently pry screwdiriver outward, removing disc.
- Page 123 MANUAL 406, 2-33 LINE FEED MOTOR (Cont) 3.06 To remove the line feed motor: (Cont) With floating motor Remove the logic card (if present). See Page 1.64. Remove belt. (Left Rear View) 430404 bushing.
- Page 126 406,2-36 E. DISASSEMBLY/REASSEMBLY (Cont) PLATEN (Cont) Late Design Platen (Sprocket and Friction Feed) 163765 Remove two retaining rings (one Feed Only LEFT PAPER RIGHT PAPER Remove platen GUIDE GUIDE Lift out platen. Slide two platen bearings (Top View) (one each side) outward. TP430370 HUB IS MOLDED AS A UNIT �...
- Page 130 406,2-40 E. DISASSEMBLY /REASSEMLBY (Cont) PAPER TRAY (Cont) Sprocket Feed, Late Design Remove 119653 retaining ring from paper tray shaft. Unhook and retain two 82463 or 4 708 paper tray springs (one each side). remove.
- Page 131 MANUAL 406,2-41 Friction Feed Unhook and ratain two 4 708 paper tray springs (one each side). Pull paper tray shaft to the left and remove.
- Page 132 406,2-42 PAPER GUIDES 3.13 To remove the paper guide: Sprocket Feed, Early Design Note 1: Left and right guides removed in a similar manner. ® Remove two 101386 springs (one each side) Remove two paper strip pers (one each side). Note 2: During reassembly, the tail on the paper guide must go behind the stop on the...
- Page 133 Information on maintenance spare parts is provided in this part for the Pedestal GENERAL ..... 2-43 Based or Tabletop 43 Printer.
- Page 134 PARTS (Cont) PARTS Platen and Carri a ge Ass e mbly (Friction Feed, Late Arrangement) 4302 81 (Fric tion Feed , E ar ly Arrangem ent) 4301 43 -- - - -- • 430098 163765 430206 (Sprocket Feed, Late Arrangement)
- Page 135 MANUAL 406, 2-45 Line Feed Motor and Bell Assembly (Friction Feed Early Design Drive) (Late Design Friction and Sprocket Feed) 430309 430143 430143 430145 (Sprocket Feed Early Design Drive) 430143 430404 ..). 4 30154/ ·rJ. �...
- Page 136 406,2-46 PARTS (Cont) PARTS 430063 430214(approximately 13 characters per inch) 430319 ( 10 characters per inch) 430019 430285 ( 10 characters per inch) 430032 (approximately 13 characters per inch) (L ate De sig n) 430441 Motor w/Cable and Encoder Part of TP430440 Mod Kit (See pages 2-44 and 2-45.) (Early Design) Part of TP430439 Mod Kit.
- Page 139 MANUAL 406, 2-49 Paper Tray (Sprocket Feed, Early Design) @119654 (Spro cket Feed , Inter im Desig n) 430346 Mod Kit Paper Tray and Shaft Assembly 4300 11 4303 46 repla ces 0 430391 430179 replaces 43025 8 (Friction Feed, Early Design) �#) �Ji) �...
- Page 140 Early Design 430267 430100 � --- - - .._ rif: _ _ _ _ 430 1 430218 430 242 ---s.� � 430224 lift 43 02 5 6 43 02 55 -- - 430448 430267 replaces 430106 430107 �/...
- Page 141 MANUAL 406, 2-51 NUM ERIC AL INDE X Note: One spare should be available in each maintenance area, unless otherwise specified in parentheses. Part Description and Part Description and Part Description and Number Page Number Number Page Number Number Page Number 97 39 3 Screw 50 430101...
- Page 142 406,2-52 NOTES:...
- Page 143 MANUAL 406, 3-1 PART 3-43 BUFFERED OPERATOR CONSOLE PAGE INDEX TROUBLESHOOTING............
- Page 144 The 43 opcon 1.06 Trouble analysis is presented in the form must be tested as part of a 43 Buffered KSR of a "20 Questions" routine in 2. TROU Teleprinter. Refer to Page 1-43. Where analysis BLESHOOTING GUIDE.
- Page 145 MANUAL 406, 3-3 TROUBLESHOOTING GUIDE Does opcon pass the keyboard test Go to 2. (see Page 6-1 [WHEN TROUBLE Go to la. OCCURS])? -- ---- ---- Check continuity-of Do any indicators light during Check Continuity of indicator that doesn't keyboard test? all leads of cable.
- Page 146 406,3-4 WIRING CONTENTS 1.01 This part provides wiring information for Buffered Operator Console. GENERAL ..... 1.02 For additional wiring information, plug WIRING .
- Page 147 Teletype Corporation SPACER, HOUSING AND equipment. For a listing of the tools required to REFERENCE IDENTIFICATION .. 3-11 perform the disassembly /reassembly of the 43 Buffered Operator Console, refer to 2. TOOLS REQUIRED. GENERAL 1.05 Precautions should be taken to assure that 1.01...
- Page 148 406, 3-6 TOOLS REQUIRED Remove the wire bail from the left and right spacebar guides (snaps in and out) 2.01 The following tools are recommended for (Fig. 4). use during the disassembly and reassembly procedures: 75765 Spring Hook - Pull 1/4 Inch Nut Driver 89954 Screwdriver (6 Inch Medium)
- Page 150 406,3-8 C. DISAS SEMB LY/R EASS EMBL Y (Cont ) Remove solder from around connector Place 346257 tool over the keyswitch and pins of cable to be removed (Fig. 13). press downward. When the tool bottoms and embossed projections snap into notches on keyswitch, squeeze and pull back on the tool to lift keyswitch out (Fig.
- Page 151 �-··-----� MANUAL 406, 3-9 Reassemble keyswitches keytops Slide cable to the left until it clears the removed in steps (a) and (b). circuit card and remove. Replace circuit card cover removed in In reassembly, insert new cable connector step_(d). into circuit card holes and press into place. Route cable as shown in Fig.
- Page 152 406,3-10 DISASSEMBLY/REASSEMBLY (Cont) KEYTOP AND KEYSWITCH IDENTIFICATION (Cont) TP PART NO. KEYTOP DESCRIPTION TPPART NO. KEYTOP DESCRIPTION 340701 BLOCKING- CONTROL CAPS LOCK 340894 340975 340714 BLOCKING- DATA 340976 BACKSPACE 340977 """-/ 340778 SPACEBAR 340978 340821 340979 340822 340981 340823 340982 340824 340983 340825...
- Page 153 MANUAL 406, 3-11 COLOR SWITCH NO. TYPES PUSH ROD 340720 BASIC WHITE 340721 OVERTRAVEL GREEN © 340722 LATCHING BLACK 346359 INDICATOR ORANGE ® 341088 INDICATOR ONLY Fig. 19--Keyswitch Identification SPACER HOUSING AND REFERENCE IDENTIFICATION 340762 � 340770 ® SPACEBAR GUIDES SPACERS 346293 346301...
- Page 155 MANUAL 406, 3-13 NUMERICAL INDEX QTYPER DESCRIPTION PAGE MAINTENANCE AREA PART NUMBER 3-12 340720 Keyswitch 3-12 340721 Keyswitch 3-12 340722 Keyswitch 3-12 341088 Indicator Assembly 346359 3-12 Keyswitch· 346397 3-12 Bushing 346927 3-12 Cable...
- Page 156 406,3-14 NOTES:...
- Page 157 MANUAL 406, 4-1 PART 4- 43 BUFFERED CONTROLLER INDEX PAGE TROUBLESHOOTING ......... · . · · · · · · · · · WIRING · · · · · · · · · · · · · · ·...
- Page 160 406,4-4 TROUBLESHOOTING (Cont) 3.03 Test Procedure SELF-TEST PROCEDURES FOR CON TROLLER (Pedestal Based) With Self-Test switch depressed, apply ac power 430770 power supply and 3.01 The self-test should be performed when so observe LED pattern for Step 1 in Self directed by the response to questions in Test chart.
- Page 162 406,4 - 6 WIRING CONTENTS PAGE 1.01 This part provides wmng information Pedestal Based 43 Buffered GENERAL ..Controller with Power Supply. · · · · · · WIRING (Pedestal Based)..4 - 5 1.02 For additional wiring information, plug or cable locations, refer to Page 1-39 Tele...
- Page 164 406,5- 2 PART 5- 43 BUFFERED PAPER HANDLING AND ENCLOSURES ADJUSTMENTS CONTENTS 1.0 2 After an adjustment is completed, tighten � any screws or nuts loosened to make the GENERAL ....
- Page 166 Teletype Corporation part numbers . GENERAL Replacement of cabinet parts is specified 1.03 The parts is this part are maintenance 1.01 Page ROUTINE MAINTE 1-61, spares for the 43 Buffered Pedestal Based NANCE. DISASSEMBLY/REASSEMBLY is spec Tabletop Teleprinter Paper Handling ified on Page 1-57.
- Page 169 -<. - � - � / / / / r o.. ;;;; 430270 arly Desgin 430 296 - 1- - - - 43 02 79 � 1 � � & : 43 02 74 430294 ;_./ � �/ 430 273...
- Page 170 406,5-6 Friction Feed 43018l(Ped estal Based) Late Design 430550 430246 430550 Part of 0 430566...
- Page 172 430141 5-5,5-6 Knob w/lnsert 430148 5-5,5-6 Clamp 430149 5-5,5-6 Plate, Nut 5-5,5-6 430181 Bustle 5-5,5-6 430186 Nameplate, Teletype 5-5 ,5-6 430207 Label Instruction 430246 Assembly, Switch Bracket 5-5 ,5-6 430250 Housing w/Holder 430270 Support, Paper Roll 430271 Lever, 430272 Spindle, Paper...
- Page 175 HOW TO OPERATE Manual Part also avai able as .. Manual Issue October 1979 • 113 teleprinter BUFFERED KSR (Full Duplex Batch and Send Receive)
- Page 177 TABLE OF CONTENTS ......1 INTRODUCTION. Ribbon . Sprocket Feed Paper ..... . . 4 IDENTIFICATION.
- Page 179 Your Buffered 43 Teleprinter is operationally compa The telephone is used to establish a data call or to tible with existing Basic 43 Teleprinters, 33 and 35- answer a call manually or automatically. In some type termirials and time-sharing computers. Buffering...
- Page 180 INTRODUCTION (Cont) Included in the Buffered 43 is a 132-column pin The total amount of data that can be stored in the feed SO-column friction feed matrix printer, send and receive buffers is-'determined by the mem memory (nonvolatile volatile) keyboard ory size provided.
- Page 181 OPTIONS section of this manual. Operator training, in addition to the instructions in this manual, is recommended for operation of the 43 Buffered KSR. (See Teletype Corporation Product Service and Training). Refer...
- Page 184 POWER TURN ON (Tabletop) Power to the memory is on when power to the terminal The tabletop Buffered 43 power switches are located is on. at the right rear of the teleprinter. eVolatile Memory (Data) - Data stored in the...
- Page 185 KEYTOPARRANGEMENT The keytop arr a ngement is divided into three groups according to their purpose or function as shown here. Each group of keys is discussed in the following sections. Reference to this keytop arrangement should be made as required. The information shown below in the area between the top row of keys and the keyboard is etched in the cover for your convenience and may be used when setting tabs, or margins, or to prepare and load user programmable options.
- Page 186 This section describes the purpose and operation of on-line until INTRPT key is depressed (lamp extin most controls and indicators on the 43 Buffered KSR. guishes). Nearly all the operating controls are across the top of the keyboard -those on the keyboard are described...
- Page 187 CONTROLS AND INDICATORS (Cont) Lamp turns on when receive buffer contains Press to send from Send Buffer; press to stop messages waiting be printed. Depressing sending. Lamp on if message is waiting to be key causes printing of messages (KP goes to sent.
- Page 188 KEYBOARD The keyboard is active whenever TERM LOCAL, DC1 - DCl and other special control character TERM ON LINE OR TERM READY lamps are on. keys (keys with abbreviations at top or right side of key) when dperessed together with the ESC -Depress key momentarily, then the desired CTRL key (codes are sent on-line), print or perform escape sequence functions on-line.
- Page 189 KEYBOARD (Cont) DEL NUL - Depression of this key alone gen SHIFT - Performs normal shift function (does erates the ASCII DELETE code sometimes used not release CAPS LOCK mode). as a time-fill character. Also obliterates erroneous unwanted characters. Depression this CTRL- Depress and hold while selected key is key together with the CTRL key generates the...
- Page 191 Note : Returning messages to the "data PR T CTRLS - Causes the message from the sent" section is accomplished one message at a time current buffer location be printed with by use of the STORE key. symbols for control characters (see SPECIAL CONTROL CHARACTERS).
- Page 192 KEYBOARD-PRINTER (KP) OPERATION Left- and Right-Hand Margins To operate your KP locally off-line or on-line, the When power is turned on, the left- and right-hand margins are reset to the boundary values set in the typed, margins changed, tabs set or paper loaded user option memory (LfBdy and RtBdy).
- Page 193 c• · Horizontal Tabulation* may be changed, if not restored before entering utilize horizontal tabulation, stops must be set. Tab stops can be set at any desired loca options prep mode for any reason. tion between the left and right margins. It may necessary first clear...
- Page 194 � Data Link Escape SPECIAL CONTROL CHARACTERS Group Separator Start of Heading i· Control characters are generated from the buffered 43 Device Control 3 � keyboard to the edit buffer by use of the CTRL key, End of Transmission �...
- Page 195 Sprocket Feed Paper using different weight paper or carbonless paper, however these should tried before ordering large Paper for the 43 Sprocket Feed Teleprinter must be quantities. CrimpeG. multiple part forms 12 inch sprocket feed, with folds or horizontal per...
- Page 196 Install paper as shown after centering the print Note: Paper may be fed directly from the supply • head and removing the unused paper. It is not box or if the paper holder is used, a limited stack of necessary to disconnect an on-line call, open the forms may be placed in the holder.
- Page 198 Refer to Ribbon Install a tion under printer cover. Position print head against ribbon, with thumb on top of the print head push the Center print head print head toward the platen, Pull on cartridge to the and open cover. then move locking handle right and pass ribbon Alarm lamp lights.
- Page 199 �---- MEMORY AND DATA BUFFERS There are two types of memory in the terminal - nonvolatile and volatile. See the directory card for a record of the total memory size provided. The nonvolatile memory stores the user programmable options that provide many of the operational charac teristics of your terminal.
- Page 200 The capacity of the receive buffer depends on the Receive Buffer value entered in the user option memory (RBSze). The receive buffer accepts all received data from the To recall a message from the receive buffer for reprint line and holds it until the printer is available. After printing, the data remains in the buffer until Jle ing, the terminal must be off-line, and...
- Page 201 EDIT MODE • Type message and end with designated message You will notice in certain instances that some Note: end character (MsEnd). of the edit controls (Store, Search, Retrieve, Character Delete, Reprint Receive, Insert) do not respond • Depress · lamp lights.
- Page 202 Type a string of characters in the message being • retrieved, the last 16 of which will be used to lamp turns off. retrieve the information. • Depress then . The printer carriage • " .• •• [08UF return-line feeds and the edited message is printed. BROUN FOX JUHPED THE QUICK BROUN FOX JUHPED OVER THE LAZY ..
- Page 203 Note: The string typed is always retained until a new-string is entered. To "Walk Through" the edit Depress 'r.i�: if not on. buffer for often repeated string, simply depress • key for the same string. Depress • " " Depress lamp turns on.
- Page 204 ESTABLISHI NG COMMUNICA TION S WITH DISTANT TERMINALS Establishing connection and transferring to the Data mode is basically under the control of the directly connected communications device (modem) and its associated telephone over the switched-network or, without a telephone over private lines. In some arrangements terminals are directly connected to the distant termina l or computer.
- Page 205 SEND ON-LINE When the distant terminal answers, request Data Sending on-line from your buffered 43 is accomplished • mode. If the distant terminal called is on auto in either of two communication modes, S/R (Conver matic-answer, it will respond with a high-pitched sational) or Send (Batch).
- Page 206 � Batch-Send From Buffer Controlled Send Receipt of a Start Sending code ( StrSn), will cause mes Prepare mPssage(s) store (see Edit Mode). • Depress �if not on. sages stored in send buffer to be sent when terminal • is provided with automatic-answer (Modem Option). []To Originate a Call and Manually Send Prepare message(s) to be sent and stored.
- Page 207 RECEIVE ON-LINE Receiving on-line is possible whether the KP is avail able or not. As a message is received, the Depress • turns on and the printer, if available, copies the received message (S/R Receive). If the KP is in use Depress •...
- Page 208 Receive to Buffer Automatic-Answer (i'd • Depress to turn off lamp if on. Modem used must provided with automatic answer feature; if it does, proceed follows: • epress • Check paper supply. • When telephone rings, answer call in the usual manner.
- Page 209 SENDING AND RECEIVING ESCAPE (ESC) SEQUENCES Note: Only the following ESC characters are functional in The escape sequence will be sent on-line or the buffered They are performed when sending or entered in the edit buffer when the control char receiving the character immediately following the acter (if shown in parentheses) is operated locally.
- Page 211 be changed. The option list is arranged so that seldom Example: PREVIOUS LINE KEY DEPRESSED changed characteristics (ie, answer-back message, � parity, etc) are near the end of the list while such Speed=1200•300SpP. 000•0300 options as speed, automatic line feed and format "...
- Page 215 Can data be stored and sent (data received by The TST indicator will light and remain lit indicating remote terminal)? Test mode. Can data be received and printed? • OThird making a trouble call. TEST INDICATOR Local analysis of the keyboard can be performed easily by depressing certain keys causing certain lamps on the keyboard to light and extinguish.
- Page 216 Depress key Indicator Depress key Lamp Indicator Lamp (or keys): (or keys): Condition Condition TERM.LOCAL BUFFER ENTER CTRL & A TERM LOCAL CTRL & K BUFFER ENTER SHIFT PAD 7 TERM LOCAL FLASH ON SHIFT PAD BUFFER ENTER FLASH ON TERM LOCAL CTRI'.·&...
- Page 218 ALABAMA BIRMINGHAM 230 OXMOOR CIRCLE, SUITE 1113, HOMEWOOD, AL 35209 (205) 942-2574 ARIZONA PHOENIX 2113 S. 48TH ST., SUITE 104, TEMPE, AZ 85282 (602) 894-9891 TUCSON 2015 N. FORBES BLVD., SUITE 106. TUCSON, AZ 85705 (602) 623-6419 CALIFORNIA LOS ANGELES •...
- Page 219 NORTH CAROLINA CHARLOTTE 8920 YORK ROAD, CHARLOTTE. NC 28210 1704) 588-3297 500 E. WILLIAMS ST., APEX, NC 27502 DURHAM 1919) 362-4469 GREENSBORO 727 E. MOUNTAIN ST., KERNERSVILLE, NC 27284 1919) 996-4934 OHIO CINCINNATI 9909 C SPRINGFIELD PIKE, CINCINNATI, OH 45215 1513) 772-6906 CLEVELAND 1216) 248-0288...
- Page 221 _ _ _ TELETYPE CORPORATION HOW TO OPERATE MANUAL 386 5555 Touhy Avenue, Skokie Illinois 60077 Issue 3, October 1979 Telephone: (312) 982-2000...
Need help?
Do you have a question about the 43 and is the answer not in the manual?
Questions and answers