
Related Manuals for Ikan OTTICA


Summary of Contents for Ikan OTTICA
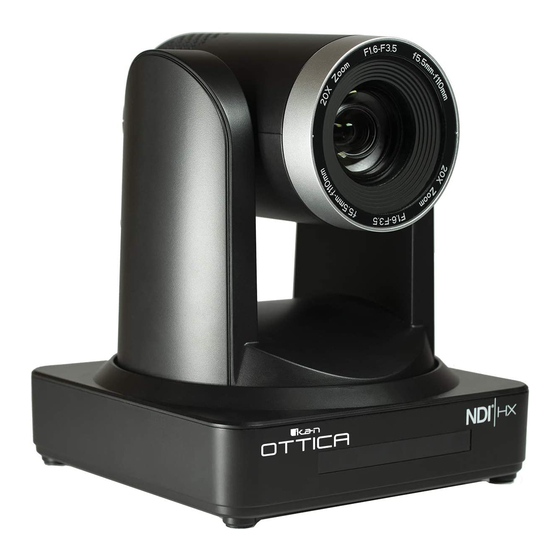
- Page 1 Manual OTTICA OTTICA 20x Zoom NDI 1080/60P PTZ Video Camera ® www.ikancorp.com sales@ikancorp.com - 1 -...
-
Page 2: Table Of Contents
Table of Contents 1. Getting Started 1.1 Camera Interface 1.2 Power-On Initial Configuration 1.3 Video Output 1.4 Bracket Mount 2. Product Overview 2.1 Product Introduction 2.1.1 Dimension 2.1.2 Accessory 2.2 Main Features 2.2.1 Camera Performance 2.2.2 Network Performance 2.3 Technical Specifications 2.4 Interface Instructions 2.4.1 External Interface 2.4.2 Bottom Dial Switch... -
Page 3: Getting Started
Table of Contents (cont.) 5. Serial Communication Control 5.1 VISCA Protocol List 5.1.1 Camera Return Command 5.1.2 Camera Control Command 5.1.3 Inquiry Command 5.2 Pelco-D Protocol Command List 5.3 Pelco-P Protocol Command List 6. Camera Maintenance and Troubleshooting 6.1 Camera Maintenance 6.2 Troubleshooting 1. -
Page 4: Power-On Initial Configuration
A. Network Cable Connection Port: No.12 in Figure1.1; B. Webpage Login: - The OTTICA is set to auto DHCP so you’ll need to connect the camera to devices that can automatically assign an IP address, such as routers and switches. -
Page 5: Bracket Mount
1.4 Bracket Mount Note: The bracket can only be mounted on a wall or ceiling on either template or concrete wall, but cannot be installed on plasterboard. Wall Mount Steps - 5 -... - Page 6 Upside-down Mount Steps - 6 -...
-
Page 7: Product Overview
2. Product Overview 2.1 Product Introduction 2.1.1 Dimensions Figure 2.2 Camera Dimensions 2.1.2 Accessories When unboxing, check that all the supplied accessories are included: 1 x Power Adapter 1 x RS232 Cable 1 x IR Remote Controller 1 x Wall Mounting Bracket 1 x RS485 Connector 1 x Cascade Cable - 7 -... -
Page 8: Main Features
2. Various Optical Zoom Lens: 5.5-110mm varifocal lens offers 20x optical zoom and viewing angle range from 3.3° to 54.7° 3. Auto Focus Technology: OTTICA’s auto focus algorithm makes the lens fast, accurate, and stable. 4. Low Noise and High SNR: The Low Noise CMOS effectively ensures high SNR of the camera video. -
Page 9: Technical Specifications
2.3 Technical Specifications Camera Parameters Sensor 1/2.8 inch high quality HD CMOS sensor Effective Pixels 16: 9 2.07 megapixel HDMI/SDI Video Format Video Format 1080P60/50/30/25/59.94/29.97;1080I60/50/59.94;72 0P60/50/30/25/59.94/29.97 Optical Zoom Focal range: 5.5-110mm 3.3° (tele) View Angle 54.7° (wide) F1.6 – F3.5 Digital Zoom Minimum Illumination 0.5Lux (F1.8, AGC ON) - Page 10 Input / Output Interface LAN (NDI | HX 4.0), HDMI, 3G-SDI, Audio-in, Video Interfaces RS232 (In&Out), RS485 Image Code Stream Double streams outputs simultaneously Video Compression format H.264, H.265 Control Signal Interface RS-232 Ring through RS232 output, RS-485 VISCA/Pelco-D/Pelco-P; Baud Rate: Control Protocol 115200/9600/4800/2400bps Audio input Interface...
-
Page 11: Interface Instructions
Other Parameters Store Temperature 14°F to +140°F Store Humidity 20% - 95% Working Temperature 14°F to +122°F Working Humidity 20%--80% Dimension 150mmX150mmX167.5mm Weight 3.08 LBS Working Environment Indoor Remote Operation (IP) Remote Upgrade, Reboot and Reset 2.4 Interface Instruction 2.4.1 External Interface 1. -
Page 12: Bottom Dial Switch
2.4.2 Bottom Dial Switch Figure 2.6 Bottom Dial Switch Diagram Two DIP switches are set to ON or OFF to select different modes of operation. Table 2.2 Dial Switch Setting Explanation Working Mode Updating Mode Note: Working mode can be applicable for web upgrade. 2.4.3 RS-232 Interface Computer / Keyboard &... - Page 13 3. TXD 4. GND 4. GND 5. RXD 5. RXD 6. GND 6. GND 7. IR OUT 7. OPEN 8. NC 8. OPEN Note: OTTICA has RS232 input and output interface, so you can cascade as shown above. - 13 -...
-
Page 14: Application Instructions
3. Application Instructions 3.1 Remote Control 3.1.1 Keys Instruction 1. Standby Key After a 3-second long press, the camera will step into standby mode. After pressing the standby key for 3 seconds again, the camera will self-test again and go back to the HOME position. -
Page 15: Applications
11. Camera IR Remote Control Address Setting [ * ]+ [ # ]+[ F1 ] : Camera Address No. 1 [ * ]+ [ # ]+[ F2 ] : Camera Address No. 2 [ * ]+ [ # ]+[ F3 ] : Camera Address No. 3 [ * ]+ [ # ]+[ F4 ] : Camera Address No. - Page 16 Focus Control - Focus (near):Press FOCUS + Key (Valid only in manual focus mode) - Focus (far): Press FOCUS - Key (Valid only in manual focus mode) - Pressing and holding the “+” or “–“ keys will result in the action of focus to continue. Release the key to stop the action of focus.
-
Page 17: Menu Settings
Remote Controller Address Setting [ * ]+ [ # ]+[ F1 ] : Camera Address No. 1 [ * ]+ [ # ]+[ F2 ] : Camera Address No. 2 [ * ]+ [ # ]+[ F3 ] : Camera Address No. 3 [ * ]+ [ # ]+[ F4 ] : Camera Address No. -
Page 18: Camera Settings
3.2.3 Camera Settings Move the arrow to the CAMERA option in the Main Menu and click the HOME key to enter into the CAMERA Settings Menu. CAMERA ======================== (Exposure) Move the arrow to desired setting (Exposure, (Color) Color, etc.) option in the CAMERA menu and (Image) click the HOME key to enter. - Page 19 2. COLOR COLOR ======================== - WB Mode: Auto, 3000K, 3500K, 4000K, WB Mode Auto 4500K, 5000K, 5500K, 6000K, 500K, Saturation 7000K, Manual, One Push - Red Gain: 0~255(only available in Manual AWB Sensitivity High mode) Color Style Default - Blue Gain: 0~255(only available in Manual Color Temp mode) - Saturation: 60%, 70%, 80%, 90%, 100%,...
-
Page 20: P/T/Z
4. NOISE REDUCTION NOISE REDUCTION ======================== - 2D Noise Reduction: Auto, Close, 1~7 NR-2D Auto - 3D Noise Reduction: Close, 1~8 NR-3D - Dynamic Hot Pixel: Close, 1~5 Dynamic Hot Pixel OFF ] Select ] Change Value 3.2.4 P/T/Z Move the arrow to the P/T/Z option in the Main Menu and click the HOME key to enter into the P/T/Z Settings Menu. -
Page 21: Version
3.2.6 Version Move the arrow to the VERSION option in the Main Menu and click the HOME key to enter into the VERSION Settings Menu. - MCU Version: Display MCU version VERSION information ======================== - Camera Version: Display camera version MCU Version 2.0.0.15 2015-12-18 information... -
Page 22: Network Connection
4. Network Connection Obtain Camera IP Address Based on Auto DHCP The OTTICA is set to Auto DHCP, so you’ll need to obtain camera IP address before connecting to a networtk. See 2 common solutions to obtain the camera IP address. -
Page 23: Ie Log In
Solution 2: 1. Connect the camera to devices that can automatically assign IP address, such as routers and switches. 2. Enter into the Management Interface of the router or switch and obtain the camera IP address with reference to the MAC address pasted on the bottom of the camera. 4.2 IE Log In 4.2.1 Web Client... -
Page 24: Preview
- You can login as the administrator and normal user. If logging in as an administrator, fill out the required fields with the following: Username: admin. Password: admin. - Administrator users can preview, playback, cancel, and configure in the Web Client; If logging in as a normal user, the default User name/Password is: user1 or user2. - Page 25 format (main stream default: 1080p. 720p is optional). - Stream Rate control: You can set the rate control mode. Save and reboot to activate the new mode (primary / secondary stream default is set to Variable Rate. Fixed rate is optional). - Image Quality: You can set the image quality.
- Page 26 4. Video Parameters A. Focus Settings - Focus Mode: Auto (default), Manual & OnePush (optional). - AF-Zone: All (default), Top, Center, Bottom (optional). - Focus Sensitivity: Low (default), High & Medium (optional). B. Exposure - Mode: Auto (default), Manual, SAE, AAE, Bright (optional). Shutter Priority, Aperture Priority, Brightness Priority (optional).
- Page 27 - Flip Vertical: (Default: OFF; Optional: ON). - DCI: (Default: OFF; Optional: ON). - DZoom: (Default: OFF; Optional: ON). - Low-Light Mode: (Default: OFF; Optional: ON). E. Noise Reduction - 2D Noise Reduction: (Default: 1; Optional: 2-7, AUTO, and OFF). - 3D Noise Reduction: (Default: 3;...
-
Page 28: Network Configuration
4.2.6 Network Configuration 1. Network Port - Data port: You can set the Data Port. The device will restart automatically after it’s changed (Default: 3000; Optional: 0-65535). - Web Port: You can set the Web Port. The device will restart automatically after changed (Default: 80;... -
Page 29: System Configuration
4. GB28181 - Switch: Set GB28181 function on or off. - Time Synchronization: Turn the ClockSync on or off. - Video Type: Stream Type setting (Default: Main Stream; Optional: Secondary Stream) - Registration Valid Time(s) (in seconds): 3600 Range 5-65535 - Heartbeat Time (seconds): 60 Range 1-65535 - Register ID: 34020000001320000001 - Register User name: IPC... - Page 30 - Hour Type: (Default: 24 hours; Optional: 12 hours). - NTP Enable: Click the checkbox to turn the “NTP Enable” function on or off. - Update Interval: You can set the NTP server to automatically update the time interval. Valid after setting NTP server synchronization (Default: One Day;...
-
Page 31: Logout
5. Restore Factory Setting - Click on “Restore Factory Defaults” button and choose “yes” or “no”, then the device will restart automatically and restore factory setting. 6. Reboot - Click on the “Reboot” button and choose “yes” or “no”. - The device will restart automatically. 4.2.7 Logout Click “Logout.”... -
Page 32: Serial Communication Control
3. Wireless Wi-Fi Login Page - If you do not check the above DHCP configuration (automatically obtain IP), then open the browser, enter the wireless network IP address in the address bar (Default: 192.168.1.250), press Enter to log construction. - If you checked DHCP, then you will obtain IP automatically, just login specific router or switch user interface settings to view the allocation of IP address. -
Page 33: Camera Control Command
5.1.2 Camera Control Command Command Function Command Packet Notes AddressSet Broadcast 88 30 0p FF p: Address setting IF_Clear Broadcast 88 01 00 01 FF I/F Clear CommandCancel 8x 21 FF 8x 01 04 00 02 FF CAM_Power Power ON/OFF 8x 01 04 00 03 FF Stop 8x 01 04 07 00 FF... - Page 34 Command Function Command Packet Notes Manual 8x 01 04 35 05 FF 6500k 8x 01 04 35 06 FF 3500K 8x 01 04 35 07 FF CAM-WB 4500K 8x 01 04 35 08 FF (continued) 5500K 8x 01 04 35 09 FF 6000K 8x 01 04 35 0A FF 7000K...
- Page 35 Command Function Command Packet Notes Reset 8x 01 04 0D 00 FF 8x 01 04 0D 02 FF Bright Setting CAM_Bright Down 8x 01 04 0D 03 FF 8x 01 04 4D 00 00 0p Direct pq: Bright Positon 0q FF 8x 01 04 3E 02 FF Exposure Compensation ON/OFF...
- Page 36 Command Function Command Packet Notes Reset 8x 01 04 3F 00 pq FF pq: Memory Number(=0 to 254) 8x 01 04 3F 01 pq FF CAM_Memory Corresponds to 0 to 9 on Recall 8x 01 04 3F 02 pq FF the Remote Commander 8x 01 04 61 02 FF Image Flip Horizontal ON/...
- Page 37 Command Function Command Packet Notes P: 0~E Video Format 0:1080P60 5:720P50 1:1080P50 6:1080P30 2:1080i60 7:1080P25 3:1080i50 8:720P30 Set camera 4:720P60 9:720P25 CAM_VideoSystem 8x 01 06 35 00 0p FF video system A: 1080P59.94 B: 1080i59.94 C: 720P59.94 D: 1080P29.97 E: 720P29.97 8x 01 06 01 VV WW 03 01 FF 8x 01 06 01 VV WW...
-
Page 38: Inquiry Command
Command Function Command Packet Notes 8x 01 06 07 00 0W W:1 UpRight 0:DownLeft 0Y 0Y 0Y 0Y 0Z 0Z 0Z 0Z FF YYYY: Pan Limit Posi- Pan-tiltLimitSet tion(TBD) 8x 01 06 07 01 0W Clear 07 0F 0F 0F 07 0F 0F ZZZZ: Tilt Limit 0F FF Position(TBD) - Page 39 Command Function Command Packet Notes y0 50 00 FF Full Auto y0 50 03 FF Manual CAM_AEModeInq 8x 09 04 39 FF y0 50 0A FF Shutter Priority y0 50 0B FF Iris Priority y0 50 0D FF Bright 8x 09 04 4A CAM_ShutterPosInq y0 50 00 00 0p 0q FF pq: Shutter Position...
- Page 40 Command Function Command Packet Notes p: Color Gain setting CAM_ColorSaturationInq 8x 09 04 49 FF y0 50 00 00 00 0p FF 0h (60%) to Eh (130%) CAM_IDInq 8x 09 04 22 FF y0 50 0p FF p: Gamma ID y0 50 02 FF IR_ReceiveInq 8x 09 06 08 FF...
-
Page 41: Pelco-D Protocol Command List
Command Function Command Packet Notes P: 0~E Video format 0:1080P60 1:1080P50 2:1080i60 3:1080i50 4:720P60 5:720P50 6:1080P30 VideoSystemInq 8x 09 06 23 FF y0 50 0p FF 7:1080P25 8:720P30 9:720P25 A: 1080P59.94 B: 1080i59.94 C: 720P59.94 D: 1080P29.97 E: 720P29.97 ww: Pan Max Speed Pan-tiltMaxSpeedInq 8x 09 06 11 FF y0 50 ww zz FF zz: Tilt Max Speed... -
Page 42: Pelco-P Protocol Command List
Function Byte1 Byte2 Byte3 Byte4 Byte5 Byte6 Byte7 Set Preset 0xFF Address 0x00 0x03 0x00 Preset ID Clear Preset 0xFF Address 0x00 0x05 0x00 Preset ID Call Preset 0xFF Address 0x00 0x07 0x00 Preset ID Query Pan 0xFF Address 0x00 0x51 0x00 0x00... -
Page 43: Camera Maintenance And Troubleshooting
Function Byte1 Byte2 Byte3 Byte4 Byte5 Byte6 Byte7 Byte8 Set Preset 0xA0 Address 0x00 0x03 0x00 Preset ID 0xAF Clear Preset 0xA0 Address 0x00 0x05 0x00 Preset ID 0xAF Call Preset 0xA0 Address 0x00 0x07 0x00 Preset ID 0xAF Query Pan 0xA0 Address 0x00 0x51... - Page 44 2. Image Dithering When Zooming In or Out A. Check whether the camera installation position is solid. B. Whether there is shaking machine or objects around the camera. 3. Remote Controller Not Working A. The remote control address could be set to 1 (if the has been set back to the factory defaults, the remote control addresses need to be set back to 1 also).
- Page 45 • Damage caused by abuse or misuse, dismantling, or changes to the product not made by the company. • Damage caused by natural disaster, abnormal voltage, and environmental factors, etc. ©2020 Ikan International. All rights reserved. - 45 -...
Need help?
Do you have a question about the OTTICA and is the answer not in the manual?
Questions and answers