Table of Contents
Advertisement
Available languages
Available languages
Quick Links
Digitaler Türspion Benutzerhandbuch
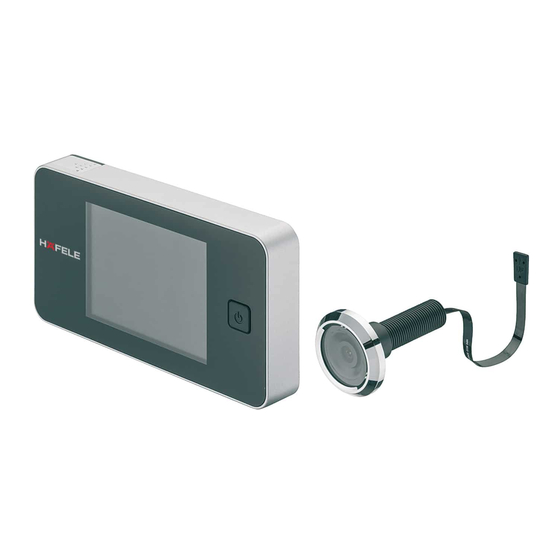
Digital Door Viewer User Manual
Manuel utilisateur - Judas de porte numérique
Manuale utente spioncino digitale per porta
Mirilla digital - Manual del usuario
deutsch ............................................................................................ 2
english ............................................................................................. 5
français ............................................................................................ 8
italiano ........................................................................................... 11
español .......................................................................................... 14
959.23.040
1/16
Advertisement
Table of Contents

Related Manuals for Häfele 959.23.040


Summary of Contents for Häfele 959.23.040
- Page 1 Digitaler Türspion Benutzerhandbuch 959.23.040 Digital Door Viewer User Manual Manuel utilisateur - Judas de porte numérique Manuale utente spioncino digitale per porta Mirilla digital - Manual del usuario deutsch .................... 2 english ..................... 5 français .................... 8 italiano ................... 11 español ..................
- Page 2 Digitaler Türspion Benutzerhandbuch Achtung: 1. Bitte lesen Sie vor der Benutzung die Bedienungsanleitung. 2. Bauen Sie die Kamera bzw. die Haupteinheit NICHT auseinander. 3. Vorsichtig behandeln. 4. Schrauben Sie an der Unterseite des digitalen Türspions die Befestigungsplatte heraus, nehmen sie heraus und halten Sie sie für den Einbau bereit.
-
Page 3: Vor Dem Einbau
Vor dem Einbau: Stellen Sie vor dem Einbau des Türspions sicher, dass die mitgelieferten Batterien eingelegt sind. Einbau: 1. Entfernen Sie den jetzigen Türspion oder bohren Sie in Augenhöhe ein Loch mit Ø 14 mm in die Tür. Bringen Sie die Kamera von der Außenseite her an, und legen Sie die Unterlegscheibe zwischen der Rückseite der Linse und der Tür ein. -
Page 4: Betrieb
Einlegen und Austausch der Batterien 1. Den Deckel zum Öffnen nach links schieben. 2. Die Batterien entsprechend den +/- Markierungen einlegen. 3. Zum Schließen den Deckel in entgegengesetzter Richtung schieben. Betrieb: 1. AN/AUS-Taste: Die AN/AUS-Taste drücken und loslassen, dann arbeitet das Gerät die nächsten 10 Sekunden weiter. -
Page 5: Package Contents
Digital Door Viewer User Manual Attention: Please read the instruction manual before use. 2. DO NOT disassemble the camera or the mainbody. 3. Handle with care. Please unscrew from the bottom of the digital door viewer, take out the holding plate and prepare to install. Battery: Dispose of used batteries appropriately, DO NOT bury or burn the batteries and keep them away from children. -
Page 6: Before Installation
Before installation: Prior to mounting the door viewer, please make sure you have inserted the batteries included. Installation: 1. Remove the existing door viewer or drill a 14 mm hole in the door at eye level. Insert the camera from the outside while inserting the washer between the back of the lens and the door. -
Page 7: Operation
Installation and replacement of the batteries 1. Slide the cover left to open. 2. Insert the batteries in accordance with the +/- sign. Proceed in the reverse order to close the cover. Operation: 1. ON/OFF button: Press and release the ON/OFF button, and the device will continue working for the next 10 seconds. - Page 8 Manuel utilisateur - Judas de porte numérique Attention : 1. Veuillez lire les instructions d'utilisation avant emploi. 2. NE démontez PAS la caméra ou l'unité principale. 3. Manipuler avec précaution. 4. Dévissez la plaque de fixation sur la partie inférieure du judas numérique, retirez-la et tenez-la à...
-
Page 9: Montage
Avant le montage : Avant le montage du judas, assurez-vous que les piles livrées ont bien en place. Montage : 1. Retirez le judas existant ou percez un trou de Ø 14 mm dans la porte à la hauteur des yeux. Mettez la caméra en place de l'extérieur. Positionnez la rondelle entre la partie arrière de la lentille et la porte. -
Page 10: Mise En Place Et Remplacement Des Piles
Mise en place et remplacement des piles 1. Pour ouvrir, faire glisser le couvercle vers la gauche. 2. Disposer les piles conformément aux marquages +/-. 3. Pour fermer, repousser le couvercle dans le sens contraire. Fonctionnement : 1. Touche MARCHE/ARRÊT : Appuyer sur la touche MARCHE/ARRÊT et relâcher la pression, l'appareil continue à... -
Page 11: Contenuto Confezione
Manuale utente spioncino digitale per porta Attenzione: 1. Prima dell'uso leggere attentamente le istruzioni d'uso. 2. NON separare la telecamera dall'unità centrale. 3. Maneggiare con cura. 4. Svitare la piastra di fissaggio posta sul lato inferiore dello spioncino digitale della porta, prelevarla e tenerla a portata di mano per il montaggio. Batterie: Smaltire le batterie usate in maniera appropriata, NON sotterrare o bruciare le batterie e tenere lontano dalla portata dei bambini. -
Page 12: Prima Del Montaggio
Prima del montaggio: Prima del montaggio dello spioncino della porta assicurarsi che siano state inserite le batterie fornite in dotazione. Montaggio: 1. Rimuovere l'attuale spioncino della porta o realizzare sulla porta ad altezza occhi un foro con un Ø di 14 mm. Applicare la telecamera sul lato esterno e inserire la rondella tra il lato posteriore della lente e la porta. -
Page 13: Funzionamento
Introduzione e sostituzione delle batterie 1. Per aprire spingere il coperchio verso sinistra. 2. Introdurre le batterie in base ai segni +/-. 3. Per chiudere spingere il coperchio in direzione opposta. Funzionamento: 1. Tasto ON/OFF: Tenere premuto e lasciare il tasto ON/OFF, l'apparecchio continuerà a lavorare per altri 10 secondi. -
Page 14: Contenido Del Paquete
Mirilla digital - Manual del usuario Atención: 1. Lea estas instrucciones antes de utilizar el dispositivo. 2. NUNCA desmonte la cámara ni la unidad principal. 3. Maneje el dispositivo con cuidado. 4. Antes de comenzar el montaje, retire el tornillo de la parte inferior de la placa de montaje y sepárela de la mirilla digital. -
Page 15: Antes Del Montaje
Antes del montaje: Antes de instalar la mirilla digital, por favor, asegúrese de haber colocado correctamente las pilas suministradas. Montaje: 1. Retire la mirilla existente o taladre la puerta a la altura de los ojos, practicando un agujero de Ø 14 mm. Introduzca la cámara desde el lado exterior colocando la arandela entre la parte trasera de la lente y la puerta. -
Page 16: Datos Técnicos
Colocación y sustitución de las pilas 1. Deslice la tapa hacia la izquierda para abrirla. 2. Coloque las pilas siguiendo las indicaciones de polaridad +/- de la tapa. 3. Para cerrar la tapa, deslícela en dirección contraria. Funcionamiento: 1. Tecla ON/OFF: Al pulsar y soltar la tecla ON/OFF, el dispositivo sigue funcionando otros 10 segundos.
Need help?
Do you have a question about the 959.23.040 and is the answer not in the manual?
Questions and answers