
Related Manuals for Western Airconditioning CASK-12C


Summary of Contents for Western Airconditioning CASK-12C
- Page 1 USER AND INSTALLATION MANUAL Indoor unit - 4 way cassette CASK-12C CASK-24 CASK-18C CASK-36 CASK-18 CASK-48 Version 1.0...
-
Page 2: Declaration Of Conformity
DECLARATION OF CONFORMITY Description MONO/MULTI CASSETTE DC INVERTER Model CASK-12C CASK-24 CASK-18C CASK-36 CASK-18 CASK-48 Is in compliance with the follow ECC direcrives, latest modification included, and the relevant nationale granting regulations in force: 2004/108/CE 2006/95/CE 2003/108/CE 2011/65/CE 2012/2016/CE... - Page 3 INDEX chapter page 1. GENERAL INFORMATION 2. DESCRIPTION 3. PRELIMINARY CHECKS 4. INSTALLATION 5. TEST RUNNING 6. TROUBLESHOOTING AND MAINTENANCE...
-
Page 4: General Information
1. GENERAL INFORMATION 1.1 SYMBOLOGY Within this publication and / or inside the equipment we used the following symbols: USER: Information, paragraph, chapter WARNING: Calls attention to actions that, Manual affecting the user or the user. if not correctly performed, may cause serious injury. -
Page 5: Warnings And Precautions
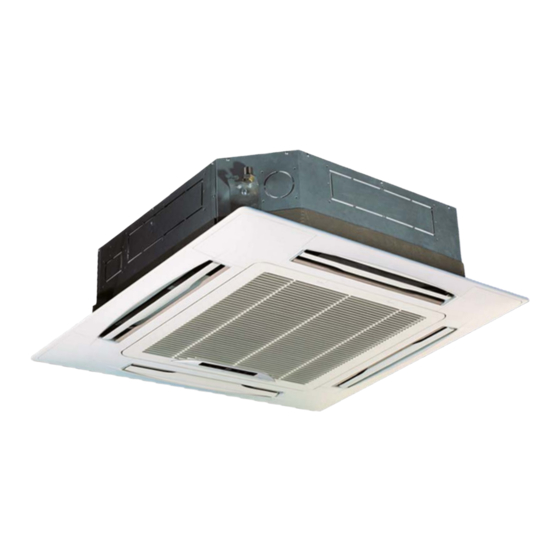
1.3 OBSERVATIONS Keep the manual in a dry location to avoid deterioration. The device must be installed in such a way as to make carefully read and understood all the information contained possible the maintenance and / or repair. in this manual. Pay particular attention to the operating standards with The warranty does not cover in any case cover costs due to “DANGER,”... - Page 6 2. DESCRIPTION 2.1 COMPONENTS AND MEASURES INDOOR UNIT CASK-12C, CASK-18C CASK-18, CASK-24, CASK-36, CASK-48 Outline of the Unit and Main Parts utline of the Unit and Main Parts Indoor Drainpipe...
-
Page 7: Preliminary Checks
If not, reinforce it before installation. ≥1000mm e large amount of greasy dirt accumulated on the fan, heat exchanger and water CASK-12C, CASK-18C CASK-18, CASK-24, CASK-36, CASK-48 ed in the dinning room and kitchen, which would reduce the capacity of the heater lead to leakage and abnormal operation of the water pump. -
Page 8: Connection Pipe Requirement
Size of Fitting Pipe (Inch) Max.Pipe Length Max.height Difference between Model Indoor and Outdoor Unit (m) Liquid CASK-12C CASK-18C CASK-18 CASK-24 CASK-36 CASK-48 1. The connection pipes hould be insulated with proper 2. - Page 9 697.6 766.3 766.3 Units:mm Fig.4 le 4 Units: mm The Ceiling 4.2 INSTALLATION FOR CASK-12C AND CASK-18C Installation Dimension Panel Dimentsion Dimension 1. Hang the main unit to the ceiling 2. Secure the main unit to the ceiling 769.3 697.6 766.3...
- Page 10 4.3 INSTALLATION FOR CASK-18, CASK-24, CASK-36 AND CASK-48 1. Install the hoisting stand on the hoisting screw by using 4. Check if the unit is installed horizontally at four directions. nuts and gaskets at both the upper and lower sides of the If not, the water pump and the float switch would function hoisting stand.
- Page 11 Installation of outdoo 3. Pretightening the union nut with hand. 4. Tighten by refer 2. BendingPipes Hex nut dia Installation of the Unit pipe joint Φ 6 - The pipes are shaped by your hands. Φ 9.5 Be careful not to collapse them. When the flare nut is tightened properly by your hand, use a torque wrench to finally tighten it.
-
Page 12: Vacuum And Gas Leakage Inspection
4.5 VACUUM AND GAS LEAKAGE INSPECTION CAUTION! Do not purge the air with refrigerants but use a vacuum pump to vacuum the installation! There is no extra refrigerant in the outdoor unit for air purging! 1.Vacuum And verify if the pressure gauge at the low pressure side of (1). -
Page 13: Installation Of The Drain Hose
4.6 INSTALLATION OF THE DRAIN HOSE CAUTION! Install the drain hose in accordance with the instructions 2. Keep pipe size equal to or greater than that of the in this installation manual and keep the area warm enough connecting pipe. to prevent condensation. -
Page 14: Precautions When Doing Riser Piping Work
4.8 PRECAUTIONS WHEN DOING RISER PIPING WORK 1. Make sure that heat insulation work is executed on the 2. Make sure the lift pipe is at most 280 mm. following 2 spots to preventany possible water leakage due 3. Stand the lift pipe vertically, and make sure it is not further to dew condensation. - Page 15 4.10 ELECTRICAL WIRING CASK-18, CASK-24, CASK-36 E CASK-48 - Before obtaining access to terminals, all supply circuits the air conditioner canbe operated safely and positively. must bed is connected. - Install a leakage special branch circuit breaker in accordance - The rated voltage of the unit is as shown as table3 with the related lawsand regulations and electric company - Before turning on, verify that the voltage is within the standards.
- Page 16 4.11 ELECTRICAL WIRINGS CASK-12C E CASK-18C The power supply cable and the fresh air valve cable are - Tighten the internal / external connection cable and the high voltage, while the communication cable and the wired power cord respectively to the terminal. The faulty connection controller wire are low voltage.
-
Page 17: Test Running
5. TEST RUNNING 5.1 TRIAL OPERATION AND TESTING Error Code Name Filter clean remind High exhaust temp. protection Overcapacity protection Compressor overload protection Anti-frost protection System high pressure protection System low pressure protection Lack refrigerant/ valve stop protection Auxiliary heat adhesion protection The communication between indoor unit and wired controller fault Indoor temp. -
Page 18: Test Operation
5.3 TEST OPERATION If matching with the MULTI-S external unit, after installing the B: The test operation is terminated when the interior view is complete drives, you must verify the operation changed to show the temperature from “LL”. When it turns on the first time and turns on the units to ensure C: If the indoor display shows “PA”... - Page 19 3. Do not wet the indoor unit in case of electric shock or (3). Replacing the air filter Reinstall the filter asbefore. firehazard. 6.3 ROUTINE MAINTENANCE CASK-12C E CASK-18C in a shaded area and cool to dry. Only a qualified service person is authorized to perform maintenance.
Need help?
Do you have a question about the CASK-12C and is the answer not in the manual?
Questions and answers