Table of Contents
Advertisement
Quick Links
Advertisement
Table of Contents

Subscribe to Our Youtube Channel
Related Manuals for Sensus SensusRF


Summary of Contents for Sensus SensusRF
- Page 1 SensusRF Gateway User Guide © SENSUS 2015...
- Page 2 SensusRF gateway user manual SensusRF Gateway User’s Guide Revision Date Notes Responsible April 17, 2015 & earlier Draft versions Revision 9 June 30, 2015 Draft Version 1 M. Andre, I.Reed, U. Gross Revision 10 6 October 2015 Version 2 I.Reed...
- Page 3 SensusRF gateway user manual | 17/04/2015...
-
Page 4: Table Of Contents
Contents ............................3 ONTENTS ..........................5 NTRODUCTION ......................7 ARDWARE ESCRIPTION ......................... 7 ACKAGING ........................7 UTSIDE THE CABINET ........................7 NSIDE THE CABINET ........................... 9 OWER UPPLY AC ....................9 AINS OWER UPPLY 5.1.1 ......... F ECHNICAL PECIFICATION EHLER EXTMARKE NICHT DEFINIERT 5.1 O .................. - Page 5 20 SMS ........................41 COMMANDS 20.1 “ ” ....................... 42 COMMAND 20.2 “G ” ....................... 43 WCONT COMMAND 20.3 “G ” ....................43 GWCONT COMMAND 20.4 “R ” ....................... 43 ESTART COMMAND 20.5 “ ” ......................44 SIGNAL COMMAND...
-
Page 6: Introduction
Manager. An individual Gateway can also be managed locally by its own internal IRIS Light management system instead of the centralized IRIS server. The SensusRF Gateway has an inbuilt webserver that can display and configure information about the Gateway itself, perform the configurations of GPRS, Ethernet and IRIS Lite Server, verify Task Status, upgrade firmware and verify radio information that is being collected. - Page 7 SensusRF gateway user manual | 17/04/2015...
-
Page 8: Hardware Description
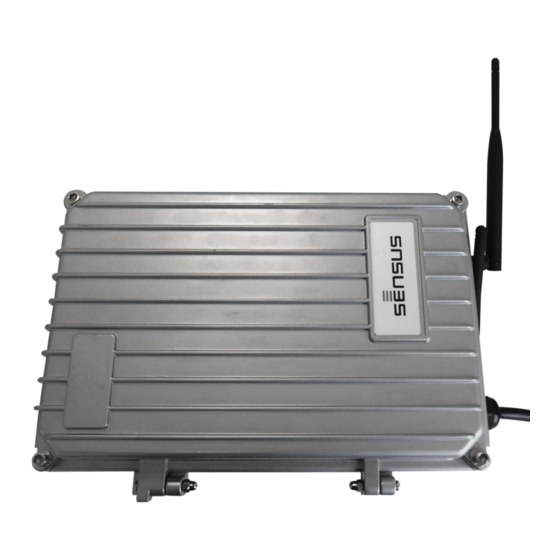
Connect the GPRS/GSM antenna, handtight only. Connect SensusRF antenna, handtight only. There are two different antennas available for the gateway (one for 433 MHz and a different one for 868 MHz). The antenna supplied with the gateway will match the SensusRF frequency of the Gateway. - Page 9 SensusRF gateway user manual | 17/04/2015...
-
Page 10: Power Supply
Power Supply Mains Power Supply AC Attention: Before opening the cabinet, make sure that all AC power is disconnected! Warning: Internally there are live parts when switched on that may cause electric shock. The electrical installation must be made by a trained professional. AC POWER SUPPLY AC INPUT 88 ~ 264 VAC... -
Page 11: Technical Specification
AC INPUT (Disabled. Do not use) DC INPUT Ground (-V) DC INPUT (+V) 5.2.1 DC power Specification Model 300.128 DC INPUT 12 to 24 VDC Battery Charger 230mA (Max) Output Voltage 6.5V Output Current Output Power 13.7W... -
Page 12: Sim Card Connectors
SIM Card Connectors On the Gateway main board, there are two SIM card slots as illustrated below: SIM card in slot 1 (top slot): SIM card in slot 2 (bottom slot - do not use):... -
Page 13: Installation
NOTE Use the SIM card slot 1 only. Before inserting the SIM card make sure that: 1. Either the correct SIM pin code is already configured in the gateway software as shown in the following chapters, or 2. The PIN code is disabled. Otherwise the SIMcard might be blocked due to the gateway using the default PIN which may be the wrong PIN code. - Page 14 Pole Mounting : For pole mounting, hanger straps (not supplied) must be used. Physical & Environmental Specifications Gateway enclosure details: • Aluminum Enclosure • Length: 306 mm • Width: 242 mm • Thickness: 113 mm • Temperature stability: -20 C to +70 C •...
-
Page 15: Led Indicators (Internal)
The SIM Card is present & the GPRS modem is registered on the GSM Network. • Communication LED: Orange LED that indicates the status of the SensusRF radio Transceiver (called SiRT). o LED blinks when the SiRT (SensusRF Radio Transceiver) receives any radio package (BUP, SEMI, RAT, …). -
Page 16: Gateway Internal Webserver
Gateway internal webserver Local communications with the SensusRF Gateway (e.g. for initial configuration) can be performed by connecting the mini USB cable or the Ethernet cable connected to a PC or notebook with a standard web browser, such as Chrome or Firefox. The figure below illustrates the location of these connections:... -
Page 17: Sensusrf Gateway Installation
8.1 SensusRF Gateway Installation After connecting the Gateway via USB, there will be two components looking for drivers: • CDC Serial, and • Linux USB Ethernet / RNDIS: Both drivers are located on the virtual drive “CAS Gateway”. The first time a PC is connected to a gateway it will be necessary to install these drivers. - Page 18 4) Then, select the option “CAS Gateway” and click on “OK”.
- Page 19 5) The device is updated, as shown below: The same procedures must be applied for updating the Linux USB Ethernet / RNDIS. After updating, the driver will appear in “Device Manager” as below:...
- Page 20 Check the extended properties of the device and enter manually the IP address of the gateway 192.168.7.1. For this, right click on icon and select the option “Properties”, then on “Advanced” tab, type the address as shown below:...
- Page 21 7) If you are using an http proxy, it is necessary to set the address 192.168.7.2 in the proxy configurations in order to access the SensusRF Gateway by Firefox:...
- Page 22 SensusRF gateway user manual | 17/04/2015...
-
Page 23: Configuring The Gateway
Configuring the Gateway The Gateway can be configured using a Chrome or Firefox webbrowser. Access the file storage in the gateway called “CAS Gateway” on “My computer” (Figure 9-1) and start the webserver application by double clicking on file “START.htm” (Figure 9-2). IGURE 9-1. - Page 24 On the initial page of the SensusRF Gateway are displayed the login fields, as shown in figure 9-3. 9-3. G IGURE ATEWAY To log in to the Gateway, user must use the information: Username: admin Password: admin Note: Both are “admin”, all lower case letters.
-
Page 25: Gateway Online Status
Supervisor – Task that supervises the Integrated Gateway verifying everything is working correctly. Services Task – Task that manages the webserver communication Radio Task - Task that controls the SensusRF Radio Modem Task – Task that controls the GPRS communications Sensors Task –... -
Page 26: Connection
Connection The information displayed in the “Connection” column is “Server” (Connected or Disconnected), “PPP” (ON or OFF), “SIMCARD” (Ready or NOT Ready) and the GPRS received signal level. The same format is used as for Status: Online/Ready will be display in green and offline will be displayed in red. 9-5 - G –... -
Page 27: Gateway Info
On the “Gateway Info” screen is information about the Gateway hardware and firmware configuration. The information refers to the GPRS Modem, Ethernet interface and SensusRF Radios as well as the firmware versions. In order to access “Gateway Info” screen, click the tab “Gateway” then “Info” as shown in Figure 9-7. -
Page 28: Configuring Gprs & Ethernet Parameters
Configuring GPRS & Ethernet parameters 10.1 GPRS Parameters To configure GPRS information, click the “Communication” tab then “GPRS”. This will display the “GPRS Parameters” screen. The Figure 10-1 illustrates the path to access this screen. 10-1 - GPRS P IGURE ARAMETERS In order to configure GPRS it is necessary to fill in the fields below and then click the “Save”... - Page 29 To configure the Ethernet settings, click the tab “Communication” then “Ethernet” (as shown in figure 10-1) which will display “Ethernet Parameters” screen. 10-3 - E IGURE THERNET ARAMETERS DHCP can be enabled by toggling the button “Enable DHCP” to “ON” and then clicking the button “Config”. If DHCP is disabled (OFF), the fields IP, Mask and Gateway Default must be completed then saved with the “Config”...
-
Page 30: Server Mode Configuration
Server Mode Configuration When the Gateway is initialized for the first time, server mode should be configured. This configuration is available on the “Advanced” tab then the “Settings” option. Figure 11.1 Advanced Settings There are two server mode options: IRIS Server and Iris Light. In IRIS Server mode, all readings collected by the Gateway are processed by the central IRIS server, and collected by a Meter Data Manager (such as Hemera). -
Page 31: Iris Light Mode - Parameters
ERVER ARAMETERS 11.2 Iris Light mode – Parameters On tab “Upload” is possible to configure the parameters to allow SensusRF Gateway in SMTP Mode. For this, it is necessary to fill info in following tab options: 11-2 - U IGURE... -
Page 32: Sensusrf
The key need to be a same as that used in all the meters. Note, if no key is entered, the default key is used. In the Ghost Filter enter valid SensusRF network addresses masks, so that the Gateway only will register devices whose addresses are within one of the valid masks. -
Page 33: Ftp Profile
11-5 - E IGURE MAIL ROFILE CONFIGURATION The following fields must be configured: • SMTP Server name • SMTP Server port • Login information about the email account: address and password • Type of security used • Email addresses to send the files to (separated by a comma) Click the “Save”... - Page 34 11-6 - FTP IGURE PROFILE PAGE The following fields must be configured: • Server name • Server port • Login information about the FTP account: address and password • The FTP protocol used • Destination directory Click the “Save” button to save configuration. To validate this configuration, click on Test button.
-
Page 35: Meter Readings
11.2.5 Meter Readings In order for the gateway to collect meter readings and send them either via SMTP email or via FTP, it is necessary to configure 1 or more schedules on the scheduler page. Figure 11-9 Reading configuration To configure a task, enter: •... -
Page 36: Routes
When the “Download” button is clicked, 2 files are downloaded: • one with the last readings collected and decrypted by the Gateway; • one with any readings that the Gateway could not decrypt. These may then be decrypted if the encryption key is available. -
Page 37: Radio Info
When route is writing, it is listed on Repeater Activation List area. Figure 11-12 Repeaters Activation List Below there is an example of activation route: 11-9 - A IGURE CTIVATION OUTE EXAMPLE In the example above, repeater 0080 should be activated by repeaters 0067 then 0061. •... -
Page 38: Clear Table
12-1 - D IGURE EVICES CREEN 12.1 Clear Table On the Devices Info page there is the button ‘Clear Table’ that can be used to delete all devices (endpoints and repeaters) linked to the Gateway. This button can be used after an installation and if the user wants to delete all devices and load information again. -
Page 39: Installation Mode
“Gateway Installation” mode. The figure 14-1 illustrates the “Gateway Installation” mode NOTE: For security reasons, if the SensusRF Gateway is left on ‘Installation Mode’ for more than 12 hours the gateway will disable automatically returning to the Normal Mode. -
Page 40: Password Changing
15-1 - “G ” IGURE ATEWAY ESTART BUTTON Password Changing On “Password Changing” is possible to update password of access to the system. For this, it is necessary to click on tab “Advanced” option “Settings”. The fields that must have be filled are Current Password, New Password and New Password (Again), and then click on button “Save”. -
Page 41: Languages
17-1 - F IGURE IRMWARE PGRADE After installing new firmware, the Gateway will restart automatically: Languages Currently, it is possible to select the language for Portuguese or English by clicking on “Languages”. The Figure 18-1 illustrates the option “Languages”. 18-1 - L IGURE ANGUAGES Logout... -
Page 42: Sms Commands
SMS commands The SensusRF Gateway has functionality that allows the user to send commands via SMS. This is useful for situations where the user is not close to where the Gateway is installed. Firstly, in order to send a command to the Gateway it is necessary send the PIN command. -
Page 43: Pin" Command
Currently, there are five commands that are possible to send via SMS. These commands are explained in the chapters below. 20.1 “pin” command The “pin” command opens a session between the mobile phone and the CAS Gateway. After sending the command, the Gateway will answer with an ACK (Acknowledge) or NAK (Not Acknowledge). -
Page 44: Gwcont" Command
20.2 “Gwcont” command The “gwcont” command is used for configure GPRS and server parameters. The syntax of the command is: gwcont,1, APN, PORT, IP, USER, PASS Where: 1- It means only one SIMCARD (NOTE: on the Gateway just SIMCARD slot one is used) APN is the carrier Access Point Name (APN) PORT, IP is the server port and IP the gateway has to connect to the IRIS Server USER, PASS is the apn username and password... -
Page 45: Signal" Command
20.5 “signal” command The “signal” command returns information to help with diagnostics of the state of communications with the gateway. Displays the current temperature and maximum temperature reached by the module among others information. The syntax to send the command is: signal Returns this example: SIRT 12345678 02022015 S(10) GPRS: 3/ 1 -61dBm TEMP: 31 degrees... - Page 46 This information is obtained from the GPRS network, and represents a reliable basis for determining whether or there is not any problem with the GPRS network in place (0 = GPRS not available, 1= GPRS available)
- Page 47 The Sensus GmbH reserves the rights to modify or to update the information, character and technical features described related to the product without previous notification.
Need help?
Do you have a question about the SensusRF and is the answer not in the manual?
Questions and answers