Table of Contents
Advertisement
Quick Links
Intercell
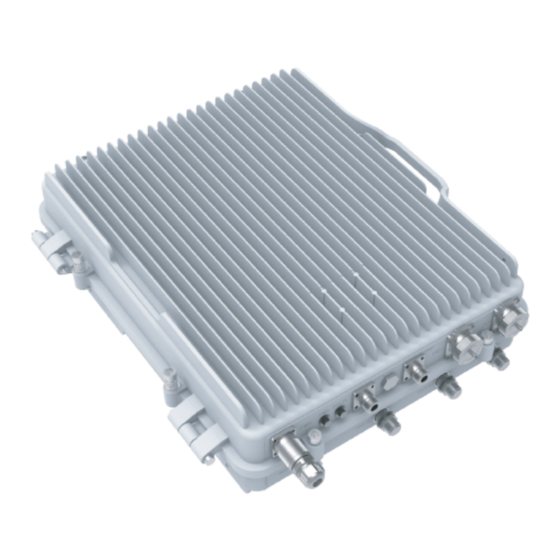
Intercell 10 B38+B39
The intercell 10 B38+B39 is an outdoor TDD-LTE dual carriers base station with 2*(2*10W) output power (each carrier supports 2x2 MIMO with 10W
output each RF channel).
Quickstart
Please follow these quick steps to set up your device:
Connect external antennas and Ethernet cable to the connectors (see "
Connect the device to the power source (see "
Connect with your laptop to the Ethernet port for configuration.
The device can get the IP address by DHCP and Static assignment;
Once connected, default maintenance IP address: 192.168.200.200, user name: admin, password: MikroTik;
If connecting with Static assignment method, configure the IP address of your laptop as 192.168.200.100/24, then connect through https to the
device: 192.168.200.200;
Configure backhaul and radio network see "
Powering
The device accepts power in the following way:
Input power jack accepts 48 V DC. The only connector with cable is provided with the package, you will need the power unit - generating 48 V.
The power consumption under maximum load can reach 200 W.
Connect provided cable to your power source.
Connect cable connector to the device.
If using Ethernet cable add RBGESP to the setup, comes with the package.
Configuration
All configuration is necessary to carry out through the webGUI.
The configuration of this device should be done by a qualified person.
Expansion ports and slots
Intercell#Powering
");
Intercell#Configuration
".
");
Advertisement
Table of Contents

Summary of Contents for MikroTik Intercell 10 B38+B39
- Page 1 Intercell Intercell 10 B38+B39 The intercell 10 B38+B39 is an outdoor TDD-LTE dual carriers base station with 2*(2*10W) output power (each carrier supports 2x2 MIMO with 10W output each RF channel). Quickstart Please follow these quick steps to set up your device: Connect external antennas and Ethernet cable to the connectors (see "...
-
Page 2: Configuration Flow
Configure IP address of PC as 192.168.200.100/24 Connect to HeNB WAN interface directly, login WebGUI through https Default maintenance IP address: 192.168.200.200 User name: admin Password: MikroTik Configure HeNB IP address Configure "Address Type" as "Static" Configure "IPv4 address" and "Mask" accordingly. - Page 3 Press "Submit", HeNB will reboot to take configuration into effect. Connect the HeNB WAN interface back to LAN. Login: Login WebGUI with https. Backhaul parameter Configure NME/HeNB-GW IP address: Path: Management > Cell > S1SigLinkServer.
- Page 4 Radio network parameter Configure common radio parameters: Path: Management > Cell Duplex Mode: TDD TAC: 10 PLMNID: 00666...
- Page 5 Configure Cell 1 radio parameters: CellIdentity: 257 CandidateARFCNList: 38400 Note: EARFCN in Downlink, the Uplink EARFCN will be configured automatically by HeNB. CandidatePCIList: 0..503 Note: Range from 0 to 503, HeNB will select PCI automatically. FreqBandIndicator: 39 DL Bandwidth: 100 Note: 20MHz ↔...
- Page 6 Configure Cell 2 radio parameters: CellIdentity: 258 CandidateARFCNList: 37900 Note: EARFCN in Downlink, Uplink EARFCN will be configured automatically by HeNB. CandidatePCIList: 0..503 Note: Range from 0 to 503, HeNB will select PCI automatically. FreqBandIndicator: 38 DL Bandwidth: 100 Note: 20MHz ↔ 100, 15 MHz ↔ 75, 10MHz ↔ 50, 5MHz ↔ 25. UL Bandwidth: equal to DL Bandwidth value.
- Page 7 Select the "AdminState" when all the above parameters are well configured. Note: This is the switch to control the RF function, select enable RF function when all parameters are well configured. Press "Submit", then HeNB will reboot to take configuration into effect. Checking the RF status: Path: Management >...
- Page 8 Mounting The device is designed to be used outdoors. When mounting on the wall or mast, please ensure that the cable feed is pointing downwards. The IPX rating scale of this device is IP66. We recommend using Cat6 shielded cables. Mounting and configuration of this device should be done by a qualified person.
- Page 9 Get the pole mounting accessories from the packing case, including 4 fixed plates, 4 M12 bolts, 4 M12 nuts. Guide the M12 bolt through the mounting frame, the fixing plate, cradle, and fix it on the cradle as shown in the picture. Keep the 4 fixing screws near the lower side of the chassis fixed on the chassis and leave a 3mm gap for hanging the mounting frame.
-
Page 10: Hardware Specifications
Grounding The installation infrastructure (towers and masts), as well as the router itself, must be properly grounded. Attach your grounding wire to the grounding screw, then attach the other end of the grounding wire to the grounded mast. Power interface lightning protection – GB/T 17626.5, IEC61000-4-5. Expansion slots and ports Power supply connector. -
Page 11: Operating System Support
δήλωσης συμμόρφωσης ΕΕ διατίθεται στην ακόλουθη ιστοσελίδα στο διαδίκτυο: https://mikrotik.com/products EN Hereby, Mikrotīkls SIA declares that the radio equipment type Intercell 10 B38+B39 is in compliance with Directive 2014/53/EU. The full text of the EU declaration of conformity is available at the following internet address: https://mikrotik.com/products... - Page 12 UE è disponibile al seguente indirizzo Internet: https://mikrotik.com/products IS Hér með lýsir Mikrotīkls SIA því yfir að Intercell 10 B38+B39 er í samræmi við grunnkröfur og aðrar kröfur, sem gerðar eru í tilskipun 2014/53/EU. Fullur texti ESB samræmisyfirlýsingar er að finna á eftirfarandi veffangi: https://mikrotik.com/products...
Need help?
Do you have a question about the Intercell 10 B38+B39 and is the answer not in the manual?
Questions and answers