Table of Contents
Advertisement
Advertisement
Table of Contents

Related Manuals for Paralenz Vaquita


Summary of Contents for Paralenz Vaquita
- Page 1 Vaquita User Manual...
-
Page 2: Table Of Contents
Table Of Contents The Paralenz Vaquita The Camera Getting Started Photos & Videos Download Content Maintenance Camera Modes Software Updates Battery... - Page 3 Troubleshooting Warranty Precautions Regulatory Information FCC Statement IC Statement Support...
-
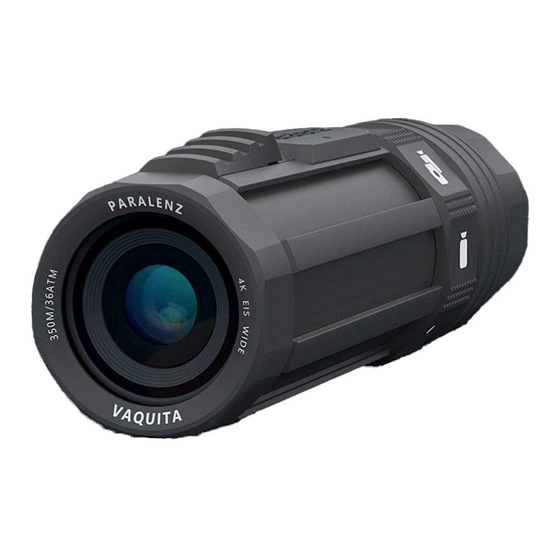
Page 4: The Paralenz Vaquita
The Paralenz Vaquita Selector Ring GPS Sensor End Cap Activation Switch Rear Glass Lens Lock Ring Eyelet Front Glass Quick Connector Ring Camera Body... - Page 5 The Paralenz Vaquita SD Card OLED Display USB-C Port...
-
Page 6: The Camera
The Camera Activation Switch • Click Pull back the activation switch once and release quickly to ‘click’. • Hold Pull back and hold the activation switch for 1 second or more to ‘hold’. Selector Ring To switch between modes, rotate the selector ring. The icon aligned with the antenna will indicate the selected mode. - Page 7 Rotate the selector ring to the power mode position and pull back the activation switch and hold for 4 seconds to turn on the camera. The camera will vibrate shortly after, and the Paralenz logo will appear. When the camera is ready to use, the display will show the Home screen.
-
Page 8: Getting Started
Getting Started Pull Off the End Cap To access the USB-C port and SD-card, pull off the end cap. The end cap is using a quick release system. Pull back the lock ring and then pull off the end cap - a bit of force is needed. To put the end cap back on, pull back the lock ring on the end cap, and push the end cap back on. - Page 9 Getting Started Insert Micro SD-Card Turn off the camera before inserting the micro SD card. Use only SanDisk class U3 or V30 SD cards. SD cards compatible with the Paralenz Vaquita • Extreme • Extreme PLUS • Extreme PRO When using different types of SD cards, the recorded footage might appear black. A capacity of 32 GB or more is recommended.
- Page 10 Getting Started Remove Micro SD-Card Make sure any recording is stopped when removing the SD-card. Remove: Pull off the end cap Push in the micro SD card, then release it and the card will automatically pop Press the end cap back on - If the red ring is visible, the end cap is not at- tached correctly Charge The Battery You can use a variety of devices to charge your camera.
-
Page 11: Photos & Videos
Photos & Videos Take Photo To take pictures, rotate the ring to the snap record mode. To take a picture, pull back on the activation switch and release quickly. The camera will vibrate to indicate that the picture was taken. The screen will now show the amount of photos you have taken. -
Page 12: Download Content
Download Content The Paralenz App The free Paralenz App makes downloading, sharing, and viewing your photos and recordings easy. Download the app via App Store/Google Play. The app will guide you through the connection process. Note that you can also update the camera firmware through the app. The app will notify you if there is a new firmware update available. -
Page 13: Maintenance
Always Clean The Camera In Fresh Water After Use Leaving the Paralenz Vaquita covered in salt water after usage can damage your product. It is important to wash the Paralenz Vaquita with fresh water after usage to ensure the functionality of the product. -
Page 14: Camera Modes
Camera Modes Snap Record The snap record mode allows you to take pictures and record short clips. • Picture To take a picture, pull back on the activation switch and release quickly. • Video To record a video, pull the activation switch back and hold. The camera will keep recording for as long as you hold the activation switch. - Page 15 Camera Modes Custom 1 & 2 The vaquita camera has two custom modes. You can assign different functions to these two modes. You choose which modes to assign in the camera settings. The Possible Functions Are: • Video - different resolution and frame rate from the normal video mode •...
- Page 16 Wi-Fi settings on your device. The device will ask for a password when connecting to the camera’s Wi-Fi. The camera’s Wi-Fi password is: 1234567890 To access content from the camera, download the Paralenz app and go to the camera tab to connect to the camera.
- Page 17 Camera Modes What Is DCC DCC (Depth Controlled Color) is a dynamic digital filter that automatically adjusts the colors of your footage to the depth and the color of the water. The DCC analyses the current conditions and can take some time to adjust to the local conditions.
- Page 18 Camera Modes Video Settings This menu allows you to change the settings for the video mode. You can select at which resolution and frame rate you want to record in. Available resolutions and frame rates: • 4K (3840 x 2160) at 30 FPS •...
- Page 19 Camera Modes Custom 1 & 2 There are two custom submenus - one for each of the custom icons on the ring. Example: To change the settings in custom 1 or 2, do the following. In the submenu, three modes are presented: •...
- Page 20 Camera Modes • 10 seconds • 60 seconds • 120 seconds To start the photo log, go to the custom mode that has the photo log assigned. Hold the activation switch for 1 second to start the photo log. To stop the photo log, hold the activation switch for 1 second.
- Page 21 Camera Modes Advanced The advanced submenu contains items that are less commonly used. Reset All Settings To restore the factory setting, activate this mode. Calibrate Depth Sensor If the depth is not showing exactly 0.0 on the surface, it’s a good idea to calibrate the sensor.
- Page 22 Camera Modes • 20 min Manual Settings The manual settings submenu gives you further adjustment possibilities for the image quality. Reset Manual Settings By resetting the manual settings, all manual options will be set to auto. White Balance You can select to have a fixed white balance at a certain Kelvin. The options are: •...
- Page 23 Camera Modes • 1/120 • 1/240 • 1/500 • 1/1000 • 1/2000 • 1/4000 • 1/8000 The options for ISO are: • • • • • 1600 • 3200 • 6400...
- Page 24 Camera Modes Dive Log The dive logs mode lets you see your dive graph live. The graph will take shape as you dive. If you have dived with the camera before, you can see your previous dive logs by clicking on the activation switch. The number in the right bottom corner indicates the number of dive logs and the current position.
- Page 25 Camera Modes Location The position mode lets you see your current location. The camera gets the current location based on the GPS antenna on top of the camera. To get the best signal, the camera needs to be outside and above water. The camera will not immediately get a position.
-
Page 26: Software Updates
Software updates of the camera can be done through the app or by placing a firmware file on the SD-card. To update through the app, download our Paralenz app, and go through the app’s instructions. To update the software manually, follow the following steps: Download the latest firmware for your camera from www.paralenz.com. -
Page 27: Battery
Battery The Paralenz Vaquita comes with an integrated LiPo 2000 mAh battery. Charging The Battery Use the included USB-C cable for charging. Charge the camera through your com- puter or use a wall charger – preferably a 2.1 A USB power adapter. See section 2.4 for information about how to charge the battery. -
Page 28: Troubleshooting
Troubleshooting If The Camera Freezes Or Won’t Turn On In the case of the camera freezing and not responding, you can always do a hard reset: Turn the selector ring to the power position. Plug in the charger. Hold the activation switch for 10 seconds. - The camera will now reboot. -
Page 29: Warranty
The warranty period begins from the date of purchase. The warranty does not cover commercial or rental use. In case you experience any fault with the Paralenz Dive Camera in the warranty peri- od, please go to www.paralenz.com/support and fill in a warranty claim, to start the replacement process. -
Page 30: Precautions
This may cause electrical shock. The Paralenz Dive Camera should not in any way be used as a dive computer, or as a sup-plement to a dive computer. When charging, make sure the charger is a USB type charger, of max 5V, or use a USB plug on a computer. - Page 31 Precautions The battery should be used in a temperature range from 14° to 104° F (-10° to 40° C). Use of the battery in an environment above 104° F (40° C) can lead to a fire or explosion. Use of the battery below 14° F (-10° C) can lead to permanent damage. DO NOT charge the battery until it cools down to near room temperature.
-
Page 32: Regulatory Information
Please do not throw the batteries into domestic refuse. Please use the return and collection systems available in your country for the disposal of waste batteries. The Bluetooth® word mark and logos are registered trademarks owned by Bluetooth SIG, Inc. and any use of such marks by Paralenz is under license. - Page 33 Regulatory Information The Wi-Fi CERTIFIED logo is a registered trademark of the Wi-Fi Alliance. iOS and App Store are registered trademarks of Apple Inc. Android and Google Play are registered trademarks of Google Inc.
-
Page 34: Fcc Statement
FCC Statement WARNING: Changes or modifications to this unit not expressly approved by the party responsible for compliance could void the user’s authority to operate the equipment. NOTE: This equipment has been tested and found to comply with the limits for a Class B digital device, pursuant to Part 15 of the FCC Rules. - Page 35 FCC Statement This device complies with FCC’s radiation exposure limits set forth for an uncontrolled environment.
-
Page 36: Ic Statement
IC Statement This device complies with RSS247 of Industry Canada. Cet appareil se conforme à RSS247 de Canada d’Industrie. This device complies with Industry Canada license-exempt RSS standard(s). Operation is subject to the following two conditions: (1) this device may not cause interference, and (2) this device must accept any interference, including interference that may cause undesired operation of the device. -
Page 37: Sar
This device meets the government’s requirements for exposure to radio waves. This device is designed and manufactured not to exceed the emission limits for exposure to radio frequency (RF) energy set by the Federal Communications Commission of the U.S. Government. The exposure standard for wireless devices employs a unit of measurement known as the Specific Absorption Rate, or SAR. -
Page 38: Support
Support Paralenz is dedicated to providing the best possible service. To reach our Customer Support, visit paralenz.com/support or contact support@paralenz.com...
Need help?
Do you have a question about the Vaquita and is the answer not in the manual?
Questions and answers