Flux Reference Series Installation Manual
Hide thumbs
Also See for Reference Series:
- Installation manual (10 pages) ,
- Installation manual (22 pages)

Subscribe to Our Youtube Channel
Related Manuals for Flux Reference Series


Summary of Contents for Flux Reference Series
- Page 1 COMPONENT SPEAKER INSTALLATION MANUAL Maestro Competition Series Reference Series MC Comp 261 RC 261...
- Page 2 Volume and Driver Awareness Use of sound components can impair your ability to hear necessary traf- fi c sound and may constitute a hazard while driving your vehicle. FLUX except no liability for hearing loss boardly injury or property damage as result of use or missused of this product.
-
Page 3: Features And Contents
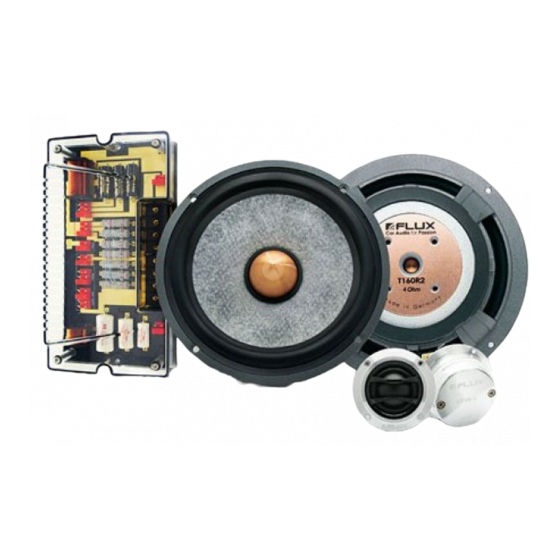
Passive Crossover FEATURES AND CONTENTS Product Features - Reference Series (RC 261) FLUX T 160 R2 • 6.5” midwoofer, 4 layer (paper+glass fi ber+silk+ceramic) cone • 37mm v/c with 90mm magnet diameter • Aluminium die cast basket, vented basket • copper phase plug FLUX HT 25 R •... -
Page 4: Passive Crossover
INSTALLATION Getting Started It is recommended that your new FLUX speakers are installed by an autho- rized FLUX Authorized Dealers. This will ensure the use of proper installa- tion techniques and material and will save you a lot of time and efforts. - Page 5 Passive Crossover Positioning & Choosing a Location Using a component speaker gives you the freedom to place the woofer and tweeter separately in your car. It could be good or bad in terms of sound quality, it depends where you put it. 2 Way Speaker System 2 way speaker system tweeter and midbass drivers are supported.
-
Page 6: Installation Components
Reference Series [RC 261] Installation Components Installation Using 1 Amplifi er XR 261 Input Jumper Position Input jumper position Single Amp (1Amp) Single Amp (1 Amp) Amplifi er HT 28R T 160 R2 WARNING Jumper confi guration for Bi Amp input must be installed correctly... - Page 7 Reference Series [RC 261] Installation Components Installation Using 1 Amplifi er Installation Using 2 Amplifi er Installation Using 2 Amplifi er Installation Using 2 Amplifi er XR 261 Input Jumper Position Input jumper position Bi Amp (2 Amp) Bi Amp (2 Amp)
- Page 8 Reference Series [RC 261] Standard Jumper Settings XR 261 TWEETER WOOFER -6 -9 LEVEL ( dB ) FREQ FREQ Q LEVEL Jumper positions are attached, TWEETER you can still change it based on -6 -9 your style of sound. Or it can be adapted to the conditions.
- Page 9 Reference Series [RC 261] Tweeter Setting RC 261 0 dB -3 dB -6 dB LEVEL (dB) -9 dB LEVEL 1 2 3 4 FREQ FREQ...
- Page 10 Reference Series [RC 261] Woofer Setting RC 261 FREQ FREQ 1 2 3 Q LEVEL Q LEVEL 1 2 3...
- Page 11 Maestro Competition Series [MC Comp 261] Installation Components Installation Using 1 Amplifi er XMC 261 Input Jumper Position Input jumper position Single Amp (1Amp) Single Amp (1 Amp) Amplifi er HT 25 MC T 160 MC2 WARNING Jumper confi guration for Bi Amp input must be installed correctly or You can damage Amlifi...
- Page 12 Maestro Competition Series [MC Comp 261] Installation Components Installation Using 2 Amplifi er Installation Using 2 Amplifi er Installation Using 2 Amplifi er Installation Using 2 Amplifi er XMC 261 Input Jumper Position Input jumper position Bi Amp (2 Amp) Bi Amp (2 Amp) Tweeterv- Woofer...
- Page 13 Maestro Competition Series [MC Comp 261] Standard Jumper Settings XMC 261 TWEETER WOOFER -6 -9 LEVEL ( dB ) FREQ FREQ Q LEVEL Jumper positions are attached, TWEETER you can still change it based on -6 -9 your style of sound. Or it can be adapted to the conditions.
- Page 14 Maestro Competition Series [MC Comp 261] Tweeter Setting XMC 261 0 dB -3 dB -6 dB LEVEL (dB) -9 dB LEVEL 1 2 3 4 FREQ FREQ...
- Page 15 Maestro Competition Series [MC Comp 261] Woofer Setting XMC 261 FREQ FREQ 1 2 3 Q LEVEL Q LEVEL 1 2 3...
- Page 16 Ringstrasse 20 | 85386 Eching | Germany Email : info@fl ux-audio.com | Website : www.fl ux-audio.com...
Need help?
Do you have a question about the Reference Series and is the answer not in the manual?
Questions and answers