Table of Contents
Advertisement
Quick Links
Advertisement
Table of Contents

Subscribe to Our Youtube Channel
Summary of Contents for Digitus DN-70568
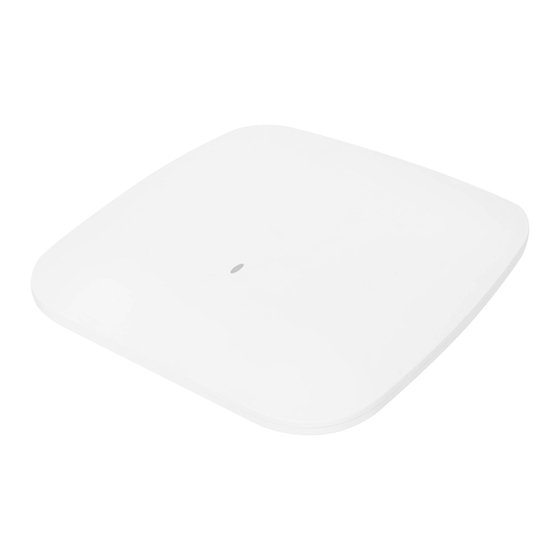
- Page 1 Wireless PoE Access Point for Ceiling Mount, 300Mbps User Manual DN-70568...
-
Page 2: Table Of Contents
Content 1. Hardware and AP installation Instruction ....... 3 2. Login AP system ..............7 3. Wireless ................8 3.1. General Setting ..............8 3.2. WALN Setting ..............9 3.3. WLAN Clients ..............10 4. Micro AC ................10 4.1. AP List ................10 4.2. -
Page 3: Hardware And Ap Installation Instruction
Built-in 5dBi antenna. It also enhanced intelligent channel analysis and automatic selection of optimal channels, reducing interference and delay, and providing a stable wireless network signal. In addition, DN-70568 supports IEEE 802.3at standard PoE, which can realize 80-100 meters network cable power supply. Information Frequency Range: 2412 MHz-2472 MHz for 802.11b,g,n/HT20... - Page 4 AP Interface: Reset: Reset Button, it makes AP revert to default data after press it 15 seconds. WAN: WAN Port, connect to the Internet. LAN: LAN Port can connect to LAN devices. LED: LED Indicator of WAN port and LAN port DC power connector Safety Precautions Only use the device within the specified temperature range...
- Page 5 Installation Flow 1. Hardware connection 2. Set up your computer 3. Management login interface 4. Set up your AP 5. Test wireless 6. Erecting installation Attention: 1. Before the actual installation of the ceiling AP, please complete the software settings of the AP first, and then install it after successful test.
- Page 6 POE Power Supply POE Adapter Power Supply: The POE network port of the POE Adapter is connected to the WAN port of the wireless AP through the network cable, and the power adapter is inserted into the socket to supply power to AP through the network cable.
-
Page 7: Login Ap System
2. Login AP system AP management page login default IP address:6.6.6.6, password: admin (SSID: Smart AP-XXXX, Password: 88888888) After login, the default home page displays the main state information of the AP system, such as CPU, memory, user, traffic… Therefore, the administrator can monitor the operation of the AP through status information. -
Page 8: Wireless
3. Wireless Wireless management is the main configuration of AP. 3.1. General Setting SOS rescue SSID provides a convenient way to login and manage the wireless AP in case of emergency. Easy to use the reset button on the device, or when something unusual happens, releases a rescue SSID called SOS_XXXX. -
Page 9: Waln Setting
3.2. WALN Setting AP has a SSID configuration information by default, which can modify or add SSID. Click add SSID as shown below and fill in the relevant parameters. Note: Up to 4 SSID can be added in the single frequency, and 8SSID can be added in dual frequency. -
Page 10: Wlan Clients
3.3. WLAN Clients The WLAN Clients list displays connection terminal information of each SSID. 4. Micro AC This micro AC is designed to work in a small environment and stops after more than 16 AP. You can view and manage all APs in the network by logging in to any of the AP. -
Page 11: Ssid List
4.2. SSID List Check SSID corresponding to AP device, SSID RF, VLAN, client’s status. 4.3. Client List Display of the end user, the corresponding SSID, AP, Data rates, signal and other states. -
Page 12: Statistics
4.4. Statistics Statistics show the number of AP, SSID, and Clients in the LAN 5. Statistics The statistics mainly display AP status information in the process of operation: routing table, system log, kernel log, real-time information. 5.1. Routing table The routing table displays the ARP cache information and the system static routing table. -
Page 13: System Log
5.2. System Log The system log prints the AP system running log in real time and labels the prompts according to different levels. 5.3. Kernel Log The kernel log prints the AP kernel system run log in real time for viewing. -
Page 14: Wired Lan Setting
6.2. Wired LAN Setting Automatic access gateway IP or static IP address can be set up. 6.3. Diagnose Network Diagnose is mainly to diagnose the connection between AP and AC. Click ”one-click Diagnostic” to print out diagnostic information to help the maintenance personnel find out the cause of the problem. -
Page 15: Reboot
6.5. Reboot After recovery, the AP is the factory default configuration. 6.6. Registration This is factory set up. If the ceiling AP is not registered, ask for the service support for the registration code. Hereby Assmann Electronic GmbH declares that the Declaration of Conformity is part of the shipping content.


Need help?
Do you have a question about the DN-70568 and is the answer not in the manual?
Questions and answers