Table of Contents
Advertisement
Quick Links
Advertisement
Table of Contents

Related Manuals for Antartica M138 LIZARD TURBINE VERSION

Summary of Contents for Antartica M138 LIZARD TURBINE VERSION
-
Page 3: Very Important
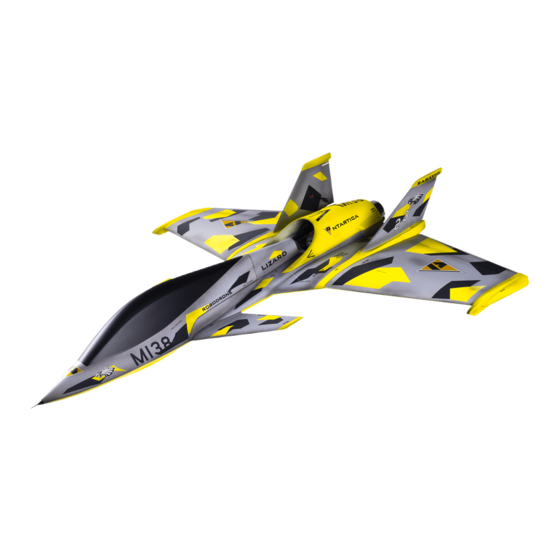
INTRODUCTION Please read this user manual carefully, it contains instructions for the correct assembly of the KIT. Please refer to the web site www.sabavio.com for updates and other important information. VERY IMPORTANT In the Manual bag you will find a product card with your serial number. Please take a moment to register your kit online via our website: 1550mm www.sabavio.com... -
Page 4: Important Note
IMPORTANT NOTE IMPORTANT NOTES *This radio controlled airplane is not a toy. *This radio controlled airplane can be very dangerous. *This radio controlled airplane is a technically complex device which has to be built and handled very carefully. *This radio controlled airplane must be built following these instructions. This manual provides the necessary information to correctly assemble the model. -
Page 5: Notes For Assembly
NOTES FOR ASSEMBLY ADDITIONAL COMPONENTS REQUIRED TOOLS AND ADHESIVES * Turbine from 4.5kg to 12kg. (with Accessories). *Drill with drill bits 2, 3, 4, 5mm. * Landing gear system. ( P/N S0303 ). *Small milling cutter for drill. * UAT. ( P/N S0296 ). *Generic pliers. - Page 6 PACKAGING INSIDE THE BOX * Main fuselage * Canopy * Turbine Cover * Left Wing * Right Wing * Left Rudder * Right Rudder * Left Canard * Right Canard * HARDWARE CONVERSE TURBINE KIT ( Optional , P/N S0305 ) * Tank.
- Page 7 CANARD INSTALLATION BAG1 Canard Arm Assembly Canard DX Collar (S0311-S) (S0023-S) Canard Arm Uniball M3 (H0065-S) Flat Head Cap Screw M3x8mm (HC134-S) Socket Head Cap Screw M4x12mm (HC105-S) Washer 16x1mm (HC230-S) Washer 16x1mm (HC230-S) Canard SX (S0312-S) Page 5...
- Page 8 CANARD SERVO BAG2 Self Tapping Screw 3x12mm (HC549-S) SERVO ASSEMBLY NOTE: Standard Servo Size 20x40. A 2mm hole is suggested Self Tapping Screw 3x12mm It is suggested to use metal servo horn with an M3 hole. (HC549-S) NOTE: Socket Head Cap A 2mm hole is suggested Uniball M3 Screw M3x6mm...
- Page 9 SERVO VECTOR ASSEMBLY [upgrade S0087] OPTIONAL FUNCTION FOR 3D FLIGHT. IT IS NOT INCLUDED ON THE STANDARD KIT. IF YOU DO NOT USE THE VECTOR SKIP THIS PAGE. BAG3 SERVO ASSEMBLY ...x2 Mini Servo 15x35mm Seft Tapping Cap Screw M3x12mm (HC549-S) Uniball M3 Seft Tapping Cap...
- Page 10 VECTOR BAG3 IF YOU DO NOT USE THE VECTOR SKIP THIS PAGE LIZARD CONE (S0341-S) VECTOR ASSEMBLED (S0087-S) Socket Head Cap Screw M3x10mm (HC056-S) Page 8...
- Page 11 VECTOR VECTOR LINKAGE ASSEMBLY IF YOU DO NOT USE THE VECTOR SKIP THIS PAGE BAG3 Plastic Ball Link Carbon Rod 5x225mm (H0402-S) Thread rod M3x55mm (S0331-S) Thread rod M3x55mm Metal uniball M3 NOTE: Please allow plenty of time for the glue to Nut M3 cure before inserting plastic ball link onto the threaded rod.
- Page 12 REAR LANDING GEAR These 2 pages show the assembly of the SAB landing gear p/n S0303. (Optional not included in the basic KIT) RETRACT BOX, BAG4 LEFT REAR LANDING GEAR ASSEMBLY LEFT REAR LANDING GEAR ASSEMBLED Seft Tapping Screw M3x12mm (HC549-S) Seft Tapping Screw M3x12mm...
-
Page 13: Front Landing Gear
FRONT LANDING GEAR FRONT LANDING GEAR ASSEMBLY RETRACT BOX, BAG4 LIZARD FRONT RETRACT FRONT LANDING GROUP ASSEMBLED GEAR ASSEMBLY NOTE: Use loctice 243 in all screws Nylon Screw SERVO GUIDE DO NOT OVER TORQUE ASSEMBLED M4x15mm THE NYLON SCREWS (S0330-S) Flat head cap Nylon Screw Screws M2x6mm... - Page 14 FRONT LANDING GEAR BAG4T Socket Head Cap COMPONENTS PLATE ASSEMBLY : p/n S0325-S Screw M3x8mm Electronic Main Plate (HC050-S) UAT Support Vertical wall Finishing Washer M3 (H0007-S) Socket Head Cap Screw M3x8mm (HC050-S) Finishing Washer M3 (H0007-S) ELECTRONICS PLATE ASSEMBLED Finishing Washer M3 (H0007-S) Socket Head Cap...
- Page 15 WING & RUDDER WIRE INSTALLATION NOTE: Properly protect all cables from contact with internal frames. Wing Wire Rudder Wire Wing Wire Rudder Wire Page 13...
- Page 16 SERVO VECTOR & LANDING GEAR WIRE NOTE: Properly protect all cables from contact with internal frames. Landing Gear Wire Servo Wire Landing Gear Wire Servo Wire Page 14...
- Page 17 TURBINE & FUEL WIRE INSTALLATION NOTE: Properly protect all cables from contact with internal frames. Turbine Wire Fuel Pipe Page 15...
- Page 18 CANOPY CLAMP BAG5 You can adjust the canopy Clamp plate to get the perfect match with the canopy. Socket Head Cap Screws M3x10mm (HC056-S) Washer 3.2x 6x0.5mm NOTE Socket Head Cap Screws M3x10mm Seft Head Cap (HC056-S) Screws M3x10mm (HC136-S) Washer 3.2x 6x0.5mm...
- Page 19 COMPONENTS BAG5 The Following drawing shows a typical installation. NOTE: If you use Vector We recommend the most advanced possible positioning of the components to optimize the CG. Page 17...
- Page 20 COMPONENTS The Following drawing shows a typical installation. Page 18...
-
Page 21: Tank Assembly
TANK ASSEMBLY BAG6T The Following drawing shows a typical solution for kerosene aspiration. NOTE: After preparing the tank, check the absence of air leaks. Lizard Tank (S0316-S) Lizard Tank Tube (S0318-S) Breather Fuel Tube Brass Tube Tigon Tube Socket Head Cap Screw Shoulder M3x30mm (HC090-S) Page 19... - Page 22 TANK ASSEMBLY BAG6 Flat Head Cap Screw M3x8mm (HC134-S) LIZARD TANK ASSEMBLED Tank Plate (S0324-S) Straps ( 2 on the plate ) (HA045-S) Foam 20x3mm Page 20...
-
Page 23: Installation Of The Turbine
INSTALLATION OF THE TURBINE Check the assembly center point of your own turbine. Use this dimension to define the drilling position. Use the wood spacer to find the correct height position. BAG7 NOTE: We recommend installing the turbine as far forward as possible to optimize CG. VECTOR NO VECTOR Socket Head Cap... - Page 24 SERVO WING ASSEMBLY SERVO RIGHT WING ASSEMBLY SERVO LEFT WING ASSEMBLY BAG8 Flat Head Cap Flat Head Cap Screw M2.5x8mm Screw M2.5x8mm (HC125-S) (HC125-S) Servo Mount The 4 holes without (S0320-S) countersinking need for use a standard size servo. NOTE: Use loctice in all screws In this case use the bigger The 4 holes without servo mount S0042...
- Page 25 INSTALLATION OF THE SERVO WINGS BAG8 INSTALLATION SERVO LEFT WING Nut M5 INSTALLATION SERVO RIGHT WING Wing Block Screw Flat Tapping Flat Tapping Screws M3x10mm Screws M3x10mm (HC548-S) Aprrox 142mm (HC548-S) SERVO LEFT WING SERVO RIGHT WING ASSEMBLED ASSEMBLED Socket Head Cap Screw M2.5x15mm Socket Head Cap Screw M2.5x15mm (HC028-S) (HC028-S)
- Page 26 SERVO RUDDERS ASSEMBLY BAG9 Servo Horn Suggested SERVO LEFT RUDDER ASSEMBLY SERVO RIGHT RUDDER ASSEMBLY Nylon Nut M2.5 Uniball M2 Uniball M2 (HC200-S) (H0064-S) (H0064-S) Nylon Nut M2.5 20mm (HC200-S) Servo Spacer Servo Mount Plate Servo Mount Plate Servo Spacer (S0321-S) (S0321-S) (S0321-S)
- Page 27 INSTALLATION OF THE SERVO RUDDERS BAG9 LEFT RUDDER ASSEMBLY RIGHT RUDDER ASSEMBLY Lizard Rudder SX Lizard Rudder DX SERVO LEFT RUDDER SERVO RIGHT RUDDER ASSEMBLY ASSEMBLY Socket Head Cap Socket Head Cap Screws M2.5x15mm Screws M2.5x15mm (HC028-S) (HC028-S) Flat Tapping Flat Tapping Screws M3x10 Screws M3x10...
-
Page 28: Wings Installation
WINGS INSTALLATION MAIN FUSELAGE ASSEMBLED RIGHT WING ASSEMBLED Adjust the length of the M5 ring to get a lock without any play. LEFT WING ASSEMBLED Page 26... - Page 29 RUDDERS INSTALLATION BAG10 To secure the 2 Rudder in position use the 2 M3x16 screws. RIGHT RUDDER ASSEMBLED LEFT RUDDER ASSEMBLED Finishing Washer M3 (H0007-S) Finishing Washer M3 (H0007-S) Socket Head Cap Screws M3x16mm (HC068-S) Page 27...
- Page 30 SET UP AILERON, ELEVON, CANARD SETUP Mix the canard rotation with elevon and vector deflection. When the elevon surface goes up, the vector should point up. The canard should increase it's angle as shown in the figure. Set minimum two flight conditions, indicated in table below. HIGH SPEED CONDITION LOW SPEED CONDITION Deflection...
- Page 31 SET UP RUDDER SETUP Set the rudder with +30 external, -50 internal. The extra internal movement can be used as a " brake ". Mix the rudder function with Vector function. LOW SPEED CONDITION HIGH SPEED CONDITION Deflection Exponential Deflection Exponential RUDDER +30 / -30 / -20...
- Page 32 CANOPY BAG10 CANOPY Socket Head Cap Screw M4x15mm Assemble the canopy by inserting the 2 ball screws in the appropriate canopy clamps. (HC103-S) You can adjust the screw length to get the optimal connection. Ensure positioning with the M4x15mm. Lizard Canopy (S0308-S) Page 30...
- Page 33 COVER TURBINE COVER BAG10 Assemble the turbine cover as shown below. Socket Head Cap Lizard Turbine Cover Screw M3x12mm (S0319-S) (HC062-S) Socket Head Cap Screw M3x12mm (HC062-S) Page 31...
- Page 34 SET UP CENTER OF GRAVITY POSITION Set the Battery in order to get the correct position of the Center of Gravity (CG) shown. The correct CG position allows for excellent stability in flight. If it is necessary, please add weight (lead) in the nose. RADIO TEST and PRE FLIGHT CHECK BEFORE ANY FLIGHT *Set up the remote control, RX and if you use Gyro with Care.
-
Page 35: Spare Parts
SPARE PARTS LIZARD FUSELAGE LIZARD CANOPY LIZARD WING DX LIZARD WING SX (S0307-S) (S0308-S) (S0309-S) (S0310-S) - 1 x Lizard Fuselage. - 1 x Lizard Canopy. - 1 x Lizard Wing DX. - 1 x Lizard Wing SX. LIZARD CANARD DX LIZARD CANARD SX LIZARD RUDDER DX LIZARD RUDDER SX... - Page 36 SPARE PARTS LIZARD TANK LIZARD BOTTOM STABILAZERS LIZARD TANK TUBE SET LIZARD TURBINE COVER (S0316-S) (S0317-S) (S0318-S) (S0319-S) - 1 x Lizard Tank. - 2 x Lizard Bottom Stabilazers. - 1 x Lizard Tank Tube SET. - 1 x Lizard Turbine Cover. CANARD MACHENICAL STEERING HARDWARE CANOPY CLAMP...
- Page 37 SPARE PARTS LIZARD WING SERVO SUPPORT LIZARD RUDDER SERVO SUPPORT LIZARD TUBINE HARDWARE TANK PLATE + CANOPY BLOCK (S0320-S) (S0321-S) (S0323-S) (S0324-S) - 2 x CF Servo wing support. - 4 x Aluminum Servo Wing Mount Big. - 4 x Aluminum Servo Wing Mount Small. - 2 x CF Servo Mount.
- Page 38 SPARE PARTS LANDING GEAR RETRACT ( 5 - 10 kg) UAT 120cc EXHAUST PIPE (S0303-S) (S0296-S) (S0341-S) - 1 x Lizard Cone. - 1 x Landing Gear Retract SET. - 1 x SET UAT 120cc. VECTOR CARRY BAGS FOR WING WING ROCKETS (S0087-S) (S0302-S)
Need help?
Do you have a question about the M138 LIZARD TURBINE VERSION and is the answer not in the manual?
Questions and answers