Advertisement
Quick Links
Package contents:
1 x 15cm White Dot Light
4 x 15cm Warm White Dot Lights
1 x 15cm Red Dot Light
3 x 15cm Green Dot Lights
1 x 15cm Blue Dot Light
1 x 30cm White Dot Light
2 x White Strip Lights
6 x Green Strip Lights
3 x 5cm Connecting Cables
10 x 15cm Connecting Cables
1 x 50cm Connecting Cable
6 x 6-port Expansion Board
1 x 8-port Expansion Board
1 x AA Battery Pack
Extra pieces
Important things to note:
When installing dot lights
Make sure they are correctly placed (Yellow LED package is exposed). You can put they either
on the top of the studs or between studs.
Place wires on the surface or under the building blocks.
The wire can be place between the building blocks or under the block, but they should be
placed between the studs correctly.
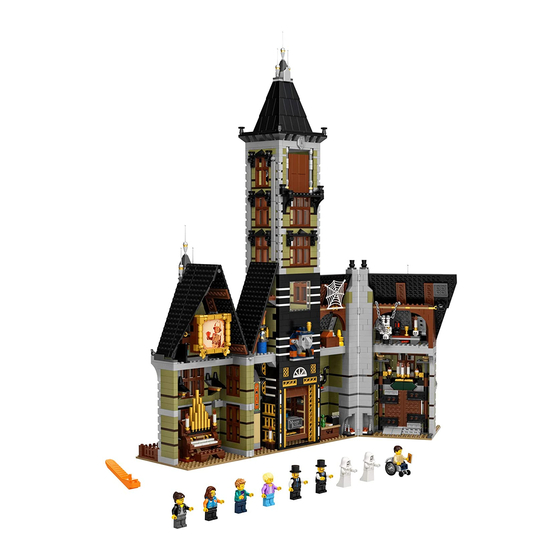
Haunted House # Lego Light Kit for 10273
Advertisement

Subscribe to Our Youtube Channel
Related Manuals for vonado 10273


Summary of Contents for vonado 10273
- Page 1 Haunted House # Lego Light Kit for 10273 Package contents: 1 x 15cm White Dot Light 4 x 15cm Warm White Dot Lights 1 x 15cm Red Dot Light 3 x 15cm Green Dot Lights 1 x 15cm Blue Dot Light ...
- Page 2 Be careful when insering the micro connector to the micro expansion board. With connecting cable side facing down, conenct the connector to the board as per below. In case of damaging the pieces, do ont force to connect the pieces. Insert the connectors to the ports.
- Page 3 Connecting cable connectors to Strip Lights Take extra care when inserting connectors to ports on the Strip Lights. Connectors can be inserted only one way. With the Strip Light facing up, ensure the side of the connector with the wires exposed is facing down. If a plug won’t fit easily into a port connector, don’t force it.
- Page 5 Instructions for installing this kit: OK, Let’s Begin! You can use the tweezer to help to install this lighting kit. Separate the house as per below. Remove the doll on front the door as per below. Remove the lamp from the left of the door, disassemble it.
- Page 6 Take a white 15cm dot light, thread the connector through the yellow 1x1 round piece, pull the cable out till the light is placed inside. Reconnect the lamp shade and the post.
- Page 7 Reconnect the lamp. Lift the following piece, thread the cable through the space as per below. Close the space.
- Page 8 Remove the following rail, disassemble it. Place the cable as per below, secure the cable with the following cone piece. Reconnect the following 1x1 plate.
- Page 9 Remove the following bricks. Place the cable as per below, reconnect the bricks to secure the cable. Pull the cable out as per below.
- Page 10 Take a 6-port expansion board, connect the connecting cable to it. Stick the expansion board to the back of the door with adhesive square. Take a white 30cm dot light, repeat the steps above to install the light at the right side.
- Page 11 Remove the following bricks, place the cable as per below before connecting it to the expansion board, reconnect the bricks to secure the cable. Connect the cable to the expansion board.
- Page 12 Take a green strip light, a 15cm connecting cable, connect the connecting cable to the strip light. Stick the strip light over the door, thread the cable through the frame to the inside.
- Page 13 Wind the cable around the post before connecting it to the expansion board. Take a 15cm connecting cable, connect it to the expansion board. Thread the cable through the following place, pull it up.
- Page 14 Take a green strip light, connect the connecting cable to it. Take a 15cm connecting cable, connect it to the strip light. Stick the strip light to the following place inside the door.
- Page 15 Lift the following piece, thread the connecting cable from the strip light through the following space as per below. Close the space to secure the cable. Remove the following skeleton, and the desk as per below.
- Page 16 Take a 6-port expansion board, connect the connecting cable to it. Tuck excess cable before sticking the expansion board to the following place. Take a 15cm green dot light, thread it through the following space.
- Page 17 Stick the light to the following place with adhesive square. Disconnect the following brown 1x12 plate. Wind the cable half around the following stud, reconnect the brown 1x12 plate to secure the cable.
- Page 18 Connect the cable to the expansion board, tuck excess cable. Take a 15cm connecting cable, connect it to the expansion board. Remove the following trunk and the yellow piece.
- Page 19 Take a 6-port expansion board, connect the connecting cable to it. Stick the expansion board to the following place with adhesive squares. Reconnect the skeleton.
- Page 20 Remove the cobweb. Take a green 15cm dot light, stick it to the following place with adhesive square. Pull the cable up as per below.
- Page 21 Lift the gray plate, thread the cable through the following space to the expansion board. Reconnect the gray plate, tuck excess cable before connecting it to the expansion board.
- Page 22 Take a red 15cm dot light, stick it to the following place with adhesive square. Thread the cable through the back of the following gray plate to the expansion board. Tuck excess cable before connecting it to the expansion board, reconnect the cobweb.
- Page 23 Take a 5cm connecting cable, a green strip light. Assemble them, and connect the connecting cable to the expansion board. Create a gap between the following pieces, thread the strip light through the gap as per below.
- Page 24 Close the gap. Take a 15cm connecting cable, connect it to the strip slight. Stick the strip light to the following floor.
- Page 25 Reconnect the trunk and the yellow piece. Remove the following desk. Remove the following operation screen, thread the cable through the following place, reconnect the screen to secure the cable.
- Page 26 Take a 6-port expansion board, connect the connecting cable to it. Stick the expansion board to the following place with adhesive squares.
- Page 27 Move onto installing light for the following trans orange piece. Remove the one from the right, disassemble it as per below. Take 2 warm white 15cm dot lights, with lighting part facing up, place the light over the stud as per below.
- Page 28 Reconnect the trans orange slope brick to secure the light. Repeat the steps above to install the other light. Reconnect the gray piece, place the cable as per below.
- Page 29 Reconnect the trans orange piece, place the cable as per below. Take a 1x2 light gray plate, secure the cable with the plate. Disconnect the following bricks, place the cable as per below.
- Page 30 Reconnect the following 2 gray bricks to secure the cable. Place the cable as per below, reconnect the light gray 1x4 plate to secure the cable. Connect the connecting cable to the expansion board.
- Page 31 Take 2 more warm white 15cm dot lights, repeat the previous steps to install lights for the left side. Connect the cables to the following expansion board. Take a 15cm connecting cable, connect it to the expansion board.
- Page 32 Thread the cable through the following door frame. Tuck excess cable, reconnect the desk to secure the cable. Take a white strip light, a 15cm connecting cable, connect the connecting cable to the strip light.
- Page 33 Connect the previous connecting cable to the other end of the strip light. Stick the strip light over the following frame, tuck excess cable as per below.
- Page 34 Thread the cable from the left side through the following space. Take a 6-port expansion board, connect the connecting cable to it. Disconnect the following desk lamp.
- Page 35 Stick the expansion board to the following place with adhesive squares. Remove the following piece. Take a 15cm connecting cable, connect it to the expansion board.
- Page 36 Take a green strip light, connect the connecting cable to it. Take a 5cm connecting cable, connect it to the spare end of the strip light. Stick the strip light to the following roof.
- Page 37 Lift the second floor, thread the 5cm connecting cable from the strip light through the following space. Close the space. Take a 6-port expansion board, connect the connecting cable to it.
- Page 38 Stick the expansion board to the following place with adhesive squares. Reconnect the piece we removed before. Remove the stand, and disassemble it.
- Page 39 Take a 15cm blue dot light, thread the cable through the golden 1x1 round plate, pull the cable out till the light is placed inside, as per below. Reconnect the light.
- Page 40 Reconnect the other pieces. Remove the following piece. Take a green 15cm dot light, a trans 2x2 round plate.
- Page 41 Place the light to the middle, secure it with a trans round plate as per below. Place the cable alongside the wall, reconnect the brown 2x4 plate as per below. Connect the cable to the expansion board.
- Page 42 Wind the cable half around the stand as per below, reconnect the stand. Tuck excess cable before connecting it to the expansion board, stick the expansion board to the following place. Continue to install lights for the jumping machine, remove the top as per below.
- Page 43 We will install lights for the jumping machine, remove the top as per below. Remove the following 2 doors. Divide the top into 2 parts. Take a green strip light, a 50cm connecting cable, connect the connecting cable to the strip light.
- Page 44 Stick the strip light to the following place. Remove the following light gray piece, wind the connecting cable half around the green stud as per below.
- Page 45 Reconnect the light gray piece to secure the cable, pull the cable downward. Reconnect the door. Reconnect the roof as per below.
- Page 46 Lift the following piece, thread the 50cm connecting cable through the following space (you may need a tweezer) as per below. Pull the cable aside, reconnect the space to secure the cable. Remove the following green skeleton and the trunk.
- Page 47 Place the cable as per below, reconnect the skeleton and the trunk to secure the cable. Continue to install lights for the house at the left. Take a 15cm connecting cable, connect it to the expansion board next to the blue stand.
- Page 48 Place the cable as per below. Take an 8-port expansion board, connect the connecting cable to it. Remove the roof at the left, stick the expansion board to the following place.
- Page 49 Take a green strip light, a 5cm connecting cable, connect the connecting cable to the strip light. Stick the strip light to the following place, pull the cable out and pull it toward the expansion board. Connect the connecting cable to the expansion board as per below.
- Page 50 Take a white strip light, a 15cm connecting cable, connect the connecting cable to the strip light as per below. Turn the roof to its side, stick the strip light to the following place. Wind the connecting cable twice around the following piece.
- Page 51 Connect the connecting cable to the expansion board. Lift the following piece. Take the battery pack, thread the connecting cable through the following space to the inside.
- Page 52 Close the space, stick the battery pack to the following place with adhesive squares. Connect the connecting cable from the battery pack to the expansion board, tuck excess cable as per below.
- Page 53 Reconnect the pieces we removed before. This completes installation of this LED Lighting Kit. ENJOY!
Need help?
Do you have a question about the 10273 and is the answer not in the manual?
Questions and answers