Table of Contents
Advertisement
Quick Links
Advertisement
Table of Contents

Subscribe to Our Youtube Channel
Related Manuals for Ingersoll-Rand Schlage AMGtime G Series


Summary of Contents for Ingersoll-Rand Schlage AMGtime G Series
- Page 1 GT-400 Terminal User’s Guide...
- Page 2 No part of this publication may be reproduced in any form without the express written permission of Recognition Systems LLC. Recognition Systems LLC is a wholly owned subsidiary of Ingersoll-Rand Company Limited, and operates through its Ingersoll Rand Security Technologies business sector under the brand name Schlage.
-
Page 3: Table Of Contents
Table of Contents Introduction ..........................1 The Least You Should Know..........................1 The GT-400 Terminal............................1 Biometrics ................................1 Principles of Operation............................2 Database Synchronization..........................2 Examples ...............................2 Command Menus ............................2 Verification..............................2 Features ................................3 Specifications ..............................4 Using This Guide..............................5 Types of Keys...............................5 Important Information....................... 7 Network Setup and Ethernet Switches........................7 Power-on and Shutdown Precautions.........................7 Synchronize the reader before enrolling any users.....................7... - Page 4 Table of Contents GT-400 Terminal User’s Guide Terminal Setup........................25 Network Mode Configuration ..........................25 Using the Terminal’s Command Menus ..................... 25 Using the Terminal’s Web Server....................... 26 Verifying Synchronization ........................... 27 Check the Terminal Status in the Terminal Command Menus............. 27 Change the Ready Screen Message ....................
- Page 5 GT-400 Terminal User’s Guide Table of Contents Command Menu Reference....................43 Command Menu Structure ..........................43 Setup Menu...............................44 Timezone Menu ............................44 Edit Timezone ............................44 List Timezones .............................45 Add Timezone ............................45 Print Setup..............................46 Set PrintBookings..........................46 Set Baud Rate............................46 General Setup ............................47 Set Time&Attend ..........................48 Set Terminal Time..........................48 Set LocaleTimezone ..........................49 Set ID Length ............................49...
- Page 6 Table of Contents GT-400 Terminal User’s Guide Template Resolution ..........................71 Set Passwords............................71 Set CLI Access Pwd..........................71 Clear UserDB ............................. 72 Clear UserDB ............................72 Factory Settings............................72 Factory Settings ........................... 72 Reject Threshold ............................73 Set Reject Threshold..........................73 User Management ............................
- Page 7 GT-400 Terminal User’s Guide Table of Contents Troubleshooting Guide ......................95 Viewing Terminal Status ...........................95 Via the Terminal ............................95 Via a Web Browser.............................95 Telnet ................................95 Choosing a Telnet Client ..........................96 Logging in and out ............................96 Using PuTTY ..............................97 Changing the password ..........................98 Navigating the file system...........................98 Changing Directories with cd .......................98 Viewing Terminal Processes with ps....................98...
- Page 8 Table of Contents GT-400 Terminal User’s Guide...
-
Page 9: Introduction
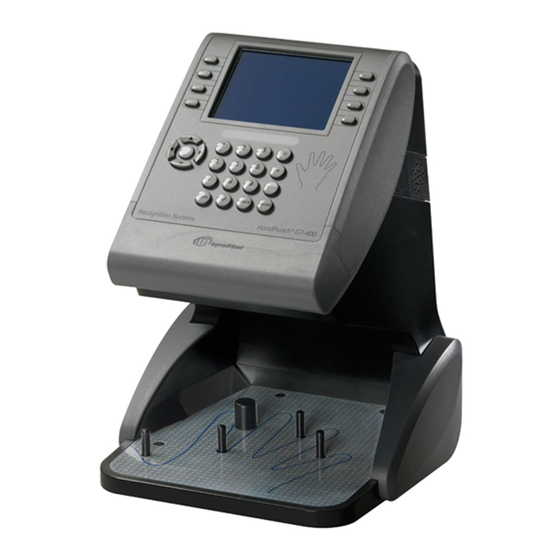
Introduction The Least You Should Know Before installing and setting up the terminal, you should read and understand “Important Information” on page 7. You can also find helpful techniques in “Tips and Tricks” on page 105. The GT-400 Terminal The GT-400 terminal is the first member of Schlage’s G-Series biometric hand geometry time and attendance terminals. -
Page 10: Principles Of Operation
Introduction: Principles of Operation GT-400 Terminal User’s Guide Principles of Operation The GT-400 terminal uses low-level infrared light, optics and a CMOS (IC chip) camera to capture a three-dimensional image of the hand. Using advanced microprocessor technology, the terminal converts the image to an encrypted electronic template. It stores the template in a database with the user’s ID number. -
Page 11: Features
GT-400 Terminal User’s Guide Introduction: Features Features Function Keys LCD Screen Function keys are used to select menu The LCD screen shows options displayed on the LCD screen. menus and messages on the terminal. Navigation Keypad The navigation keypad is used to scroll LED Bar through lists or to move forward or The LED bar gives a visual... -
Page 12: Specifications
Introduction: Specifications GT-400 Terminal User’s Guide Specifications Size: 8 inches (20.32 cm) wide by 11.18 inches (28.40 cm) high by 7.52 inches (19.10 cm) deep with optional battery backup, height is 12.04 inches (30.58 cm) Weight: 5.60 lbs (2.54 kg) – 6.90 lbs (3.13 kg) with optional backup battery Power: 12 VDC nominal (10.8 to 13.5 VDC), 4.5 Watts max. -
Page 13: Using This Guide
GT-400 Terminal User’s Guide Introduction: Using This Guide Using This Guide Types of Keys There are three types of keys used to make entries into the terminal. Each will be indicated in this guide as shown below. Type of Key Location and Purpose Symbol Function Key... - Page 14 Introduction: Using This Guide GT-400 Terminal User’s Guide...
-
Page 15: Important Information
Important Information Field installers and site administrators should read this section thoroughly before attempting to install or configure a GT-400 site. It explains important concepts and lists required administrative operations. Network Setup and Ethernet Switches For best performance, we recommend using ethernet switches to connect the terminal(s) to the host, rather than ethernet hubs. -
Page 16: Terminal Configuration Options
Important Information: Terminal Configuration Options GT-400 Terminal User’s Guide Terminal Configuration Options There are three (3) ways to configure a new terminal. The table below lists each of the three methods for terminal network setup, as well as information on which situations to which each method best applies. -
Page 17: Start-Up Sequence
GT-400 Terminal User’s Guide Important Information: Start-up Sequence Start-up Sequence When you apply power to a terminal, it goes through the start-up sequence. First the operating system loads. Then the terminal checks to see if there are any software updates (from the host application). Finally, the terminal application loads. -
Page 18: Server Network Considerations
Important Information: Server Network Considerations GT-400 Terminal User’s Guide Server Network Considerations Your network configuration may be configured with firewalls, or security software that is designed to report or deny certain operations. For this reason, certain features and commands in the GT-400 terminal (listed below) may not work, or cause the terminal to be inoperable if your network denies those actions. -
Page 19: Terminal Installation
Terminal Installation Terminal Placement The recommended height for the terminal's platen is between 40 and 48 inches (102 - 122 cm) from the finished floor. This height conforms to the Americans with Disabilities Act (ADA) standards (40 inches is recommended for ADA standards). All terminals within a site should be placed at the same height. -
Page 20: Removing The Terminal From The Box
Terminal Installation: Removing the Terminal from the Box GT-400 Terminal User’s Guide Removing the Terminal from the Box Remove any accessories from the box. Remove the packing materials from the top of the terminal. Lift the terminal from the box. Do not touch the underside of the terminal face. -
Page 21: Wall Preparation
GT-400 Terminal User’s Guide Terminal Installation: Wall Preparation Wall Preparation These directions and provided hardware are for installation on a hollow wall only. For installation on a solid wall, other means should be used. Measure and mark a point 49 inches (124.5 cm) from the surface of the finished floor. - Page 22 Terminal Installation: Wall Preparation GT-400 Terminal User’s Guide Hang the wall plate from the leveling hole located near the top of the wall plate. Use a bubble level to ensure that the wall plate is level. Figure 3.6— Leveling the Terminal, Step Two Mark the locations of the two upper Upper mounting holes and the two lower...
- Page 23 GT-400 Terminal User’s Guide Terminal Installation: Wall Preparation Remove the wall plate and nail. Upper Mounting Holes Drill upper and lower mounting holes. For a concealed wiring connection, drill a ¹⁄₂” hole in the center of the outlined rear cable entry hole. Additional holes may be drilled to enlarge hole for concealed wiring connection if necessary.
-
Page 24: Attaching The Wall Plate
Terminal Installation: Attaching the Wall Plate GT-400 Terminal User’s Guide Attaching the Wall Plate These directions and provided hardware are for installation on a hollow wall only. For installation on a solid wall, other means should be used. Pull all wires through holes in wall (if necessary) and make sure wires are clear of wall plate. Install the four auger-style fasteners that have been provided into the mounting hole locations. -
Page 25: Hang Terminal And Run Wires
GT-400 Terminal User’s Guide Terminal Installation: Hang Terminal and Run Wires Hang Terminal and Run Wires If the side covers are attached to the terminal, they must be removed before hanging the terminal on the wall plate. See “Removing/Installing Side Covers” on page 22 for more information. Slide slots in terminal over hooks on wall plate. - Page 26 Terminal Installation: Hang Terminal and Run Wires GT-400 Terminal User’s Guide There are several options for running the wiring to the terminal. Run wiring through hole in wall plate. Run wiring through slot in terminal. Remove shaded material if using Run wiring through battery cover option c.
-
Page 27: Making Back Board Connections
GT-400 Terminal User’s Guide Terminal Installation: Making Back Board Connections Making Back Board Connections Use caution when making connections to the back board to avoid damage. Be aware of possible damage due to electrostatic discharge (ESD). ESD is of particular concern when working on carpeted surfaces and in dry environments. -
Page 28: Attaching The Ferrite Clip
Terminal Installation: Attaching the Ferrite Clip GT-400 Terminal User’s Guide Attaching the Ferrite Clip The ferrite clip must be attached to the terminal’s power cord in order to be FCC compliant. Make a loop in the power cord approximately six (6) inches from the power supply. -
Page 29: Printer Setup (Optional)
GT-400 Terminal User’s Guide Terminal Installation: Printer Setup (Optional) Printer Setup (Optional) You may want to install a printer to provide a paper receipt of each user booking. A booking is the interaction that is recorded each time a user punches in or out of the terminal. If you want to install a printer after initial terminal setup, you will need to shut down the terminal first and then perform the following steps. -
Page 30: Removing/Installing Side Covers
Terminal Installation: Removing/Installing Side Covers GT-400 Terminal User’s Guide Removing/Installing Side Covers The side covers must be removed in order to attach the terminal to the wall plate. The terminal may be shipped without the side covers attached. Side Cover Figure 3.14—... -
Page 31: Installing Side Covers
GT-400 Terminal User’s Guide Terminal Installation: Removing/Installing Side Covers Installing Side Covers Place outside ridge of side cover under edge of terminal body. Rotate side cover toward terminal body and snap into place. Figure 3.16— Installing the Side Covers... -
Page 32: Attaching The Terminal To The Wall Plate
Terminal Installation: Attaching the Terminal to the Wall GT-400 Terminal User’s Guide Attaching the Terminal to the Wall Plate Remove any dust and debris from the mounting site before attaching the terminal. Dust and debris can seriously affect the performance of the terminal. Choose the standard Phillips head screws or the security head screws for installation. -
Page 33: Terminal Setup
Terminal Setup Network Mode Configuration Do not apply power to the terminal until you understand the network setup procedure. The terminal should be synchronized with the host application before creating any content on the terminal. If content is created on the terminal before it is synchronized with the host application, content may be lost when synchronization occurs. -
Page 34: Using The Terminal's Web Server
Terminal Setup: Network Mode Configuration GT-400 Terminal User’s Guide • Host Username Use the alpha-numeric keypad to enter the username. It must match a username of a valid host account. See “Set Host Username” on page 55 for more information. Wait until the terminal LED turns blue, indicating host application has been found. -
Page 35: Verifying Synchronization
GT-400 Terminal User’s Guide Terminal Setup: Network Mode Configuration Verifying Synchronization There are a number of ways to quickly verify that your terminal is synchronizing with the host application. Check the Terminal Status in the Terminal Command Menus Press Maintenance Menu. Press Terminal Status. -
Page 36: Demo Mode Configuration
Terminal Setup: Demo Mode Configuration GT-400 Terminal User’s Guide Demo Mode Configuration When the terminal is started for the first time, the synchronization screen will be displayed. When the terminal is not connected to a host application, synchronization will not occur and the terminal should be switched to standalone mode. -
Page 37: Creating The Site Administrator Account
GT-400 Terminal User’s Guide Terminal Setup: Creating the Site Administrator Account Creating the Site Administrator Account The first time the terminal is booted up, there are no user accounts. The first user account that is assigned to the terminal will be the site administrator account. This can be changed later, but this account must be created before any other actions can be performed. -
Page 38: Shutting Down The Terminal Using Telnet
Terminal Setup: Shutting Down the Terminal GT-400 Terminal User’s Guide Shutting Down the Terminal Using Telnet If the terminal cannot be shut down using the terminal interface, see “Shutting down the terminal via telnet” on page 99. -
Page 39: Basic Operations
Basic Operations The Terminal Interface Soft Soft Function Function Keys Keys LED Bar Navigation Finger Placement Guide Keypad PQRS WXYZ ALPHA CAPS SPACE ENTER <>/ Figure 5.1— The Terminal Interface... -
Page 40: Startup Screens
Basic Operations: Startup Screens GT-400 Terminal User’s Guide Startup Screens The first time you boot up the terminal, the "Hand" logo will appear. The hand logo will disappear after the terminal is completely booted. Figure 5.2— Hand Screen The Introduction Screen is the default Schlage Biometrics screen. -
Page 41: Tips And Tricks
GT-400 Terminal User’s Guide Basic Operations: Tips and Tricks Tips and Tricks Terminal Time-Out • The terminal will go back one screen level after ten (10) seconds of inactivity. The terminal will return to the default screen after thirty (30) seconds of inactivity. •... -
Page 42: Creating And Enrolling Users
Basic Operations: Creating and Enrolling Users GT-400 Terminal User’s Guide Creating and Enrolling Users Creating an ID Numbering System An ID numbering system should be created before entering the first user into the terminal. ID Numbers (RPINs) are used during user enrollment and verification. Use the following guidelines when designing an ID numbering system. -
Page 43: Create A User From The Terminal
GT-400 Terminal User’s Guide Basic Operations: Setting User Data Create a User from the Terminal Users should be created using the host application. See “Add User” on page 86 for more information. Log into the terminal as an administrator. See “Administrator Authentication” on page 33 for more information. Press User Management. -
Page 44: Edit Authority
Basic Operations: Setting User Data GT-400 Terminal User’s Guide Edit Authority See “Edit Authority” on page 75 for more information. Log into the terminal as an administrator. See “Administrator Authentication” on page 33 for more information. Press User Management. Press List Users. -
Page 45: Edit Threshold
GT-400 Terminal User’s Guide Basic Operations: Setting User Data Edit Threshold See “Edit Threshold” on page 76 for more information. Log into the terminal as an administrator. See “Administrator Authentication” on page 33 for more information. Press User Management. Press List Users. -
Page 46: Remove A User
Basic Operations: Setting User Data GT-400 Terminal User’s Guide Remove a User See “Remove User” on page 79 for more information. Log into the terminal as an administrator. See “Administrator Authentication” on page 33 for more information. Press User Management. Press List Users. -
Page 47: Setting Date And Time
GT-400 Terminal User’s Guide Basic Operations: Setting Date and Time Setting Date and Time The date and time are usually set using the host application. Set Locale Time Zone See “Set LocaleTimezone” on page 49 for more information. Log into the terminal as an administrator. See “Administrator Authentication”... -
Page 48: Set Terminal Time
Basic Operations: User Authentication GT-400 Terminal User’s Guide Set Terminal Time See “Set Terminal Time” on page 48 for more information. Log into the terminal as an administrator. See “Administrator Authentication” on page 33 for more information. Press Setup Menu. Press General Setup. -
Page 49: Rebooting The Terminal
GT-400 Terminal User’s Guide Basic Operations: Rebooting the Terminal Rebooting the Terminal Rebooting the Terminal Using the Terminal Interface Log in to the terminal as an administrator. See “Administrator Authentication” on page 33 for more information. Press Maintenance Menu. Press Reboot. - Page 50 Basic Operations: Rebooting the Terminal GT-400 Terminal User’s Guide...
-
Page 51: Command Menu Reference
Command Menu Reference Command Menu Structure The following is a map of all the commands that can be accessed on the terminal. Each command is described in detail in the following sections of this guide. Setup Menu Security Menu Display Setup Timezone Menu Set Company Name Clear Setup... -
Page 52: Setup Menu
Command Menu Reference: Setup Menu GT-400 Terminal User’s Guide Setup Menu Timezone Menu A timezone is a period of time during which user access to the terminal is granted. Every user must have a timezone assigned, either directly or through a group, in order to access the terminal. -
Page 53: List Timezones
GT-400 Terminal User’s Guide Command Menu Reference: Setup Menu List Timezones List Timezones lists all the timezones for the Default: none Range: none terminal. Dependencies: none Who: A site administrator can list timezones at any time. Log into the terminal as an administrator. See “Administrator Authentication”... -
Page 54: Print Setup
Command Menu Reference: Setup Menu GT-400 Terminal User’s Guide Print Setup The Print Setup menu is used to configure print settings. This information is only necessary when a printer is connected to the terminal. See “Printer Setup (Optional)” on page 21 for more information. Set PrintBookings Set PrintBookings is used to enable or disable Default: Disabled... -
Page 55: General Setup
GT-400 Terminal User’s Guide Command Menu Reference: Setup Menu General Setup Set Terminal Date Set Terminal Date is used to set the date on a Default: none Range: none demo terminal. If the terminal is in a networked Dependencies: none mode, the terminal will get the date from the host Who: A site administrator should set the server. -
Page 56: Set Time&Attend
Command Menu Reference: Setup Menu GT-400 Terminal User’s Guide Set Time&Attend Set Time&Attend is used to enable or disable Default: Disabled Range: none time and attendance mode for the terminal. When Dependencies: none enabled, the user will be prompted to punch in or Who: A site administrator should set this out before the hand verification. -
Page 57: Set Localetimezone
GT-400 Terminal User’s Guide Command Menu Reference: Setup Menu Set LocaleTimezone Set LocaleTimezone is used to set the time zone Default: Pacific Standard Time (PST) Range: none of a demo terminal based on the locality of the Dependencies: none terminal itself. Otherwise, the terminal will acquire Who: A site administrator should set the the time zone from the host application. -
Page 58: Set Logfile Size Factor
Command Menu Reference: Setup Menu GT-400 Terminal User’s Guide Set LogFile Size Factor Set LogFile Size Factor will define a percentage Default: 10% Range: 0% - 80% of disk space (the SD card) to be used for the log Dependencies: Back up LogFiles need to be file. -
Page 59: Set Door Unlock Time
GT-400 Terminal User’s Guide Command Menu Reference: Setup Menu Set Door Unlock Time Set Door Unlock Time is used to define the time, Default: 0 Range: None (0 is defined as OFF) in seconds, that the relay (J5 connector) will fire Dependencies: None and remain active after verification. -
Page 60: Set Beeper
Command Menu Reference: Setup Menu GT-400 Terminal User’s Guide Set Beeper Set Beeper is used to enable or disable the Default: Enabled Range: none audible beep on the terminal. The display of Dependencies: none this menu will indicate the current state of Who: A site administrator can enable or the beeper. -
Page 61: Holiday Menu
GT-400 Terminal User’s Guide Command Menu Reference: Setup Menu Holiday Menu Holidays are used to provide a break in a normal timezone. Edit Holiday Edit Holiday is used to edit holidays already set Default: none Range: none up in the terminal. The holiday end date, begin Dependencies: none date, end time, begin time and name may all be Who: A site administrator can edit a holiday... -
Page 62: Add Holiday
Command Menu Reference: Setup Menu GT-400 Terminal User’s Guide Add Holiday Add Holiday is used to set and configure holidays Default: none Range: none for the terminal. Enter the holiday name, start Dependencies: none time and end time to build a holiday. Who: A site administrator can add a holiday at any time. -
Page 63: Network Setup
GT-400 Terminal User’s Guide Command Menu Reference: Setup Menu Network Setup The Network Setup menu is used to configure information that will be used by the terminal to communicate with the host application. This information is only necessary when the terminal is used in network mode. -
Page 64: Go To Standalone Mode/Network Mode
Command Menu Reference: Setup Menu GT-400 Terminal User’s Guide Go To StandAlone Mode/Network Mode The display of this menu indicates the current Default: enabled Range: none mode of the terminal. Dependencies: none Go To StandAlone Mode is only displayed when Who: A network administrator can change the terminal is running in networked mode. -
Page 65: Set Host Password
GT-400 Terminal User’s Guide Command Menu Reference: Setup Menu Set Host Password The host password is used to authenticate with Default: none Range: none the host application. This password must match a Dependencies: none valid user account password on the host Who: A network administrator should set application in order for synchronization to occur. -
Page 66: Set Clisrv Port
Command Menu Reference: Setup Menu GT-400 Terminal User’s Guide Set CLISrv Port Set CLISrv Port defines the port that will be used Default: 8090 Range: None to connect to the terminal's Command Line Dependencies: Site's network specifications. Interface (CLI). Who: A site administrator may change the port from the default to comply with site specifications. -
Page 67: Xmlrpc Svr Setup
GT-400 Terminal User’s Guide Command Menu Reference: Setup Menu XMLRPC Svr Setup XMLRPC Svr Setup enables or disables the XML- Default: enabled Range: none RPC server. The display of this menu will indicate Dependencies: none the current state of the XML-RPC server. If it is Who: A network administrator should set disabled, press enable to enable the XML-RPC XML-RPC server during initial... -
Page 68: Set Static/Dhcp
Command Menu Reference: Setup Menu GT-400 Terminal User’s Guide Set Static/DHCP Set Static/DHCP is used to either set a static IP Default: DHCP Range: none address for the terminal or to use DHCP. If DHCP Dependencies: none is enabled, enter an IP address to switch to static. Who: A network administrator should set If static is enabled, press DHCP to switch to Static/DHCP during initial terminal... -
Page 69: Display Setup
GT-400 Terminal User’s Guide Command Menu Reference: Setup Menu Display Setup The Display Setup menu is used to configure information that is displayed on the LCD screen. Set CompanyName The Company Name is the first line of text that is Default: Schlage Range: none displayed on the terminal screen. -
Page 70: Edit Time Format
Command Menu Reference: Setup Menu GT-400 Terminal User’s Guide Edit Time Format Edit Time Format is used to edit a time format Default: none Range: none specification that is already contained in the Dependencies: none terminal. Time formats control the way the time is Who: A site administrator can edit a time displayed on the terminal screen. -
Page 71: Add Time Format
GT-400 Terminal User’s Guide Command Menu Reference: Setup Menu Add Time Format Add Time Format is used to add a time format Default: none Range: none specification that is contained in the terminal. Dependencies: none Time formats control the way the time is displayed Who: A site administrator can add a time on the terminal screen. -
Page 72: Set Time Format
Command Menu Reference: Setup Menu GT-400 Terminal User’s Guide Set Time Format Set Time Format is used to set the time format Default: none Range: none that will be used to display the time on the Dependencies: none terminal screen. Who: A site administrator can set a time This function is available only when the format at any time. -
Page 73: Edit Date Format
GT-400 Terminal User’s Guide Command Menu Reference: Setup Menu Edit Date Format Edit Date Format is used to edit a date Default: none Range: none format specification that is already Dependencies: none contained in the terminal. Date formats Who: A site administrator can edit a date control the way the date is displayed on the format at any time. -
Page 74: Add Date Format
Command Menu Reference: Setup Menu GT-400 Terminal User’s Guide Add Date Format Add Date Format is used to add a date format Default: none Range: none specification that is contained in the terminal. Dependencies: none Date formats control the way the time is displayed Who: A site administrator can add a date on the terminal screen. -
Page 75: Set Date Format
GT-400 Terminal User’s Guide Command Menu Reference: Setup Menu Set Date Format Set Date Format is used to set the date format Default: none Range: none that will be used to display the date on the Dependencies: none terminal screen. Who: A site administrator can set a date This function is available only when the format at any time. -
Page 76: Set Language
Command Menu Reference: Security Menu GT-400 Terminal User’s Guide Set Language Set Language is used to change language on the Default: English Range: none terminal. Dependencies: none Who: A site administrator should set this value during initial configuration of the terminal. Log into the terminal as an administrator. -
Page 77: Biometric Setup
GT-400 Terminal User’s Guide Command Menu Reference: Security Menu Biometric Setup The Biometric Setup Menu is used to configure the level of security at the terminal. Biometric security is determined by a combination of template resolution and the number of access tries. Min High Res Update Count Min High Resolution Update Count defines the Default: 3... -
Page 78: Placements Per Try
Command Menu Reference: Security Menu GT-400 Terminal User’s Guide Placements Per Try Placements Per Try defines the number of hand Default: 3 Range: 0-31 placements allowed during a verification attempt. Dependencies: none Once the number of placements has been Who: A site administrator specifies this exceeded, the user ID will be locked out of the value in coordination with Number of terminal until a site administrator verifies at the... -
Page 79: Template Resolution
GT-400 Terminal User’s Guide Command Menu Reference: Security Menu Template Resolution Template Resolution defines the template Default: Dependent on kinds of readers in the network. If the network contains only resolution for the terminal. Choose Low to use G-Series readers, the default is High. only low resolution templates for enrollments and If the network contains F-Series and verifications. -
Page 80: Clear Userdb
Command Menu Reference: Security Menu GT-400 Terminal User’s Guide Clear UserDB Clear UserDB Clear UserDB will remove all users from the Default: none Range: none terminal. Dependencies: none Who: A site administrator can use Clear This function cannot be undone. However, all UserDB to remove all users from the users will be restored to the terminal the next terminal. -
Page 81: Reject Threshold
GT-400 Terminal User’s Guide Command Menu Reference: Security Menu Reject Threshold At each verification attempt, the hand placement is compared to the user template. A score that reflects how closely the placement and the template match is assigned. The lower the score, the closer the match. -
Page 82: User Management
Command Menu Reference: User Management GT-400 Terminal User’s Guide User Management Edit User Edit User is used to edit a user that is already Default: none Range: none entered in the terminal. Dependencies: none Who: A site administrator can edit a user in the terminal at any time. -
Page 83: Edit Name
GT-400 Terminal User’s Guide Command Menu Reference: User Management Edit Name Edit Name is used to change a user’s name. First Default: none Range: none name, last name and middle name are edited Dependencies: none separately. Who: A site administrator can change a user’s name in the terminal at any time. -
Page 84: Edit Threshold
Command Menu Reference: User Management GT-400 Terminal User’s Guide Edit Threshold Each time a user verifies at the terminal, a Default: 0 Range: 0-250 number that represents the closeness of the Dependencies: none match between the template (created at Who: A site administrator can edit the enrollment) and the actual hand is recorded. -
Page 85: Edit Timezone
GT-400 Terminal User’s Guide Command Menu Reference: User Management Edit Timezone Edit timezone is used to change the timezone that Default: none Range: none is associated with a user's profile. Select the user. Dependencies: none Then select the timezone you want to associate Who: A site administrator can change the with that user's profile. -
Page 86: Enroll User
Command Menu Reference: User Management GT-400 Terminal User’s Guide Enroll User Enroll User records a user's hand template for Default: none Range: none verification. After the user has been entered into Dependencies: User must be entered into the the terminal, a site administrator should instruct terminal before enrollment. -
Page 87: Generate Punch
GT-400 Terminal User’s Guide Command Menu Reference: User Management Generate Punch Generate Punch generates a punch for a Default: none Range: none particular user. Dependencies: none Who: A site administrator can generate a punch for a user at any time. Log into the terminal as an administrator. -
Page 88: List Credentials
Command Menu Reference: User Management GT-400 Terminal User’s Guide List Credentials List Credentials is used to list all credentials Default: none Range: none associated with a user. Select the user and then Dependencies: none select List Credentials. Who: A site administrator can list the credentials for a user at any time. -
Page 89: No Hand Enroll
GT-400 Terminal User’s Guide Command Menu Reference: User Management No Hand Enroll No Hand Enroll can be used to enroll a user who Default: none Range: none cannot perform normal enrollment or verification, Dependencies: User must be entered into the or to enroll a user who is not present. -
Page 90: Edit Epin
Command Menu Reference: User Management GT-400 Terminal User’s Guide Edit EPIN An EPIN is used for verification if the HPU Default: none Range: none becomes non-functional. Select the user. Then Dependencies: User must be entered into the add an EPIN to the user. terminal before an EPIN can be added. -
Page 91: Edit Access Grant
GT-400 Terminal User’s Guide Command Menu Reference: User Management Edit Access Grant Edit Access Grant is used to edit an access grant Default: none Range: none for a particular user. Access grants are used to Dependencies: none grant access to a user for a particular, recurring Who: A site administrator can edit an time period. -
Page 92: List Access Grants
Command Menu Reference: User Management GT-400 Terminal User’s Guide List Access Grants List Access Grants is used to list all access grant Default: none Range: none for a particular user. Access grants are used to Dependencies: none grant access to a user for a particular, recurring Who: A site administrator can list access time period. -
Page 93: Add Access Grant
GT-400 Terminal User’s Guide Command Menu Reference: User Management Add Access Grant Add Access Grant is used to add an access grant Default: none Range: none to a particular user. Access grants are used to Dependencies: none grant access to a user for a particular, recurring Who: A site administrator can add an time period. -
Page 94: List Bookings
Command Menu Reference: User Management GT-400 Terminal User’s Guide List Bookings List Bookings lists all of the bookings (punches, Default: none Range: none etc.) for a particular user. Dependencies: none This information is only accurate to within the Who: A site administrator can list bookings last host synchronization. -
Page 95: Maintenance Menu
GT-400 Terminal User’s Guide Command Menu Reference: Maintenance Menu Maintenance Menu Partial Sync Now If changes to users are made to the terminal that Default: none Range: none need to be immediately implemented, Partial Dependencies: none Sync Now can be used. Partial Sync Now will Who: A site administrator can use Partial start a database synchronization process Sync Now to synchronize user data... -
Page 96: Terminal Status
Command Menu Reference: Maintenance Menu GT-400 Terminal User’s Guide Terminal Status The information contained in the Terminal Status Default: none Range: none menu is tremendously important in Dependencies: none troubleshooting a terminal problem. The first step Who: A site administrator can access this of determining the cause of nearly any problem information at any time. -
Page 97: Delete Sent Interactions
GT-400 Terminal User’s Guide Command Menu Reference: Maintenance Menu Delete Sent Interactions Delete Sent Interactions also clears interactions Default: none Range: none from the database on the terminal. The database Dependencies: none contains all interactions with the terminal. Only Who: A site administrator can use Delete interactions that have been sent to the host Sent Interactions to remove old application will be cleared from the database... -
Page 98: Last Punch
Command Menu Reference: Last Punch GT-400 Terminal User’s Guide Last Punch Last Punch Last Punch shows the last punch into the Default: none Range: none terminal. The user's last name, status (IN or OUT) Dependencies: none and date and time of punch is displayed. Who: A site administrator can view the last This information is only accurate to within the punch into the terminal. -
Page 99: User Education
User Education Hand Geometry Reader Basics The terminal is easy to use and non-threatening. However, most people have never used a biometric terminal. Training users on how the terminal works and how to use it will eliminate most fears and concerns before they occur. -
Page 100: Read Score
User Education: Read Score GT-400 Terminal User’s Guide Read Score When a user verifies his/her hand, a score of the verification quality is generated. The score is displayed on the terminal’s display after a successful verification. The score can be found in the interaction data for the verification. This information is viewable in the Host Application. -
Page 101: Led Bar Indications
GT-400 Terminal User’s Guide User Education: LED Bar Indications LED Bar Indications Idle Event Connected to host Blue application Not connected to host Amber application BSP corrupted Table 7.2: LED Bar Indications When the Terminal is Idle During Verification Operation Event Beeps During Keypad Entry... -
Page 102: Cleaning The Terminal
User Education: Cleaning the Terminal GT-400 Terminal User’s Guide Cleaning the Terminal Inspect and clean the terminal regularly to maintain optimum performance. Clean the platen, side mirror, reflector, and the window above the platen using a clean cloth dampened with ordinary, non- abrasive window cleaner. -
Page 103: Troubleshooting Guide
Troubleshooting Guide Viewing Terminal Status Via the Terminal The simplest step to take for any problem is simply viewing the terminal status. It is useful to see the last network activity in which the terminal was involved. If you call technical support you will be asked to provide this information, since it lists all of the software versions running in the terminal. -
Page 104: Choosing A Telnet Client
Troubleshooting Guide: Telnet GT-400 Terminal User’s Guide Choosing a Telnet Client The DOS prompt will not function as a telnet client to connect to your terminal. HyperTerminal comes with Windows, and can be used to create a telnet connection to your terminal. It is not recommended because it has limited viewing and saving capabilities. -
Page 105: Using Putty
GT-400 Terminal User’s Guide Troubleshooting Guide: Telnet Using PuTTY Enter the IP address for the terminal. See “Terminal Status” on page 88 for information on obtaining the terminal’s IP address. Enter the telnet port number, 23. Click the Telnet radio button. Enter a title for the new profile. -
Page 106: Changing The Password
Troubleshooting Guide: Telnet GT-400 Terminal User’s Guide Changing the password Since all terminals come with a default telnet password 1520rsi, you may wish to change it for security. The command is simple: At the prompt, type passwd root. This tells the shell you wish to change the password for the user root. -
Page 107: Shutting Down The Terminal Via Telnet
GT-400 Terminal User’s Guide Troubleshooting Guide: Telnet Shutting down the terminal via telnet If you would rather shutdown the terminal as opposed to rebooting it, the command is shutdown. Shutting down the application via telnet When you shutdown the terminal with the poweroff argument, you are telling the terminal to completely power down completely. -
Page 108: The Terminal Log File
Troubleshooting Guide: Telnet GT-400 Terminal User’s Guide The Terminal Log File This log file resides in the terminal and provides a very clear picture as to what's going on in the terminal. If you are experiencing any kind of issue, your first step should be to check the terminal's log file. -
Page 109: Returning The Terminal To Factory Settings
GT-400 Terminal User’s Guide Troubleshooting Guide: Telnet Returning the Terminal to Factory Settings If you have been using a terminal in demo mode and want to convert it to network mode, you must first delete the database and log files on the terminal. This can be done either through telnet or through the terminal interface. -
Page 110: The Terminal Command Line Interface (Cli)
Troubleshooting Guide: Telnet GT-400 Terminal User’s Guide The Terminal Command Line Interface (CLI) The command line interface (CLI) is a program that runs within a telnet session. It allows you to explore the actual database: users, interactions, etc. If your log is not giving you very much information, you could choose to explore the terminal through the CLI to see if you can determine what the problem is. -
Page 111: Retrieving Sent/Unsent Interactions From Terminal
GT-400 Terminal User’s Guide Troubleshooting Guide: Telnet Retrieving Sent/Unsent Interactions from Terminal When host terminal connection is present, all interactions performed at terminal will be pushed to host at real time and saved in host database. If host terminal connection is not present, interactions generated in terminal will be saved in terminal and to be pushed to host whenever host terminal connection is resumed. -
Page 112: Summary
Troubleshooting Guide: Summary GT-400 Terminal User’s Guide Summary To summarize, the most common steps used to troubleshoot a terminal are: • Telnet (to view the terminal's log file and check processes). • Terminal Status (either through the command menus or the terminal's web server) •... -
Page 113: Tips And Tricks
Tips and Tricks Terminal Time-Out • The terminal will go back one screen level after ten (10) seconds of inactivity. The terminal will return to the default screen after thirty (30) seconds of inactivity. If you have been performing a function and fail to press a key for thirty (30) seconds, you will need to log in as an administrator again and start over. - Page 114 Tips and Tricks: GT-400 Terminal User’s Guide...
- Page 115 Index Accessing Database Command Menus 33 Synchronization 2 Date Credential 36, 80 Set 39 Date Format 66 Date Format Holiday 54 Add 66 Time Format 63 Edit 65 Timezone 45 Set 67 User 86 Delete Sent Interactions 89 Attaching the Wall Plate 16 Demo Mode Authority Configuration 28...
- Page 116 Index GT-400 Terminal User’s Guide Add 54 Configuring 25 Edit 53 No Hand Enroll 81 Holiday Menu 53 Number of Tries 70 Host DBSync Set 56 Host Passwords OK 92 Set 57 Host URL Set 57 Partial Sync Now 87 Host Username PLACE HAND 92 Set 55...
- Page 117 GT-400 Terminal User’s Guide Index Time 40 Specifications 4 Time Format 64 Start-up Sequence 9 User Data 35 Status 88 WebServer 56 Synchronization Test 27 Setup Time-Out 33 Clear 68 Time-out 105 Printer 21 Terminal Status Terminal 25 Checking 27 Shutdown Text Terminal 89...
- Page 118 Index GT-400 Terminal User’s Guide...
- Page 119 408.341.4110 www.schlage.com www.ingersollrand.com ©2008 Ingersoll-Rand Company Limited P/N 70100-7500 Rev. 3.0 06/08...
Need help?
Do you have a question about the Schlage AMGtime G Series and is the answer not in the manual?
Questions and answers