Table of Contents
Advertisement
Quick Links
Advertisement
Table of Contents

Related Manuals for THOMSON DPL953REC


Summary of Contents for THOMSON DPL953REC
- Page 1 DPL953REC User manual...
- Page 2 ATTENTION RISQUE D’ÉLECTROCUTION - NE PAS OUVRIR. ’ TTENTION OUR RÉDUIRE LES RISQUES D ÉLECTROCUTION ’ NE PAS OUVRIR LE BOÎTIER DE L APPAREIL ES PIÈCES INTERNES L’ ’ ÉCLAIR TERMINÉ PAR UNE FLÈCHE DANS UN E POINT D EXCLAMATION DANS UN TRIANGLE DE CET APPAREIL NE NÉCESSITENT AUCUN ENTRETIEN AITES TRIANGLE ÉQUILATÉRAL VOUS AVERTIT DE LA...
-
Page 3: Table Of Contents
HELPLINE life, should be disposed of separately from your household waste. You can contact THOMSON by dialling: 0871 712 1312 (for United Kingdom, £0.10/mn inc VAT) Please, dispose of this equipment at your local community www.thomson-europe.com waste collection/recycling centre. -
Page 4: Connections And Setup
Connections and Setup Some points to check before you connect your TV set • Ensure that the mains supply in your house complies with that indicated on the identification sticker located on the back of your appliance. • Install your appliance horizontally, away from any source of heat (fireplace) or appliances generating strong magnetic or electric fields.The components of this appliance are sensitive to heat.The maximum ambient temperature should not exceed 35°... -
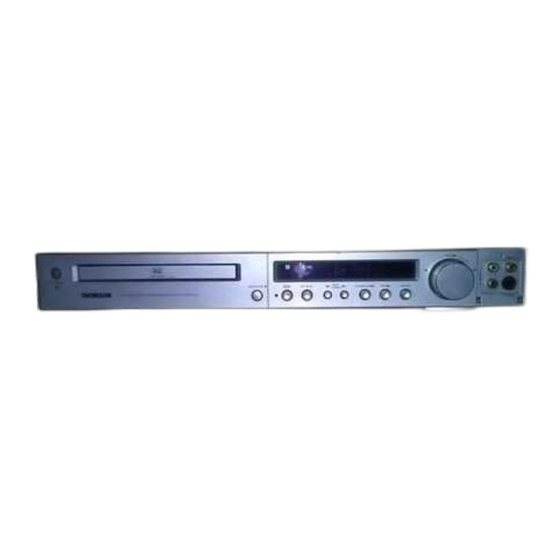
Page 5: Front Panel Controls And Sockets
Connections and Setup Front panel controls and sockets DVD RECORDER HOME CINEMA SYSTEM DPL953REC 11 12 POWER PLAY/PAUSE To switch the appliance on and off. To start playing a disc or pause. OPEN/CLOSE STOP To open and close the disc tray. -
Page 6: Connecting To Audio-Visual Equipment
Connections and Setup Connecting to audio-visual equipment Connection to a television set Cables are not provided SCART OUT Note: Use only one of the connection methods shown above for each type of equipment. SCART VIDEO OUT The SCART video socket provides the best quality for video signal. If there is no Scart socket is available on your TV set, check whether your TV has another Video socket (Composite, Component or S-Video) that you can use to connect your player. -
Page 7: Connecting The Fm Aerial
Connections and Setup Connection to another appliance Cables are not provided SCART IN SCART VIDEO IN If there is no Scart socket is available on your appliance, check whether it has a composite video socket that you can use to connect your player. Scart cable VIDEO IN socket / AUDIO IN L (left) and AUDIO IN R (right) sockets These are analogue video and audio input sockets.The AUDIO L socket and... -
Page 8: Connecting The Speakers
Connections and Setup Connecting the speakers Six speakers are provided with the appliance (2 front, 1 centre, 2 rear, 1 subwoofer). In order to enjoy good surround effects, all six speakers need to be connected to the player. Speaker wires are colour-coded to match the colour- coded terminals. - Page 9 Connections and Setup Front Speaker Position Alternative Surround Placement Rear wall Even if you cannot replicate this ideal home theatre set-up exactly, the following suggestions for positioning the speaker will help you achieve better results. Alignment Align the centre speaker evenly with or slightly behind the left and right speakers, but not in front of them.
-
Page 10: The Remote Control
Connections and setup The remote control To open and close the disc tray. OPEN/CLOSE To access the player’s menu. SETUP To mute and restore the sound. MUTE To switch the appliance on and off. STANDBY/ON To access the Repeat playback function. REPEAT To access the A-B repeat playback function. -
Page 11: Tuning In Tv Channels
Raccordements et installation Tuning in TV channels Switch the television set on. Select the AV channel on the television set. Press the button on the remote STANDBY/ON control to turn the appliance on. Press . Choose a language using the ENTER Easy Setup button on the remote control, then confirm by... - Page 12 Raccordements et installation To move a channel, use the buttons to select the channel you wish to move.Then select the Move to option and press .Then use the ENTER buttons to reach the position you wish to store the channel in and press ENTER .The channel will move to the new position.
-
Page 13: Basic Playback Operations
Basic Playback Operations Compatible discs Press to stop playback. Note:The player stores the point where playback • was interrupted. If you press again, • DVD-R, DVD-RW, DVD+R, DVD+RW playback resumes from this point.To stop playback completely or to start again from the •... -
Page 14: Status Menu
Basic Playback Operations Status menu Shuffle playback (VCD, SVCD and audio CD) Press the button a number of times DISPLAY during playback to show in turn: You can play all the tracks on the disc in a shuffle order (chosen by the player). DVD:Title elapsed time,Title remaining time, Chapter elapsed time, Chapter Press... -
Page 15: Playback Options
Basic Playback Operations Playback options Camera angle (DVD) Some discs offer different camera angles for Direct access (DVD) specific scenes. To directly access a title or a chapter: To change the camera angle during playback, Press the button. SEARCH press several times the ANGLE button to select one of the available camera angles. -
Page 16: Recording Options
Recording Recording options Instant Recording Recording options are available in the Switch on your TV set. Recorder menu: Press the button on the STANDBY/ON remote control. Menu Open the tray by pressing the button. Place a DVD+RW OPEN/CLOSE or a DVD+R disc with the printed side facing up and close the tray. -
Page 17: Instant Timer Recording
Recording Instant Timer Recording Programming a recording To set the length of time you want to Ensure the television channels have been tuned record for, press the RECORD button and stored correctly and that the clock is set twice.The television screen shows the to the correct time.You can programme up to recording duration. - Page 18 Recording If you select Once, enter the date of the Put the DVD recorder in standby mode by recording using or the numeric pressing the STANDBY/ON button on buttons, and to move the cursor. the remote control. It is now ready to If you select Repeat, select one or several record at the time you have specified.
-
Page 19: Managing The Disc Contents
Recording Managing the disc contents Caution! Once a disc is finalized, you cannot edit it or record on it. Open the tray by pressing the Select Finalize Disc using OPEN/CLOSE button. Place a DVD+RW press .A confirmation screen ENTER or a DVD+R disc with the printed side appears. -
Page 20: Mp3,Wma, Jpeg And Divx Files
mp3,WMA, JPEG and DivX files mp3 is an audio file format which compresses recorded music. It was developed in collaboration with .The main advantage of the mp3 format is that it means CD-quality music tracks can be stored on a personal computer in user-friendly compressed files. WMA (Windows Media Audio) is another audio file format developed by Microsoft. -
Page 21: Playing Divx Files
mp3,WMA, JPEG and DivX files Playing DivX files Open the tray by pressing the OPEN/CLOSE button. Place the disc with the printed side facing up. SmartNAVI The disc’s contents are displayed. Select the DivX file that you wish to play with the buttons and press to start playback. -
Page 22: Radio
Radio The player has a built-in tuner that allows for Storing radio stations FM radio function. The player can store up to 40 radio stations in its memory.You can enter every single radio Manual tuning station yourself or the player can store all Connect the FM aerial in the correct manner. -
Page 23: Player Menus
Player Menus Recorder menu Menu Press the button to display the player’s menu. SETUP Select Recorder using the buttons. Press ENTER to access the sub-menu. Please refer to chapter Recording (page 14). System menu Menu Press the button to display the player’s menu. SETUP Select System using the buttons. - Page 24 Player Menus Parental control This setting prevents the playback of DVDs that may not be suitable for all audiences, by using the rating level that may be encoded on the disc. If the rating level on the disc is higher than the preset level the playback function will not be enabled unless the password is entered.
-
Page 25: Language Menu
Player Menus Language menu Menu Player Menu With this menu, you can set the language for player Disc Menu menus, dialogue, subtitles and the disc menus. Audio Press the button to display the player’s menu. SETUP Subtitle Select Language using the buttons. -
Page 26: Video Menu
Player Menus Video menu Menu Press the button to display the player’s menu. SETUP Select Video using the buttons. Press ENTER to access the sub-menu. TV Type In addition to PAL DVDs and VCDs, you can enjoy NTSC films as well. If the pictures from the DVD being played appear in black and white on your screen, try changing the colour standard. -
Page 27: Speaker Menu
Player Menus Progressive Scan Progressive Scan provides high-quality pictures with less flicker.Turn on Progressive Scan if you used the Component Video sockets of the player to connect a TV or monitor compatible with a progressive scan signal. Press to access the sub-menu. ENTER Menu Select ON using the... -
Page 28: Audio Menu
Player Menus Audio menu Menu Press the button to display the player’s menu. SETUP Select Audio using Press ENTER to access the sub-menu. Dynamic Compression You can use this function to control the different sound levels via dynamic compression. It improves the quality of the sound track at a low volume and quietens the loudest sounds. -
Page 29: Additional Information
Additional Information Troubleshooting The subtitles do not appear. • Check that the DVD disc provides The appliance does not switch on. subtitles. • Make sure it is plugged into a mains • Refer to the section on how to display socket. -
Page 30: Precautions
Additional Information Precautions Handling and caring for discs • If your appliance has been stored in a cool place for any length of time, during a journey for example, wait for about 2 • Handle your discs with care. Hold the disc hours before using it. -
Page 31: Technical Data
In spite of the progress made to ensure playability of equipment.THOMSON does not accept all disc types , it is not possible to guarantee playback of discs which do not comply with DVD, CD,VCD or any liability if the appliance is used in any SVCD standards.This unit may not play some... -
Page 32: Sound Enhancement Systems
Additional Information DivX files • WMA filenames should not exceed 8 characters, and should end with the “.wma” extension. DivX is the name of a revolutionary new video codec General name format:Title.wma.When composing your which is based on the new MPEG-4 compression title ensure that you use 8 characters standard for video. - Page 33 Safety information - UK socket Equipment for the UK is supplied with a mains cable fitted with a moulded plug. Mains connection This appliance is suitable for use on A.C. mains supply, 230 V - 50Hz only. It must not be connected to D.C.
- Page 34 Model and serial number DPL953REC THOMSON Multimedia Sales Europe 46, quai A. Le Gallo 92648 Boulogne Cedex FRANCE 322 019 464 RCS NANTERRE http://www.thomson-europe.com 56123440 © Copyright THOMSON 2005 Dealer's address...
Need help?
Do you have a question about the DPL953REC and is the answer not in the manual?
Questions and answers