Advertisement
Quick Links
Advertisement

Related Manuals for 4CR ECO IR 3

Summary of Contents for 4CR ECO IR 3
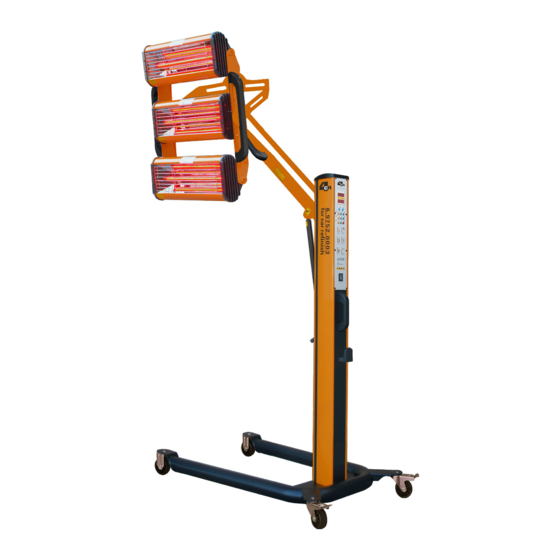
- Page 1 6.9752.0003 ECO IR 3 Infrared dryer...
-
Page 2: Table Of Contents
Content 1. Precaution 2. Technical specifications 3. Control panel 4. Installation 5. Operation 6. Trouble shooting 7. Light tubes exchange 8. Circuit diagram... -
Page 3: Precaution
1. Precaution 1. Read this manual carefully before installing or using the device. 2. Before first use, check / unscrew connections of the fluorescent tubes. If the screw connection is too strong, the arc tube will break due to temperature induced expansion. 3. -
Page 4: Technical Specifications
2. Technical specifications Model ECO IRE3 Input voltage 230V 50/60Hz Single phase Total power 3 x 1100W Curing area 1200 x 1000mm Temperature 40°C - 100°C adjustable Timer 0 Min – 99 Min adjustable Light intensity 10%-100% 1. Cassette 2. Support arm Attention! Check if the 3. -
Page 5: Control Panel
3. Control panel 1. Time display 2. Temperature display 3. Pulse drying 4. Permanent drying 5. Time setting 6. Temperature setting 7. Turn ON 8. Turn OFF 9. Lamp 1 switch 10. Lamp 2 switch 11. Lamp 3 switch... -
Page 6: Installation
4. Installation 1. Installation of the substructure: a. Remove the substructure from the packaging. b. Place the substructure on the ground. c. Attach the four wheels to the base and tighten the screws. d. Make sure the rollers with brakes are mounted on the back of the substructure. 2. -
Page 7: Operation
5. Operation 1. Connect the electricity. The supply cable must be at least 4mm² at 230V. Make sure the supply voltage and frequency are as specified correspond to the type plate of the device. 2. Switch on the device, symbols are displayed. 3. -
Page 8: Trouble Shooting
6. Trouble shooting Error Reason Solution • Check the light • Light tube tube / if necessary defective exchange Light tube doesn’t work • Not connected • Check connections • SRC defective • Check SRC / if necessary swap* • Check SRC / if Lamps in continuous •... -
Page 9: Light Tubes Exchange
7. Light tubes exchange 1. Remove cassette for tube replacement 2. Remove protective grille 3. Remove both holder plates from the sides of the cassette 4. Remove the fixed plates from both ends of the cassette 5. Disconnect cable connections and screws. Subsequently the arc tube can be exchanged 6. -
Page 10: Circuit Diagram
8. Circuit diagram...
Need help?
Do you have a question about the ECO IR 3 and is the answer not in the manual?
Questions and answers