Table of Contents
Advertisement
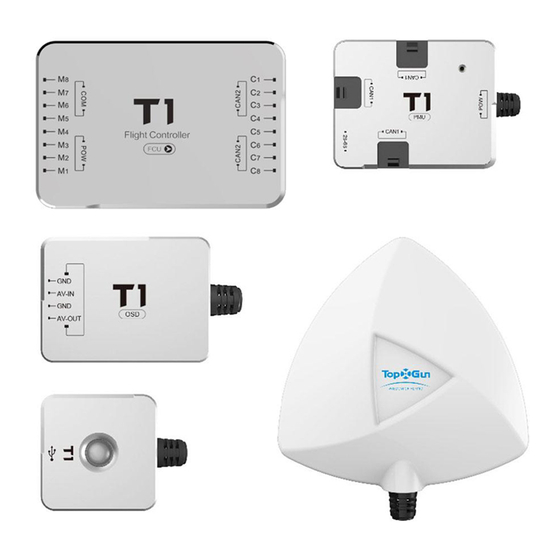
T1-A
User Manual V1.2
2016.07.20 Revision
For Firmware Version V4.10 or above
& Assistant Software Version V1.20 or above
Please strictly follow these steps to mount and use this product, as well as to install the Assistant Software on
your computer or phone.
Thank you for purchasing TopXGun product. There are web pages of T1 at our website www.topxgun.com, which
is updated regularly. You can obtain product information, technical updates and manual corrections. TopXGun
recommends you to download and use the newest user manual. The information contained in this manual is
subject to change without notice.
This manual is only for basic assembly and configuration; you can obtain more details and advanced instructions
when using the assistant software, if you find the information on software and user manual are not consistent,
the assistant software shall prevail.
Copyright © Shanghai TopXGun robotics Co., Ltd.
1
Advertisement
Table of Contents

Related Manuals for TopXGun T1-A

Summary of Contents for TopXGun T1-A
- Page 1 Please strictly follow these steps to mount and use this product, as well as to install the Assistant Software on your computer or phone. Thank you for purchasing TopXGun product. There are web pages of T1 at our website www.topxgun.com, which is updated regularly. You can obtain product information, technical updates and manual corrections. TopXGun recommends you to download and use the newest user manual.
-
Page 2: Table Of Contents
NDICATOR ESCRIPTIONS ............................... 20 IRMWARE PDATE ..............................23 IRST LIGHT ADVANCED FUNCTIONS .............................25 ............................... 25 NTELLIGENT ............................. 26 ANUAL OPERATION ......................... 26 ONTINUE PRAY REAKPOINT .............................. 27 ............................27 ............................ 27 OLTAGE ROTECTION Copyright © Shanghai TopXGun robotics Co., Ltd. - Page 3 Keep the aircraft away from people, dangerous objects and fragile objects. TopXGun accepts no liability for damage or injuries incurred directly or indirectly from the use of this product in the following conditions: Failure to follow the guidance of the manual to assemble or operate.
-
Page 4: Introduction
Introduction Product Introduction TopXGun T1-A is a professional flight controller combining main functions of agricultural UAV in current market, it can be installed on a variety of model structures, it has the functions as follows: Intelligent mode Dose detection ... -
Page 5: Assembly & Configuration
1 Assembly & Configuration 1.1 Hardware Installment Step1. Confirm multi-rotor type, forward direction and rotation direction of the motor/propeller. Figure 1-1 Confirm multi-rotor type Step2. Install the controller unit, connect every part. Copyright © Shanghai TopXGun robotics Co., Ltd. - Page 6 Main controller module installation Installation position requirements The TopXGun logo should be facing the sky, with the orientation arrow pointing directly to the nose direction, please mount it on a central place in board center of aircraft. Port connection ...
-
Page 7: Installation & Test
DCU Installation Instruction 1.2 Installation & Test Preparation before installation and debugging T1-A flight controller supports PC, Mobile phone to adjust prameters If you do the configuration on phone, you only have to install phone app and buy bluetooth module,no need to install any driver. - Page 8 (2) The direction of the blue arrow indicates rotating anticlockwise (view from the top). (3) To coaxial propellers: red propeller is at Top; blue propeller is at Bottom. Step3. Choose the type of receiver and calibrate it. Copyright © Shanghai TopXGun robotics Co., Ltd.
- Page 9 Set the end point of CH5 to 30%~70% Set the rudder angle in the range of normal mode. you can verify the Fail-Safe setting by shutting down the transmitter, the control mode will automatically jump to red „Fail-Safe‟ area. Copyright © Shanghai TopXGun robotics Co., Ltd.
- Page 10 . If the low-voltage protection is triggered, you are unable to switch to any kind of flight mode except for attitude mode and returning mode and landing mode. Copyright © Shanghai TopXGun robotics Co., Ltd.
- Page 11 Step6. Set the return height, as shown in figure 1-8. In return, the aircraft cannot avoid obstacles. Therefore, it is need to set the appropriate return height , according to the actual needs of the environment. Copyright © Shanghai TopXGun robotics Co., Ltd.
- Page 12 Figure 1-8 Return height setting Step7. Set working parameters. Click the “agricultural protection” button, enter the settings page. Choose “spraying range” page, set the working spray range. Copyright © Shanghai TopXGun robotics Co., Ltd.
- Page 13 Figure 1-9 spraying range setting Choose “working speed”page, set the maximum working speed. Copyright © Shanghai TopXGun robotics Co., Ltd.
- Page 14 Figure 1-10 working speed setting Choose “pump calibration” page, set up work spray speed and minimum spray speed respectively. Copyright © Shanghai TopXGun robotics Co., Ltd.
-
Page 15: Unlock And Lock
1.3 Unlock And Lock T1-A has only one way to unlock the aircraft, follow the figure 1 to unlock no matter whether you are using Japan TX or US TX, and follow the figure 2 to lock the aircraft. The aircraft will automatically lock after landing with the throttle stick maintaining minimum for 3 seconds. -
Page 16: Esc And Compass Calibration
After the MC is repowerd, the motor will After the LED blinks red and blue beep twice, pull the throttle stick to alternatively, it turns to normal minimum position within two seconds indication Figure 1-12 Procedure of ESC calibration Copyright © Shanghai TopXGun robotics Co., Ltd. -
Page 17: Horizontal Calibration
Position 1 - 3 - 1 6 - 1 Time Figure 1-13 T1-A Procedure of compass calibration 1.5 Horizontal Calibration For the first time before a test flight, put the plane on level ground and make it perform toe-out locking action for 10 seconds. -
Page 18: Fly Test
GPS mode. Attitude mode and GPS mode are used most generally. When need to work, should be set to operation mode. Different mode bar quantity and aircraft movements corresponding as shown in table 2.1. Table 2.1 T1-A Control mode instruction Stick Control mode... - Page 19 Compass calibration failed The flag of ESC calibration has been stored, continue calibration complete calibration after reboot (N)means LED blinks yellow N times; (2) { }(N)means LED blinks yellow and purple alternatively N times; Copyright © Shanghai TopXGun robotics Co., Ltd.
-
Page 20: Firmware Update
Step1. Click "update" button, enter into the interface of firmware update,then choose the module you need to update. Figure 2-1 firmware update 1 Step2. Click this buttom “ ”, system will upgrade the firmware Copyright © Shanghai TopXGun robotics Co., Ltd. - Page 21 Step3. When the update of firmware is finished successfully, click 'Yes' button in the dialogue box to complete the whole update process. After the upgrade, the display of 'No update is avaiable' in 'Upgrade' column means the current firmware is the latest version. Copyright © Shanghai TopXGun robotics Co., Ltd.
- Page 22 Figure 2-3 firmware update 3 Copyright © Shanghai TopXGun robotics Co., Ltd.
-
Page 23: First Test Flight
Double check the items by following steps before flight, ensure safe flight. Step1. Check before flight Double check the nose direction, MC installation direction, motor rotating direction, make sure the connection between every part is solid. Step2. Power on and Check Copyright © Shanghai TopXGun robotics Co., Ltd. - Page 24 If the temperature is inconsistent with each other, the aircraft may have a load imbalance. Therefore, it is need to calibrate the level of propeller,in order to ensure the consistency of the level of propeller. Copyright © Shanghai TopXGun robotics Co., Ltd.
-
Page 25: Advanced Functions
/ right flight cover the distance of one work interval and hover. Work interval namely spraying range and it can be set in assistant software. Copyright © Shanghai TopXGun robotics Co., Ltd. -
Page 26: Manual Operation
Shortage of Dose During the flight, T1-A will perform the following operation when the amount of the dose is less than the warning value: Step1. Aircraft will decelerate and automatically rise to the specified height (in assistant software you can set the height) and hover, then record the current point as breakpoint. -
Page 27: One-Key Go Home
), during (∞)), then lock after second level protection the aircraft will land automatically with LED warning( landed. You can switch to attitude mode to quit protection after automatic landing of low-voltage protection executed. Copyright © Shanghai TopXGun robotics Co., Ltd.
Need help?
Do you have a question about the T1-A and is the answer not in the manual?
Questions and answers