Advertisement
Table of Contents
- 1 Manufacturer’s Limited Warranty
- 2 Operational Check
- 3 Features of the Quik-Code Wireless Keyless Entry
- 4 Mounting the Quik-Code Wireless Keyless Entry
- 5 Programming the Quik-Code Wireless Keyless Entry
- 6 Programming Steps for Quik-Code Wireless Keyless Entry
- 7 Using the Quik-Code Wireless Keyless Entry
- 8 Changing the Quik-Code Wireless Keyless Entry PIN
- Download this manual
Operational Check
After installing your keypad, check the operation by entering your PIN and door
number. Operation should be reliable. However, environmental conditions and the
location of the keypad will affect distance.
• If the keypad doesn't activate the operator check the PIN and door number.
The PIN and door number entered must exactly match the learned PIN and
door number.
• Press the ON/RESET button and wait a few seconds before entering your PIN
and door number. Press the keys slowly.
• If the distance is inadequate check the battery and replace if necessary.
• To maximize the operating distance move the keypad to different locations
until a satisfactory distance is achieved. Metal siding, metal doors and some
types of construction will affect distance.
• If system does not work at any distance, check that the MVP operator is
properly operating from the super deluxe wall station and hand-held
transmitter.
• Try to erase and re-lean the keypad PIN and door number and hand-held
transmitter.
WARNING
Refer to the door operator installation and owner's manual for proper
installation and use and adjustments. Follow all warnings.
Test the safety systems of your door operator monthly to ensure that
the system remains in proper adjustment.
Manufacturer's Limited Warranty
Allstar warrants its radio controls to be free from defect in material and workmanship for a period of one (1) year from the
date of purchase. To obtain service, contact your dealer.
To obtain service under this warranty the buyer must obtain authorization instructions from Allstar for the return of any
goods before returning the goods. The goods must be returned with complete identification, with copy of proof-of-purchase,
freight prepaid and in accordance with Allstar's instructions or they will not be accepted. In no event will Allstar be
responsible for goods returned without proper authorization or identification.
Goods returned to Allstar for warranty repair within the warranty period, which upon receipt by Allstar are confirmed to be
defective and covered by this limited warranty, will be repaired or replaced at Allstar's sole option, at no cost and returned
pre-paid. Defective parts will be repaired or replaced with new or factory rebuilt parts at Allstar's sole option.
This limited warranty does not cover non-defect damage, damage caused by unreasonable use, damage caused by improper
installation or care, vandalism or lightning, fire or excessive heat, flood or other acts of God (including, but not limited to
misuse, abuse or alterations, failure to provide reasonable and necessary maintenance), labor charges for dismantling or
reinstalling a repaired or replaced unit, or replacement batteries.
These warranties are in lieu of all other warranties, either expressed or implied. All implied warranties of merchantability
and/or fitness for a particular purpose are hereby disclaimed and excluded. Under no circumstances shall Allstar be liable for
consequential, incidental or special damages arising in connection with the use or inability to use this product. In no event
shall Allstar's liability for breach of warranty, breach of contract, negligence or strict liability exceed the cost of the product
covered hereby. No person is authorized to assume for Allstar any other liability in connection with the sale of this product.
This warranty gives you specific legal rights. Warranty effective after July 1, 2002.
Copyright © 2002 c.p.Allstar Corporation PART NUMBER 111214 REV A
by
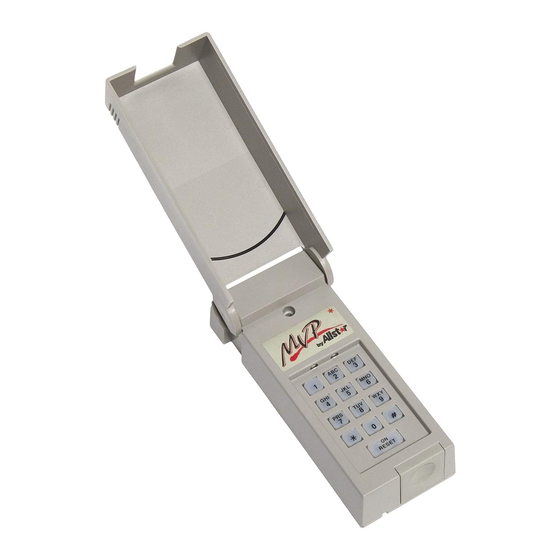
MVP Quik-Code
Wireless Keyless Entry
Installation Instructions
Model 110927
Proper installation of your radio controls will assure years of
trouble-free operation
READ THE FOLLOWING INSTRUCTIONS THOROUGHLY
BEFORE STARTING INSTALLATION
Your MVP Quik-Code Wireless Keyless Entry is designed to remotely operate
MVP garage door openers. The system permits the user to select one of 10,000
personal identification numbers (PIN's) and operate up to 10 different doors. The
radio frequency of the remote controls is fixed and tuned at the factory;
adjustments are not required and should not be attempted by the end user.
WARNING
Keep transmitters and remote controls out of the reach of children.
Do not let children play with or use the transmitter or remote controls.
Unexpected door operations can cause personal injury or property damage.
Do not place transmitter where the buttons can be accidentally or
unintentionally activated.
Features of the Quik-Code Wireless Keyless Entry
On/Reset Key: This key turns on the keypad and light system allowing you to
operated the system as well as to see the keys in the dark. The keypad will
remain lit for 20 seconds after the last key is pressed.
Single Button Mode: Once you have entered a valid PIN and your door
operator begins to function, the number keys remain active for 20 seconds.
Pressing any one of these keys sends another signal to the operator and allows
you to stop and start the door operator.
Low Battery Indicator: The lighting for your keypad also serves as a low
battery indicator. When the keypad lights flash on and off the battery should be
replaced with a standard 9 volt battery.
Non-Volatile Memory: It is not necessary to reprogram the keypad after you
replace your battery.
1
GHI
4
PRS
7
*
RESET
Allstar MVP Quik-CodeTransmitters and Receivers are
compatible with HomeLink®.
HomeLink® is a registered trade mark of Johnson Controls.
ABC
DEF
2
3
JKL
MNO
5
6
TUV
WXY
9
8
0
#
ON
Advertisement
Table of Contents

Related Manuals for Allstar MVP 110927

Summary of Contents for Allstar MVP 110927
- Page 1 Manufacturer’s Limited Warranty Features of the Quik-Code Wireless Keyless Entry Allstar warrants its radio controls to be free from defect in material and workmanship for a period of one (1) year from the date of purchase. To obtain service, contact your dealer.
- Page 2 Programming Steps for Quik-Code Wireless Keyless Entry Mounting the Quik-Code Wireless Keyless Entry Step 1: The red lighting should be . If it is on, wait until it Step 1: Choose a convenient location that does not Keypad turns off (approximately 20 seconds). interfere with the normal opening and closing of the door.
Need help?
Do you have a question about the MVP 110927 and is the answer not in the manual?
Questions and answers