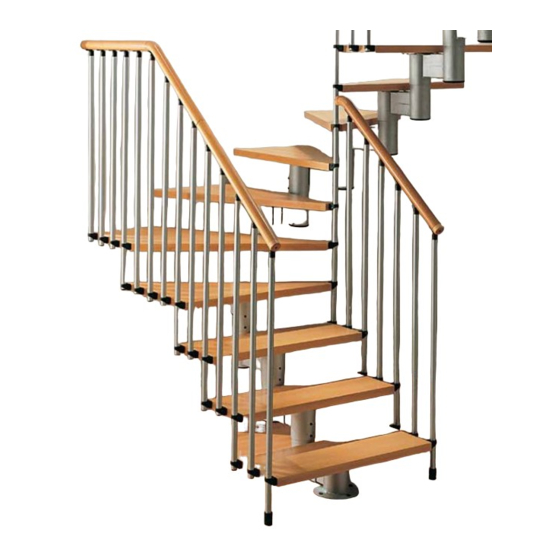
Summary of Contents for Misterstep UNIVERSAL MAXI
- Page 1 UNIVERSAL MAXI Italiano ISTRUZIONI DI POSA English ASSEMBLY INSTRUCTIONS Français INSTRUCTIONS DE MONTAGE Deutsch MONTAGEANLEITUNG Español INSTRUCCIONES PARA LA COLOCACIÓN...
- Page 3 Italiano ISTRUZIONI DI POSA “UNIVERSAL MAXI” Per procedere con maggiore ordine al montaggio della scala, consigliamo di iniziare avendo tutti gli attrezzi a disposizione. Estrarre dall’imballaggio tutti i componenti della scala e stenderli su un’ampia superficie in modo che siano ben visibili.
- Page 4 7) Irrigidimenti scala Definire la posizione del sostegno a terra (Fig.6) e tagliarlo a misura in funzione della distanza che intercorre fra il pavimento e la parte sottostante del supporto stabilito. Assemblare gli elementi come indicato nella (Fig.7). (NB: Il sostegno a terra va normalmente posizionato a circa metà scala.) Nel caso in cui non si possa fissare a terra il sostegno, si consiglia di incassarlo a parete in modo che la struttura della scala vi appoggi sopra.
- Page 5 English “UNIVERSAL MAXI” INSTALLATION INSTRUCTIONS To ensure that the staircase is assembled correctly, we suggest that all equipment is on-hand before starting. Remove all staircase components from the packing and lay them over a wide surface to be all clearly visible.
- Page 6 7) Reinforcing the staircase Determine the position of the floor support (Fig. 6) and cut it according to the distance between the floor and the lower part of its relative support. Assemble the components as shown in (Fig. 7). (NB: T he f loor support i s usu ally placed at approximat ely half way al ong t he staircase). If the support cannot be mounted to the floor, it should be inserted into the wall in order to support the staircase structure (as shown in the catalogue).
- Page 7 Français INSTRUCTIONS DE POSE “UNIVERSAL MAXI” Pour procéder avec le plus grand soin au montage de l’escalier, nous conseillons de commencer en ayant tous les outils à disposition. Sortir de l’emballage tous les composants de l’escalier et les étendre sur une grande surface de telle sorte qu’ils soient bien visibles.
- Page 8 7) Raidissements de l’escalier Définir la position du support au sol (Fig.6) et le couper en fonction de la distance entre le sol et la partie au-dessous du support utilisé. Assembler les éléments comme indiqué dans la (Fig.7). (NB: Le support au sol doit normalement être positionné à la moitié de l’escalier.) Dans le cas où...
- Page 9 Deutsch MONATGEANLEITUNG “UNIVERSAL MAXI” Um die Montage der Treppe problemlos durchführen zu können, empfehlen wir vor Beginn der Arbeiten alle nötigen Werkzeuge bereit zu legen. Alle Treppenelemente auspacken und großflächig ausbreiten, so dass sie leicht überschaubar sind. Legende: L = Breite A = Steigungshöhe P = Auftrittstiefe HT = Gesamthöhe Alle Maßangaben sind in cm ausgedrückt.
- Page 10 7) Die Versteifung der Treppe Festlegen der Position der Bodenstütze (Abb.6) und je nach dem bestehendem Abstand zwischen Boden und dem entsprechenden Mittelholmelement, nach Maß sägen. Die einzelnen Bauteile wie angegeben zusammensetzen (Abb.7). (Anmerkung : Die Bodenstütze wird in der Regel unter die mittlere Stufe der Treppe montiert.) Sollte eine Montage der Stütze am Boden nicht möglich sein, wird das Einbauen der Selben in die Wand angeraten, so dass die tragende Struktur der Treppe sicher aufliegt.
- Page 11 Español INSTRUCCIONES PARA LA COLOCACIÓN DE “UNIVERSAL MAXI” Para realizar con orden el montaje de la escalera, aconsejamos comenzar teniendo a mano todas las herramientas necesarias. Sacar del embalaje todos los componentes de la escalera y extenderlos sobre una amplia superficie para que estén bien visibles.
- Page 12 7) Fijación escalera Definir la posición del soporte al suelo (Fig.6) y cortarlo a medida en función de la distancia entre el suelo y la parte debajo del soporte establecido. Ensamblar los elementos según se indica en la (Fig.7). (Nota: El soporte al suelo normalmente se posiciona aprox. a la mitad de la escalera). Si no se puede fijar el soporte al suelo, se aconseja empotrarlo a la pared para que la estructura de la escalera se apoye encima.
- Page 14 CONFORMAZIONE "L" CONFORMAZIONE "U" L-SHAPED CONFIGURATION U-SHAPED CONFIGURATION CONFORMATION EN "L" CONFORMATION EN "U" EINMAL VIERTEL GEVENDELT ZWEIMAL VIERTEL GEVENDELT CONFORMACIÓN "L" CONFORMACIÓN "U" L 75 L 94 P-0.5 25.5...
- Page 15 63/1029 63/1893 GRADINO DI SBARCO GRADINO DI SBARCO LANDING STEP LANDING STEP MARCHE D'ARRIVEE MARCHE D'ARRIVEE AUSTRITTSSTUFE AUSTRITTSSTUFE PELDAÑOS DE DESEMBARQUE PELDAÑOS DE DESEMBARQUE L = 75 P = 18/22 L = 94 P = 22/26 VENTAGLIO DI SBARCO VENTAGLIO DI SBARCO WINDER LANDING STEP WINDER LANDING STEP QUART TOURNANT D'ARRIVEE...
- Page 16 63/11035 63/1029 63/1485 GRADINO RETTILINEO PRIMO GRADINO VENTAGLIO STRAIGHT STEP FIRST WINDING STEP MARCHE DROITE PREMIER MARCHE DE QUART TOURNANT GERADE STUFE ERSTE GEZOGENE STUFE PELDAÑO RECTO PRIMERO PELDAÑO ABANICO SECONDO GRADINO VENTAGLIO TERZO GRADINO VENTAGLIO SECOND WINDING STEP THIRD WINDING STEP DEUXIENE MARCHE DE QUART TOURNANT TROISIENE MARCHE DE QUART TOURNANT ZWEITE GEZOGENE STUFE...
- Page 17 64/820 63/1317 63/3560...
- Page 18 63/1420 63/1448 63/1020 64/810 63/2010 63/1440 63/1450 63/1530 63/1455 63/3505 63/3940 64/810 63/1440...
- Page 19 63/1530 63/1790...
- Page 20 63/3950 63/1025 63/1318 64/810 63/1540 63/3505 63/1455 64/800 64/940 634/810 63/1455...
- Page 24 4 7 1 0 0 F o r l ì ( F C ) I T A L Y T e l . + 3 9 . 0 5 4 3 . 7 7 7 3 3 9 F a x + 3 9 . 0 5 4 3 . 7 7 7 3 4 6 www.misterstep.it info@misterstep.it...


Need help?
Do you have a question about the UNIVERSAL MAXI and is the answer not in the manual?
Questions and answers