Advertisement
Before You Start, A Word About Amplification:
TC passive pickups have been designed to operate properly and sound good without the use of a preamp
when plugged into any normal electric guitar amp. As a non-preamped piezo pickup the TC has an
impedance of approximately 2 mega ohms which most electric guitar amps will handle. As with any
passive pickup, the sound can be further enhanced and EQ'd with an outboard preamp.
PA systems: If you require the added ability to be able to plug directly into a P.A. or mixer then a
preamp designed for pickups will be necessary. The preamps that are built into PA systems are
microphone preamps and generally will not work properly with a passive pickup.
Acoustic Amps: If you are plugging into an acoustic amp a preamp may be required depending upon
the design of that acoustic amp. Acoustic amps may or may not require the use of a preamp with a
passive pickup and that will depend upon whether or not there is a special built in preamp section within
that amp that specifically allows for the choice of plugging in either a passive (non-preamped) or active
(preamped) pickup. This choice is quite often a second channel or a pushbutton on the amp's control
panel. Many acoustic amps show a selection that may indicate the choice of 'high impedance' and 'low
impedance'. Low impedance in these instances usually indicates that in this range the amp will handle an
impedance of 1000 ohms or less - which will allow active pickups with preamps to be used.
High impedance in these instances may indicate an allowable impedance in the 2 or 3 mega ohm
range - which will allow passive pickups to be used. Or it may indicate a maximum input impedance
allowed of 20,000 ohms or less - which will handle magnetic electric guitar pickups but not passive
pickups. You should carefully read the technical specifications of your acoustic amp in order to see what it
will do.
Tools Required for Installation: Soldering iron(small approx. 15 to 35 watts), Solder, Electric drill,
Assorted drill bits, Deburring tool, Clear tape, Masking tape, scissors
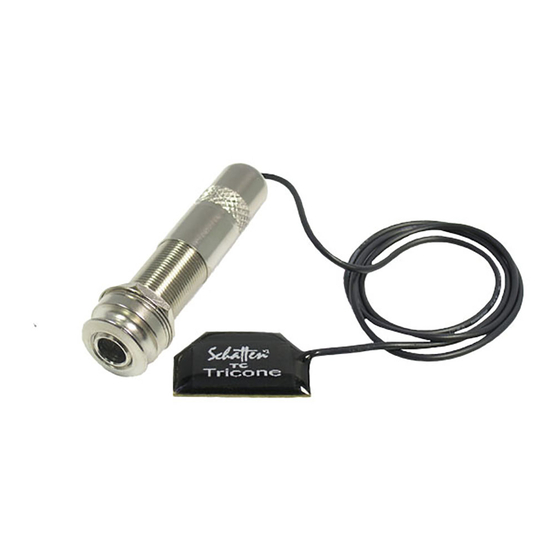
Installing the pickup sensor
1) Remove the strings and cover plate from the instrument and set them safely aside. Remove the T
bridge.
2) Using some of the supplied 3M VHB tape, cut a piece to fit and adhere it to the brass side of the pickup
sensor.
3) As per figure 1, press the pickup into position. Make sure that you hold onto the T bridge while
pressing the pickup into place.
4) Reinstall the T bridge
Strap Button Mounting of Output Jack - TC
Hanging the output jack from the strap button using the supplied clip
1) Reinstall the cover plate and strings.
2) Run the lead wire out of the slot in the cover plate and allowing enough wire to reach the strap
button (approximately 10") cut the wire to length. Slide the cover from the jack assembly onto the
lead wire.
3) Strip back an inch of the black outer insulation of the lead wire exposing the copper shield.
Twist this copper shield into a straight lead and solder it to the longest lug, this is the ground (-).
The whitish coloured insulation from the centre lead should be stripped back about a quarter inch
and this will be soldered to the shortest lug on the output jack, this is the hot (+).
4) As per figure 2, unscrew the strap button, insert the screw through the hole in the nylon jack
holder, put the output jack half way through the loop in the jack holder and tighten the screw down
on the strap button. The output jack should be securely held in place.
5) You may wish to fasten down the exposed wire with a few small strips of clear tape
Wiring The Jack Assembly - TC Std, TC Pro
1) Remove the two screws holding the cover on the jack assembly.
2) Insert the shielded cable from the pickup through the rubber grommet at the rear of the jack assembly.
3) Shielded cables are normally comprised of 2 conductors: the first conductor just under the outer
insulation is the ground (-) of the pickup. The ground wire is to be soldered to 'Lug B' of the jack. The
second conductor is contained within an inner insulated covering and is the positive (+) of the pickup.
This wire is to be soldered to the upper lug of the volume control pot 'Lug A' on Pro Models as shown in
figure 3.
4) On Std Models there is no volume pot contained within the control box. The ground wire is still to be
soldered to 'Lug B' of the jack however, the positive (+) is to be soldered to the other jack lug. You will
probably find it easier to remove the jack from the box to do the soldering and then reinstall the jack.
Handmade Pickups For Acoustic Instruments
627 Colby Drive, Waterloo Ontario, Canada N2V 1B4
www.schattendesign.com
519-742-3862
Installation Instructions: TC , TC Std, TC Pro Passive Models
email: tech@schattendesign.com
toll free: 877-633-0177
fax: 519-742-1843
Figure 1
Figure 2
Figure 3
Figure 4
Advertisement
Table of Contents

Subscribe to Our Youtube Channel
Related Manuals for Schatten Design TC


Summary of Contents for Schatten Design TC
- Page 1 Before You Start, A Word About Amplification: TC passive pickups have been designed to operate properly and sound good without the use of a preamp when plugged into any normal electric guitar amp. As a non-preamped piezo pickup the TC has an impedance of approximately 2 mega ohms which most electric guitar amps will handle.
- Page 2 Insert the supplied rubber grommet into the hole. 3) The TC Player and TCA pickups come with an end pin jack or endpin jack preamp. Either unit requires a hole through the body 3/8" diameter.
Need help?
Do you have a question about the TC and is the answer not in the manual?
Questions and answers