Table of Contents
Advertisement
Quick Links
Advertisement
Table of Contents

Related Manuals for Frequency Devices 9002

Summary of Contents for Frequency Devices 9002
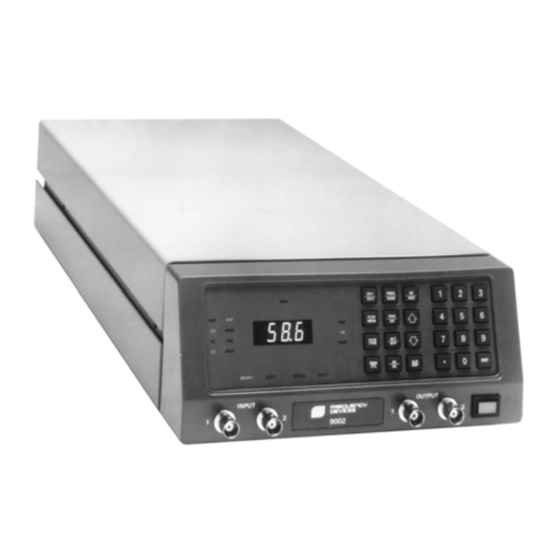
- Page 1 Model 9002 September 1999 Dual-Channel Programmable Filter Instrument OPERATOR MANUAL -Certified 25 Locust St, Haverhill, Massachusetts 01830 • Tel: 800/252-7074, 978/374-0761 • FAX: 978/521-1839 e-mail: sales@freqdev.com • Web Address: http://www.freqdev.com...
- Page 2 Model 9002 25 Locust St, Haverhill, Massachusetts 01830 • Tel: 800/252-7074, 978/374-0761 • FAX: 978/521-1839 e-mail: sales@freqdev.com • Web Address: http://www.freqdev.com...
-
Page 3: Table Of Contents
Model 9002 Table of Contents Table of Contents Section Section ......Page ...... - Page 4 ......Page Model 9002 in a Typical Setup ... . .4 Electrical Characteristics of Filters ..7 2.1a Front Panel .
-
Page 5: Preface
This manual contains installation, operation, programming and troubleshooting information about the Model 9002. Although operation of the Model 9002 is quite straightforward, you must read and understand the information in this manual before applying power or connecting any components or external devices. -
Page 6: Warranty & Repair
Warranty & Repair Warranty The Model 9002 Instrument is warranted against defects in material and workmanship for a period of one (1) year from the date of shipment. During the warranty period, Frequency Devices Inc. will, at its option, repair or replace products that prove to be defective. -
Page 7: Section 1 - Introduction
1.2 - Applications The Model 9002 filter can be used in any application where frequency filtration is required. A wide range of frequen- cies, input voltage ranges, and pre- and post-amplification stages enables these filters to interconnect with most laboratory equipment as well as standard audio and radio frequency test equipment. -
Page 8: Model 9002 In A Typical Setup
Sensor 2 Data Out 2 Figure 1.1 Model 9002 in a Typical Setup When operating the filter with a remote controller, care must be taken to follow the programming rules presented in Section 5 of this manual. In the remote mode, the unit looks at the IEEE-488 bus for its operating commands. -
Page 9: Section 2 - Instrument Description
2.2 - Input/Output Characteristics The Model 9002 is contained in a single electronic chassis and is designed to interface directly with a remote controller fitted with an IEEE-488 interface card. Connection to the controller is via an IEEE connector on the rear panel as shown in Figure 2.1b. -
Page 10: Filter Properties
Figure 2.2 IEEE Connector Identification The signals to be filtered are introduced to the Model 9002 via front and rear panel coaxial BNC connectors as seen in Figure 2.1a. Input impedance is one megohm resistive shunted by a fixed 47 picofarad capacitance. Signal inputs can be up to 20 volts p-p without clipping. -
Page 11: Specifications
Model 9002 Instrument Description Section 2 Type Number Characteristic Lowpass LP00 8-pole Butterworth LP01 8-pole, 6-zero elliptic 1.77 LP02 8-pole,Bessel LP03 8-pole, 6-zero constant delay LP05 8-pole, 6-zero elliptic (200 kHz) LP06 4-pole Bessel LP07 4-pole Butterworth LP08 8-pole, Bessel (200 kHz) -
Page 12: Physical
Altitude Up to 15,000 feet; 4500 meters 10,400.0 Hz-204,800.0 Hz @ 200 Hz increments for 9002-200 kHz See the Product Data Sheet (Appendix A) for circuit details. 25 Locust St, Haverhill, Massachusetts 01830 • Tel: 800/252-7074, 978/374-0761 • FAX: 978/521-1839... -
Page 13: Section 3 - Installation And Setup
3.1 - Unpacking and Inspection When Model 9002 is received, inspect the cartons for visible external damage. If there is obvious physical damage, we suggest that the carrier’s agent be present during unpacking. Do not destroy the shipment container during opening so that it may be used for future shipment of the device. -
Page 14: Environmental Requirements
3.3 - Environmental Requirements The Model 9002 operates as either a benchtop or rack mounted unit. When setting up the Model 9002, be sure it has sufficient space for proper ventilation. Ambient temperature and humidity should not exceed the values given in the specifications of Section 2.4.3. -
Page 15: Changing The Line Voltage
Model 9002 Installation and Setup Section 3 Reconfiguration of the system for a different voltage is accomplished as follows: A. Remove the power cord. B. Slide the plastic door to the left. C. Pull the fuse lever out and to the left; remove the fuse. -
Page 16: System Grounds
Data Sheet (Appendix A). 3.5 - Basic Setup The Model 9002 may now be connected to the power source, to the remote controller (if remote is being used), and to the circuit to be filtered. 1. Connect the device being filtered to the input and output BNCs on the front or rear panel. Be sure that both input and output are hooked up to the same channel. -
Page 17: Section 4 - Operation From The Front Panel
4.3 - Function Keys There are 10 function keys for programming and reviewing the setup of the Model 9002. These are used in the process of setting up a channel in any of the eight programmable filter configurations, and in checking the status of the filter during use. -
Page 18: Details Of The Function Keys
Model 9002 Operation from the Front Panel Section 4 Key Label Affect on Model 9002 Operation CH1/CH2 Toggle: Programming and display between Ch. 1 & Ch. 2 FLTR MEM Selects Filter Number (0-7) in both channels FLTR TYPE Display Filter Type for the active channel... - Page 19 The filter configuration number can be changed in the range 0-7 on the numeric keypad or by using the ⇑/⇓ keys. The Model 9002 will not allow any number over 7 to be entered. The configuration number affects both Channel 1 and Channel 2.
- Page 20 [active keys: ⇑/⇓, CH1/CH2, FLTR TYPE, ENT, FLTR MEM, REM CTL,] This function key allows the user to place the Model 9002 under the operation of the remote controller and displays the presently assigned address of the instrument. The address can be changed using the ⇑/⇓ keys. Only addresses 0-31 are valid.
-
Page 21: Frequency Ranges And Increments
Model 9002 Operation from the Front Panel Section 4 [all keys active] FREQUENCY The HZ or KHZ LED will be lit. The display will show the present corner frequency for the selected channel and filter configuration number. The corner frequency can be chosen in the range of 0.1 Hz to 102.4 kHz. (See Table 4.4 for 200 kHz models). The numeric keypad or the ⇑/⇓... - Page 22 CLIP2 [all keys active] The CLIP1 and CLIP2 LEDs are controlled internally by the Model 9002. They are warning lights that indicate impending or actual amplitude clipping in the indicated filter channel and after each internal gain stage. The LEDs are continuously updated and monitor both positive and negative peak signals.
-
Page 23: Section 5 - Remote Control Operation
The Model 9002 can be set up to receive remote data by means of a front panel command or a remote command. At the front panel, you press the REM CTL function key. At the remote controller, send special codes $0F, Go to Remote Control. -
Page 24: Listen/Talk Structure
Model 9002 Remote Control Operation Section 5 5.2.1 - Listen/Talk Structure Interactions between the Model 9002 and a remote controller should follow the command structure shown below: Talk Listen Controller sets up Model 9002 as a Listener " " "... -
Page 25: Special Command Codes
5.4.1 - Use of Special Codes $05, Abort to Local Special code $05 is a one-byte instruction that returns the Model 9002 to local control. The REM CTL light is turned off and the selected channel and its filter configuration will be displayed. All other codes following $05 are ignored. -
Page 26: The Code $06 Command Setup
Model 9002 Remote Control Operation Section 5 5.4.2 - Use of Special Codes $06, Set Filter Special code $06 is a seven-byte instruction used to establish a filter configuration. It is composed of a command code ($06) followed by six hex codes that define the filter setup. The parameters to be programmed are listed in Table 5.4. -
Page 27: Calculating Program Parameters
Model 9002 Remote Control Operation Section 5 Byte # PRE7 PRE6 PRE5 PRE4 PRE3 PRE2 PRE1 PRE0 Table 5.6 The $06 Command Setup List • Byte 4 contains the least significant bits, F7-F0, of the frequency base, a term we will shortly define. -
Page 28: Calculation Of R
Model 9002 Remote Control Operation Section 5 Base Result 10,638 106,380 10,638 10,638 10,638 1,063.8 10,638 106.38 Use this 100 range. (106.38 is the base result.) Table 5.7 Calculation of R Range 100 is selected because the Base Result (106.38) is the largest value of the four results in the range 1 to 1024. - Page 29 Model 9002 Remote Control Operation Section 5 ACT/BYP Status Binary bit 7 of byte 5, calling for the filter to be active or bypassed, is now selected and inserted in Table 5.6. Status Active Bypass SNG/DIF configuration Binary bit 6 of byte 5, distinguishing between SNG and DIF configuration, is now selected and inserted in Table 5.6.
-
Page 30: Example Of A Code $06
Model 9002 Remote Control Operation Section 5 Gain P7..P0 Level (bytes 6 & 7) 00000000 1.05 00000001 00000010 1.15 00000011 00000100 1.25 00000101 13.5 11111010 13.55 11111011 13.6 11111100 13.65 11111101 13.7 11111110 13.75 11111111 Table 5.9 Gain in Various Numerical Bases Let us expand our example to call for a Pre-gain of 5.15 and a Post-gain of 12.1. - Page 31 Model 9002 Remote Control Operation Section 5 Perform the following steps to calculate the Code $06 sequence for the sample configuration given above. Step # Action to be Taken Get Byte 1 Command Code = $06 Get Byte 2 Get selected channel # code Channel selected = Ch.
-
Page 32: Development Of Codes For The Sample Configuration
Model 9002 Remote Control Operation Section 5 Step # Action to be Taken Get ACT/BYP status code (ACT) Desired status = Active ACT bit = 1 Get SNG/DIF configuration code (DIF) Desired Configuration = Single DIF bit = 0 Get I/O coupling code (DC) -
Page 33: Code $0B - Go To Channel N, Filter M
Table 5.10 translates into the following form of Table 5.6. Byte These codes can be developed into the following code sequence for the Model 9002. The hex codes become the programming codes transmitted via IEEE-488 to the Model 9002. Code Sequence for Sample Configuration... -
Page 34: Code $0C - Send Back Channel Status
Special Code $0C is a one-byte instruction that sets the system up to send back channel status data. The Model 9002 must be set up as a talker by the remote controller to send back the data. The Model 9002 will send 11 bytes of data representing the setup of Channels 1 and 2. -
Page 35: Code $0D - Send Back Channel Definition
This is a one-byte instruction which sets the system up to send back filter type data in the related channel. The Model 9002 must be set up as a talker by the remote controller to send back the data. The data consists of four bytes which represent the filters of Channel 1 and 2. -
Page 36: Code $0E - Send Back Clip Status
Special Code $0E is a one-byte instruction which sets the Model 9002 up to send back signal clipping data. The Model 9002 must be set up as a talker by the remote controller to send back the data. It sends back three bytes of data which represent the clipping status of Channels 1 and 2. -
Page 37: Code $0F - Go To Remote Control
End of Program 5.5 - Example of a Remote Control Program In the following example, the Model 9002 is to be set up as shown in the boxed text below, and is then told to send back a series of status reports. - Page 38 The Send back codes ($0C, $0D, and $0E) are included in the program to provide feedback of the correctness of the setup. When the program is finished and the Model 9002 is in local control, verify the filter configuration system by performing front panel key push commands.
-
Page 39: Appendix B Binary/Decimal/Hex Review
Binary/Decimal/Hex Review When remotely programming the Model 9002, you must convert a decimal number to a 10-bit binary number and then convert it into a hex code. This review describes the formulas and procedures that are used to make such conversions. -
Page 40: Binary To Hex
B.2 - Binary to Hex Data input to the Model 9002 is a sequence of 8-bit binary bytes. For ease of presentation, this manual is written in 2-digit hex notation. What follows is a review of the relationship between binary and hex formats. The relationship... -
Page 41: Decimal To Hex
Model 9002 Appendix B B.3 - Decimal to Hex Conversion from decimal to hex is shown in Table B.3. The process can be extended for larger decimal numbers. Table B.3 Decimal to Hex Conversion 25 Locust St, Haverhill, Massachusetts 01830 • Tel: 800/252-7074, 978/374-0761 • FAX: 978/521-1839... -
Page 42: Appendix C Remote Control Programs
ASCII data. The data has been sent in decimal, not hex (the hex numbers have been converted to decimal). The user has set the address of the Model 9002 to 0, and the system has been told to listen. MTA means MY TALK ADDRESS, which has told the PC that it is a talker. -
Page 43: Program 2
NEXT After the talk back Code $0C is sent, then the Model 9002 is told to talk and the IBM is told to listen. The data being sent from the Model 9002 is 8-bit binary data, no ASCII. Therefore, RARRAY had to be used.
Need help?
Do you have a question about the 9002 and is the answer not in the manual?
Questions and answers