Table of Contents

Subscribe to Our Youtube Channel
Related Manuals for Sherlock BBGC200S


Summary of Contents for Sherlock BBGC200S
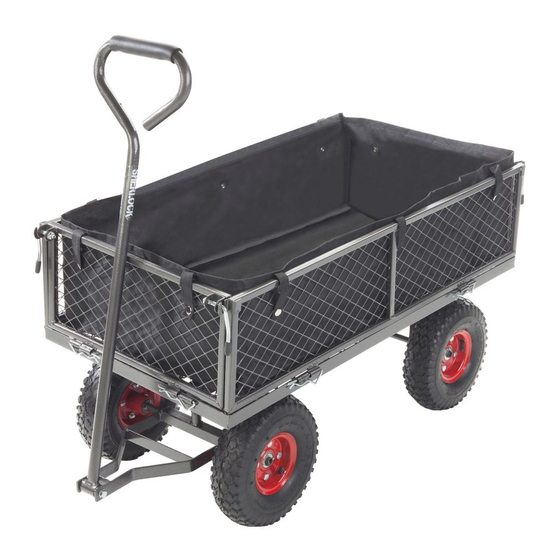
- Page 1 Assembly Instructions MANBBGC200S2 - REV A 4/9/19 SHERLOCK STEEL GARDEN CART BBGC200S SILVAN AUSTRALIA PTY. LTD. ABN 48 099 851 144 HEAD OFFICE 68 Atlantic Drive, Keysborough VIC 3173 www.sherlocklastlonger.com.au FOR SERVICE SUPPORT PH 1300 745826 info@silvanaust.com...
- Page 2 IMPORTANT SAFETY INSTRUCTIONS When inflating tyres, it is recommend using a bicycle or foot pump to prevent over inflation. The maximum pressure is 30psi. Never use air compressors as the risk of over inflation and bursting is high. Do not allow children to use the cart without supervision, it is not a toy.
- Page 3 PARTS LIST HARDWARE LIST Step 1: BOTTOM SUPPORT AND HANDLE BEAM Assemble parts �� and �� together, use washer 6 and pin 7 to secure as shown in the diagrams. (1 PC) Bottom Support �� (1 PC) Handle Beam �� (1 PC) Washers 16mm 6 (1 PC) Pins 7 Page | 3...
- Page 4 Step 2: BED AND AXLE BAR Use assembled part from Step 1 for the front of the bed �� , use bolts (4 PCS) 1 , (4 PCS) nuts 3 and washers 4 to fasten this to the bed. Use remaining nuts 3 , bolts 1 and washers 4 to fasten axle bar ��...
- Page 5 Step 4: FRAME Lock side fence �� to each side of the bed using assembly pins 5 as shown, use remaining assembly pins 5 to secure the front and back fence �� to the bed. (2 PCS) Side Fences �� (2 PCS) Front &...
Need help?
Do you have a question about the BBGC200S and is the answer not in the manual?
Questions and answers
in step 2 of assembly instruction, the nut does not screw all the way to the washer thus the assembly is loose. there appears to be a blue substance just inside the end of the nut preventing screwing all the way. Should the blue hard washer like substance be there? we have tried to dig it out but can not do so - it is preventing firm assmeblt
The blue hard substance inside the nut is likely a nylon insert, which is part of a locknut designed to prevent loosening due to vibrations. It is supposed to be there and should not be removed. To ensure a tight fit, tighten the nut securely using the appropriate tools, such as a wrench, until it firmly locks onto the bolt.
This answer is automatically generated