McIntosh C8 Owner's Manual
Hide thumbs
Also See for C8:
- Service manual (28 pages) ,
- Instruction manual (12 pages) ,
- Manual (2 pages)

Related Manuals for McIntosh C8


Summary of Contents for McIntosh C8
- Page 1 McIntosh Laboratory, Inc. 2 Chambers Street Binghamton, New York 13903-2699 Phone: 607-723-3512 www.mcintoshlabs.com Tube Preamplifier Owner’s Manual...
-
Page 2: Thank You From All Of Us At Mcintosh
For future reference, you can jot down your serial supplied in a separate document number and purchase information here. We can With the C8 Tube Preamplifier, you have invested in a identify your purchase from this information if the “Important Additional Operation precision instrument that will provide you with many occasion should arise. -
Page 3: Table Of Contents
Table of Contents List of Figures Changing the Remote’s Battery ....... 17 Thank you from all of us at McIntosh ......2 Figure 01– C8 Dimensions ......... 6 Packing the C8 ............18 Make a Note ..............2 Figure 02– Ventilation requirements ....6 Specifications ............ -
Page 4: Remove The Foam
If repairs are needed they must be performed by an authorized McIntosh Service Agency. Follow the steps below to prepare the C8 for operation: 1. Orient the C8 so the Front and Top of the Figure D Preamplifier is facing you. Refer to Figure A. - Page 5 5. The C8 Preamplifier has four Small Vacuum Tubes that are inserted into special Vacuum Tube Sockets on the Stainless Steel Chassis. Refer to WARNING: Figure E. Each of the Tube Sockets have four pin openings to accept the Vacuum Tube Shield Covers. Refer to Figure F.
-
Page 6: Where To Put It
Where to put it as a high-powered amplifier. If all the components • 2 inches (5.1cm) on each side of the C8 so that are installed in a single cabinet, a quiet running airflow is not obstructed ventilation fan can be a definite asset in maintaining •... -
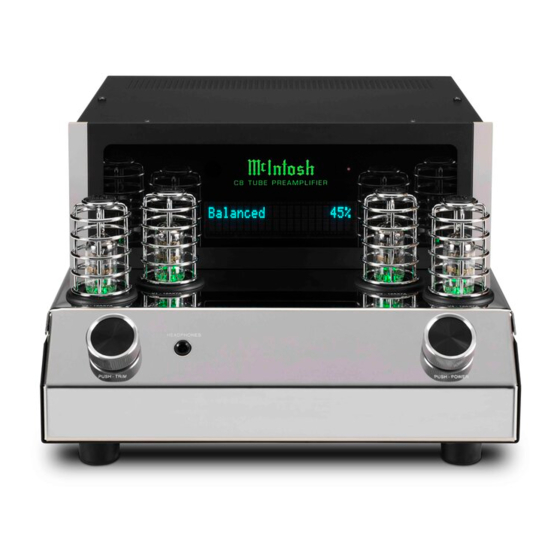
Page 7: The Front Panel
The Front Panel • Push, hold and release after 2 seconds to enter • Push and release to Power On when C8 is Off Setup mode • Push and release to Power Off. The Standby Indicator LED will glow red as long as The Right Knob The C8’s glass and metal Front Panel provides two... -
Page 8: Connections On The Back
INPUTS and UNBALANCED INPUTS 1 and 2 One stereo pair of Moving Magnet Phono inputs (B) use RCA/phono cables to connect the C8 to other One Pair unbalanced RCA Output #1 (G) Two pair of stereo Unbalanced inputs- RCA Jacks components. -
Page 9: Balanced/Xlr Input And Output
• Turn the Left Knob to the menu choice XLR cables can also be used to connect the C8 to an “SETUP: Front IR” amplifier. OUTPUT1 has a pair of XLR connectors (Continued on page 11) -
Page 10: Connection Diagram
Connection Diagram Connect to a Data Port In on a source There are many possible connections for the C8 depending on your system. This diagram shows a few typical ones. Connect to a Power Control (Trigger) Input IR Sensor Connect to Subwoofer or second amplifier. -
Page 11: Da2 Expansion Slot
When the connected unit (Master) AC Power Power Control cable removed from the PASSTHRU powers on, it will take control of your C8. The C8 connector.) This connection is essential. Plug the female end of will send the signal to your amplifier and speakers... -
Page 12: Power On The C8
25%, 50%, 75% or 100% recommended setting for your Moving Ceramic The USB port on the rear of the C8 is for McIntosh Phono cartridge. The options are selected by service use only. If you wish to add digital To use the Trim Menu you can either: rotating the Right Knob. -
Page 13: Setup Settings
Outputs 1 and 2 can be toggled On and Off through characters. When your changes are complete, press To enter the C8’s Setup menu, press and hold the Left the Trim settings. Output 2 is also called a SUB out and hold the Left Knob for two seconds to save. -
Page 14: Data Port Setup
McIntosh Preamplifier or Processor that To Set Up a Passthru relationship: Data Port Setup may be in the same location. To set the C8 to • Connect the Power Control output of the unit respond to Alternate Codes:... -
Page 15: Auto-Off Setup
Inputs or Trigger assignments.. • Turn Knob to the menu choice “SETUP: FACTORY RESET” • Press and hold the Left Knob for two seconds until the display reads “In Progress” • The C8 will power off when the Factory Reset is complete... -
Page 16: Remote Control Buttons
Remote Control Buttons Mutes and unmutes the audio Powers the C8 ON or OFF LED illuminates during the time a remote command is sent to the C8 Decreases the volume level Increases the volume level Select the desired active TRIM function; also... -
Page 17: Changing The Remote's Battery
The supplied Remote Control performs the various • Hold the remote upsidedown and backwards with Operating Functions for the C8 Preamplifier. McIntosh name upsidedown and facing away from you. The thicker end will now be the top and Input Source Selection you should be staring at the back of the remote. -
Page 18: Packing The C8
Packing the C8 When shipping the C8, it is highly recommended that the unit be packed as it was originally shipped to avoid damage. Failure to properly pack the unit will likely result in damage. (The front panel is made of... -
Page 19: Specifications
230 Volts, 50/60Hz at 50 watts 2.5V Unbalanced 240 Volts, 50/60Hz at 50 watts 5V ohms Balanced Standby, less than 0.5 watt Note: Refer to the rear panel of the C8 for the correct Input Impedance voltage. High Level - 22K ohms Unbalanced Overall Dimensions 44k ohms Balanced Width is 12-9/32 inches (31.2cm) - Page 20 The continuous improvement of its products is the policy of McIntosh Laboratory Incorporated who reserve the right to improve design without notice. Printed in the U.S.A. McIntosh Part No. 24109701...
Need help?
Do you have a question about the C8 and is the answer not in the manual?
Questions and answers