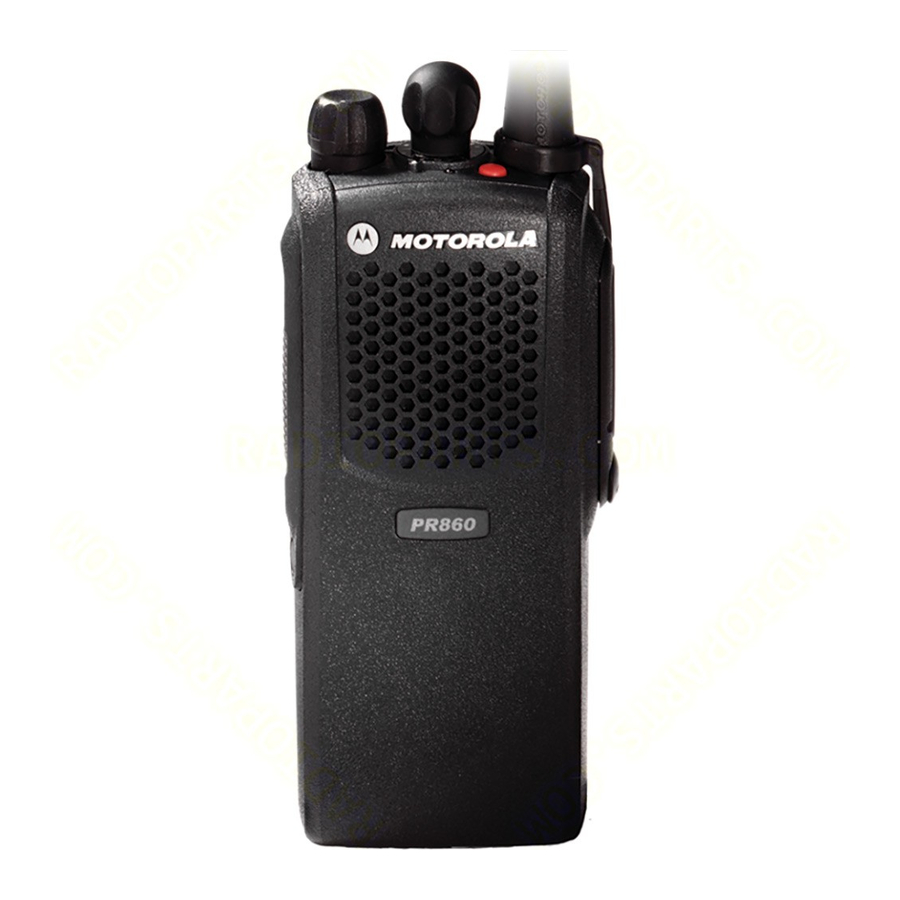
Motorola PR860 Basic Service Manual
Two-way portable radio
Hide thumbs
Also See for PR860:
- User manual (28 pages) ,
- User manual (57 pages) ,
- Detailed service manual (197 pages)
Table of Contents
Advertisement
Quick Links
Advertisement
Table of Contents

Related Manuals for Motorola PR860


Summary of Contents for Motorola PR860
- Page 1 PR860 Two-Way Portable Radio Basic Service Manual...
-
Page 2: Computer Software Copyrights
Motorola. Furthermore, the purchase of Motorola products shall not be deemed to grant either directly or by implication, estoppel, or otherwise, any license under the copyrights, patents or patent applications of Motorola, except for the normal non-exclusive license to use that arises by operation of law in the sale of a product. -
Page 3: Document History
Document History The following major changes have been implemented in this manual since the previous edition: Edition Description Date 6881098C42-O Original Release Feb. 2005 6881098C42-P Updated Part numbers and Descriptions in Jun. 2007 Exploded View section. Updated Service and Technical Support info. - Page 4 Notes...
-
Page 5: Table Of Contents
Table of Contents Foreword ......................ii Product Safety and RF Exposure Compliance ............... ii Computer Software Copyrights..................ii Document Copyrights ..................... ii Disclaimer ........................ii Trademarks........................ii Document History ..................iii Chapter 1 Introduction ....................1-1 1.1 Scope of Manual....................1-1 1.2 Warranty and Service Support................1-1 1.2.1 Warranty Period and Return Instructions.......... - Page 6 2.7.4 Chassis Assembly Reassembly ............. 2-10 2.7.5 Chassis and Front Cover Reassembly ........... 2-10 2.7.6 Option Board Installation ................ 2-11 PR860 Radio Exploded Mechanical View and Parts List ......... 2-13 2.9 Service Aids ...................... 2-15 2.10 Test Equipment ....................2-16 2.11 Configuring and Wiring the Programming/Test Cable........
- Page 7 7.1 VHF 136–174 MHz (Conventional)..............7-1 7.2 UHF1 403-470 MHz (Conventional) ..............7-2 7.3 UHF2 450-512 MHz (Conventional) ..............7-2 7.4 LowBand1 29.7-42 MHz (Conventional)............. 7-3 7.5 LowBand2 35-50 MHz (Conventional)..............7-3 7.6 Specifications, PR860 Radio ................7-4 Glossary ..................Glossary-1...
- Page 8 viii Notes...
- Page 9 List of Figures Figure 2-1: Battery Removal ..................2-4 Figure 2-2: Knob Removal ..................2-4 Figure 2-3: Chassis Removal ................... 2-5 Figure 2-4: Unlatch Flex Connectors ................ 2-5 Figure 2-5: Remove Main Board from Chassis............2-6 Figure 2-6: Remove Retainer..................2-7 Figure 2-7: Removing the Retainer and Other Boards from the Radio.....
- Page 10 List of Tables Table 1-1: Radio Model Number (Example: AAH25KDC9AA3AN) ......1-4 Table 2-1: Service Aids ................... 2-15 Table 2-2: Recommended Test Equipment ............. 2-16 Table 3-1: Test Environments (Side Button 1) ............3-3 Table 3-2: Test Channel Spacing (Side Button 2) ............. 3-3 Table 3-3: Test Frequencies (Using the Channel Selector Switch) ......
-
Page 11: Chapter 1 Introduction
In instances where the product is covered under a “return for replacement” or “return for repair” warranty, a check of the product should be performed prior to shipping the unit back to Motorola. This is to ensure that the product has been correctly programmed or has not been subjected to damage outside the terms of the warranty. -
Page 12: Piece Parts Availability
Products Services Division (RPSD) and/or the Customer Care and Services Division (CCSD) and/or the Accessories and Aftermarket Division (AAD). Motorola Online Motorola Online users can access our online catalog at https://www.motorola.com/businessonline. To register for online access, please call 1-800-422-4210 (for U.S. and Canada Service Centers only). -
Page 13: Technical Support
If a unit requires further complete testing, knowledge and/or details of component level troubleshooting or service than is customarily performed at the basic level, please send the radio to a Motorola Service Center as listed below. Motorola Service Center 45D Butterfield Trail... -
Page 14: Radio Model Information
Physical Channel Feature Model Model Protocol Unit Series Band Level Packages Spacing Level Revision Package AA or 4-5W PR860 Programma- Conventional PR860 (136-174 (no display) (non-keypad) MHz) UHF1 5.1-6W 25 kHz (403-470 MHz) UHF2 12.5 kHz (450-512 MHz) Low Band, R1 (29.7-... -
Page 15: Chapter 2 Maintenance
Chapter 2 Maintenance Introduction This chapter provides details about the following: • Preventive maintenance (inspection and cleaning) • Safe handling of CMOS and LDMOS devices • Disassembly and reassembly of the radio • Installation of Option Boards Preventive Maintenance The radios do not require a scheduled preventive maintenance program; however, periodic visual inspection and cleaning is recommended. -
Page 16: Safe Handling Of Cmos And Ldmos Devices
When damaged parts are replaced, identical parts should be used. If the identical replacement part is not locally available, check the parts list for the proper Motorola part number and order the part from the nearest Motorola Radio Products and Solutions Organization listed in the “Piece Parts” section of... -
Page 17: Disassembling And Reassembling The Radio - General
If a unit requires more complete testing or service than is customarily performed at the basic level, send this unit to a Motorola Authorized Service Center. (See Chapter 1, section 1.2.4 Technical Support on page 1-3 for a list of authorized service centers.) The following disassembly procedures should be performed only if necessary: •... -
Page 18: Detailed Radio Disassembly
Maintenance Detailed Radio Disassembly 2.6.1 Front Cover from Chassis Disassembly 1. Turn off the radio. 2. Remove the battery: a. Pull down on the two battery-release buttons. b. With the buttons pulled down, the top of the battery will fall from the radio. c. -
Page 19: Figure 2-3: Chassis Removal
Maintenance 5. Separate the chassis from the internal electronics front cover assembly as follows: a. Insert a small, 3/16” flat-blade screwdriver, or similar instrument, in between the thin remaining wall and the chassis at the bottom of the radio. Do not mar the O-ring sealing area on the housing. -
Page 20: Chassis Assembly/Disassembly
Maintenance 2.6.2 Chassis Assembly/Disassembly 1. If disassembly of the chassis or the main board is required, then use a TORX™ screwdriver with a T6 head to remove the four screws holding the main board to the chassis. Screws (4) Compliant Main Ground Contact... -
Page 21: Figure 2-6: Remove Retainer
Maintenance 3. To remove the keypad retainer shield: a. Insert the tip of a “penknife size,” flat blade screwdriver in the opening at the end of the keypad retainer arm tab. b. Pry the tab away from the side of the front cover until it moves past the ledges on the side wall. -
Page 22: Speaker, Microphone, And Universal Connector Flex Disassembly
Maintenance 2.6.4 Speaker, Microphone, and Universal Connector Flex Disassembly 1. If disassembly of the speaker-microphone assembly is necessary, remove the dustcover by turning the screw at the bottom of the dustcover counterclockwise with your fingers. Lift the dustcover out of its pocket. NOTE: The dustcover must be removed to remove the speaker-microphone assembly flex circuit. -
Page 23: Control Top Disassembly
Maintenance 6. After the universal connector tail of the speaker-microphone assembly is removed, the assembly can be completely removed. If it is necessary to replace the speaker or microphone, or both, do it while the flex circuit is removed from the front cover. When reassembling the microphone in its boot, make sure the microphone port faces the round hole in the bottom of the boot. -
Page 24: Option Board Reassembly
2-10 Maintenance 2.7.3 Option Board Reassembly 1. Replace the option board. 2. Insert the “top hooks” of the keypad retainer into the slots below the speaker (above the display) in the front cover. Snap all four of the retainer arm tabs in place in the front cover. NOTE: Pull the speaker-microphone flex circuit out of the way during reassembly. -
Page 25: Option Board Installation
Maintenance 2-11 5. Push the chassis assembly completely into the top of the front cover until it settles in place. 6. Be sure the O-ring is properly seated. 7. Snap the bottom of the chassis into the front cover. 8. Reassemble the knobs, dust cover, antenna, and battery. Radio Chassis Figure 2-10: Fastening the Chassis... - Page 26 2-12 Maintenance 5. Reassemble the option board to the front cover assembly. 6. Insert the jumper flex circuit into the connector on the option board. Notice the orientation of the flex circuit. Arrows on the jumper flex point to the correct way of inserting the flex into the connector.
-
Page 27: Pr860 Radio Exploded Mechanical View And Parts List
PR860 Radio Exploded Mechanical View and Parts List 2-13 PR860 Radio Exploded Mechanical View and Parts List Motorola Part Motorola Part Motorola Part Item Description Item Description Item Description Number Number Number 0104007J99 Keypad Board Assembly HLN9714 Beltclip Please refer to Antenna section 6.1.1 on... - Page 28 2-14 PR860 Radio Exploded Mechanical View and Parts List Notes...
-
Page 29: Service Aids
2.9 Service Aids Table 2-1 lists service aids recommended for working on the radio. NOTE: While all of these items are available from Motorola, most are standard shop equipment items, and any equivalent item capable of the same performance may be substituted for the item listed. -
Page 30: Test Equipment
2-16 Test Equipment 2.10 Test Equipment Table 2-2 lists test equipment required to service the radio. Table 2-2:Recommended Test Equipment Motorola Part Description Characteristics Application R2000, R2600 Service Monitor This monitor will Frequency/deviation meter and R2400, or R2001 substitute for items... -
Page 31: Configuring And Wiring The Programming/Test Cable
Configuring and Wiring the Programming/Test Cable 2-17 2.11 Configuring and Wiring the Programming/Test Cable Block Figure 2-12: Programming/Test Cable AARKN4074 Figure 2-13: Pin Configuration of the Cable Side Connector... -
Page 32: Figure 2-14: Programming/Test Cable Schematic
2-18 Configuring and Wiring the Programming/Test Cable TO RADIO TO RADIO UNIVERSAL TEST SET CONNECTOR RLN4460 EXT SPKR + AUDIO - EXT SPKR - OPTION B+ AUDIO + EXT MIC MIC AUDIO OPT SEL 2 OPT SEL 1 RX DATA VOL CTRL TX DATA DISC... -
Page 33: Transceiver Performance Testing
Chapter 3 Transceiver Performance Testing General These radios meet published specifications through their manufacturing process by utilizing high accuracy laboratory-quality test equipment. The recommended field service equipment approaches the accuracy of the manufacturing equipment with few exceptions. This accuracy must be maintained in compliance with the manufacturer’s recommended calibration schedule. -
Page 34: Figure 3-1: Radio Side Button Location
Transceiver Performance Testing 7. Press SB3, view “98/1”; release view “98/0”. 8. Press PTT button, view “1/1”; release view “1/0”. Channel Selector Knob On/Off Knob Side Button 1 (programmable) Side Button 2 (programmable) Side Button 3 (programmable) Figure 3-1: Radio Side Button Location... -
Page 35: Table 3-1: Test Environments (Side Button 1)
Transceiver Performance Testing Table 3-1: Test Environments (Side Button 1) Number of Side No. of Display Description Function Button 1 Beeps Shows Presses Initial (No but- Carrier RX: if carrier detected ton presses Squelch TX: mic audio required) Tone Private- RX: unsquelch if carrier and tone Line (192.8Hz) detected... -
Page 36: Test Frequencies
Transceiver Performance Testing Test Frequencies The radio channels and test frequencies are listed in Table 3-3. The channels are selected using the channel selector switch located on top of the radio, as shown in Figure 3-1 on page 3-2. The test environment and channel spacing for any particular frequency is selected using ‘side buttons 1 and 2’, as listed in Table 3-1 on page 3-3 and Table 3-2 on page 3-3. -
Page 37: Receiver Performance Tests
Transceiver Performance Testing Receiver Performance Tests The receiver and transmitter performance tests are contained in Table 3-4 and Table 3-5 respectively. Refer to Chapter 4, Figure 4-1 on page 4-2, for test equipment setup. Note that all test measurements are taken at 77°F 25°C) and in conventional or trunked models. -
Page 38: Table 3-5: Transmitter Performance Checks
Transceiver Performance Testing Table 3-5: Transmitter Performance Checks (Models with ”G” in location 10 of model number EX:AAH25RDH9GB6AN) Test Service Monitor Radio Test Set Comments Name Reference Mode: PWR MON TEST MODE, PTT to Frequency error Frequency 4th channel test frequency* Test Channel continuous ±200 Hz VHF... -
Page 39: Radio Tuning, Programming, Cloning, And Lowband Antenna Cutting Procedure
Chapter 4 Radio Tuning, Programming, Cloning, and Lowband Antenna Cutting Procedure Introduction This chapter provides an overview of the Customer Programming Software (CPS) and tuner program designed for use in a Windows NT, Windows 95, Windows 98, Windows 2000, and Windows ®... -
Page 40: Global Radio Tuning Setup
Figure 4-1: Radio Tuning Test Equipment Setup 4.2.1 Initial Test Equipment Setup The supply voltage is connected to the radio using a Motorola battery eliminator, P/N AA0180305G54. The initial test equipment (Figure 4-1) control settings are listed in Table 4-2. -
Page 41: Cps Programming Setup
Radio Tuning, Programming, Cloning, and Lowband Antenna Cutting Procedure CPS Programming Setup The CPS programming setup, shown in Figure 4-2, is used to program the radio codeplug. NOTE: Refer to appropriate program on-line help files for the codeplug programming procedures. Radio Test Box Battery... -
Page 42: Figure 4-3: Radio Side Button Locations
Radio Tuning, Programming, Cloning, and Lowband Antenna Cutting Procedure 6. When cloning is completed, both radios reset themselves and turn their green LEDs off. The source radio produces a “clone-exit” tone and displays “Clone Complete”. 7. Turn both radios off. 8. -
Page 43: Lowband Molded Antenna Cut Chart
11 7/16 (29.052 cm) 4. To replace the antenna cap, put a small bead NOTE: 10 5/8 (26.988 cm) of #414 Loctite™ (Motorola part number 1110019B59) Antenna length around the inside walls of the antenna cap. Place 10 (25.400 cm) measured from 9 3/8 (23.813 cm) - Page 44 Radio Tuning, Programming, Cloning, and Lowband Antenna Cutting Procedure Notes...
-
Page 45: Power Up Self-Test
Chapter 5 Power Up Self-Test Error Codes - Conventional Radios Turning on the radio starts a self-test routine that checks the RAM, ROM checksum, EEPROM hardware, and EEPROM checksum. If these checks are successful, the radio generates two high- pitched self-test pass tones, or a musical tone (selected in CPS). If the self-test is not successful, one low-pitched tone is heard. - Page 46 Power Up Self-Test Notes...
-
Page 47: Chapter 6 Accessories
Chapter 6 Accessories PR860 Accessories 6.1.1 Antennas NAB6064 Low Band 30-50 MHz, Heliflex NAD6502_R VHF 146-174 MHz, Heliflex PMAD4012 VHF 136-155 MHz 9 cm, Stubby PMAD4025 VHF 150-161 MHz, Stubby PMAD4013 VHF 155-174 MHz 9 cm, Stubby 8504762J01 VHF 136-155 MHz 14 cm, Whip... -
Page 48: Chargers & Charger Accessories
), Three Station PLUS WPLN4079_R Battery Maintenance System Plus (BMS ), Six Station PLUS WPLN4107_R Motorola Conditioning Charger (MCC) Single-Unit with Adapter Plate WPPN4065_R Motorola Conditioning Charger (MCC) Four Station WPPN4082_R Adapter Plate Only (use with MCC) RLN4814 Vehicular Mounting Bracket For Single-Unit MCC WPPN4079_R BMS Battery Adapter (for use with NiCd &... -
Page 49: Carry Accessories
Accessories 6.1.4 Carry Accessories HLN9714 2 1/2” Spring Action Belt Clip HLN9844 2” Spring Action Belt Clip HLN9952 Carry Holder Belt Clip HLN9652 Leather Case with Belt Loop, Li-Ion HLN9665 Leather Case with Belt Loop, NiMH & NiCd HLN9670 Leather Case with Swivel, Li-Ion HLN9676 Leather Case with Swivel, NiMH &... -
Page 50: Audio Accessory - Earpieces
Accessories AARMN4019 Medium Weight Over-the-Head Headset with Noise Cancelling Mic & Inline AARMN4032 Medium Weight Over-the-Head Headset with Noise Cancelling RMN5047 NFL Style Heavy Duty Headset (requires AAHLN9716 Adapter) RMN5015 Racing Headset (RKN4091 adapter cable required) AARMN4020 Push-to-Talk or VOX Heavy Duty Headset RMN4051 2-Way Hard-Hat Mount Headset, Black (requires RKN4097 adapter cable) -
Page 51: Audio Accessory - Ear Mics
HLN9794 Charger Insert Spacer - Compatible with “B” and “C” version chargers only RLN4890 Assistive Turning Knobs 6.1.11 Service AARKN4074 Programming and Test Cable/PR860 6.1.12 Manuals HKLN4229 PR860 Users Guide (CD) 6881098C42 PR860 Basic Service Manual 6881098C43 PR860 Detailed Service Manual... - Page 52 Accessories Notes...
-
Page 53: Model Chart And Test Specifications
Item Description PMUD2035_ PR860 Super Tanapa 136-174 MHz, 5W, 16CH PMUD2034_ PR860 Tanapa 136-174 MHz, 5W, 16CH PMHD4022_ PR860 Back Cover Kit 136-174 MHz, 5W, 16CH PMHN4058_ PR860 Front Cover Kit NAE6483 Whip Antenna (403-520 MHz) 6881098C02 PR860 User Guide... -
Page 54: Uhf1 403-470 Mhz (Conventional)
Item Description PMUE2336_ PR860 Super Tanapa 403-470 MHz, 4W, 16CH PMUE2334_ PR860 Tanapa 403-470 MHz, 4W, 16CH PMHE4032_ PR860 Back Cover Kit 403-470 MHz, 4W, 16CH PMHN4058_ PR860 Front Cover Kit NAE6483 Whip Antenna (403-520 MHz) 6881098C02 PR860 User Guide x = Indicates one of each is required. -
Page 55: Lowband1 29.7-42 Mhz (Conventional)
Model Description AAH45BEC9AA3_N PR860, 29.7-42 MHz, 6W, Conv 16-Ch Item Description PMUB1055_ PR860 Super Tanapa 29.7-42 MHz, 6W, 16CH PMUB1053_ PR860 Tanapa 29.7-42 MHz, 6W, 16CH PMHB4000_ PR860 Back Cover Kit 29.7-42 MHz,6W, 16CH PMHN4058_ PR860 Front Cover Kit NAB6064_ Heliflex Antenna (29.7-50 MHz) -
Page 56: Specifications, Pr860 Radio
Model Chart and Test Specifications Specifications, PR860 Radio General Specification Lowband Model Numbers: AAH45BEC AAH45KDC AAH45RDC AAH45CEC AAH45SDC Frequency Range: 29.7 - 42.0 MHz 136-174 MHz 403-470 MHz 35.0- 50.0 MHz 450-512 MHz Frequency Stability: ±5 PPM @ 25 kHZ (-30°C to +60°C, 25°C Ref.) - Page 57 Model Chart and Test Specifications Transmitter Specification Lowband Power Output NiMH @ 7.5V: 1-6 W 1-5 W 1-4 W Spurs/Harmonics: -36 dBm < 1GHz -30 dBm > 1 GHz Audio Response: (from 6 dB/oct. Pre-Emphasis, 300 to +1 to -3 dB 3000Hz) Audio Distortion: @ 1000 Hz, 60%...
- Page 58 Model Chart and Test Specifications Notes...
-
Page 59: Glossary
Low Level Expander: slight amount of volume expansion; used to improve the signal to noise ratio. Low-Speed Handshake: 150 baud digital data sent to the radio during trunked operation while receiving audio. Trunked signaling protocol using low speed data. Registered trademark of E.F. Johnson Company. Motorola Digital Communication. - Page 60 Glossary-2 MRTI Motorola Radio-Telephone Interconnect: a system that provides a repeater connection to the Public Switched Telephone Network (PSTN). The MRTI allows the radio to access the telephone network when the proper access code is received. Minimum-Shift Keying. OMPAC Over-Molded Pad-Array Carrier: a Motorola custom package, distinguished by the presence of solder balls on the bottom pads.
- Page 61 Glossary-3 Standby Mode An operating mode whereby the radio is muted but still continues to receive data. System Central Main control unit of the trunked dispatch system; handles ISW and OSW Controller messages to and from subscriber units (see ISW and OSW). System Select The act of selecting the desired operating system with the system-select switch (also, the name given to this switch).
- Page 62 Glossary-4 Notes...
- Page 63 Motorola, Inc. 8000 West Sunrise Boulevard Ft. Lauderdale, FL 33322 MOTOROLA and the Stylized M Logo are registered in the U.S. Patent and Trademark Office. All other product or service names are the property of their respective owners. © Motorola, Inc. 2007 All rights reserved.
Need help?
Do you have a question about the PR860 and is the answer not in the manual?
Questions and answers