Table of Contents
Advertisement
IMPORTANT
Check your power supply
Make sure that your local AC mains
voltage matches the voltage specified
on the name plate on the bottom
panel. In some areas a voltage selec-
tor may be provided on the rear
panel of the main keyboard unit.
Make sure that the voltage selector
is set for the voltage in your area.
Advertisement
Table of Contents

Summary of Contents for Yamaha YPP-50
- Page 1 IMPORTANT Check your power supply Make sure that your local AC mains voltage matches the voltage specified on the name plate on the bottom panel. In some areas a voltage selec- tor may be provided on the rear panel of the main keyboard unit. Make sure that the voltage selector is set for the voltage in your area.
- Page 2 Some of these benches are designed to be dealer assembled. Please make sure that the bench is stable before using it. The bench supplied by Yamaha was designed for seating only. No other uses are recommended. PLEASE KEEP THIS MANUAL...
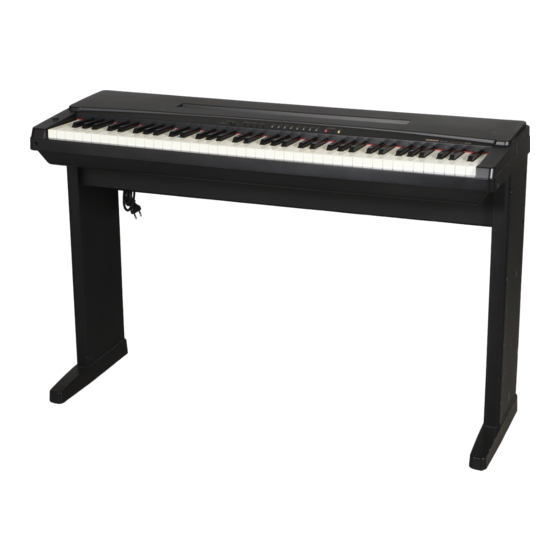
- Page 3 Thank you for choosing a Yamaha YPP-50 Personal Electronic Piano. Your Personal Electronic Piano is a fine musical instrument that employs advanced Yamaha music technology. With the proper care, it will give you many years of musical pleasure. Yamaha’s sophisticated AWM (Advanced Wave Memory) tone generator system offers rich, realistic reproductions of digitally sampled keyboard sounds.
-
Page 4: Keyboard Stand Assembly
KEYBOARD STAND ASSEMBLY NOTE: Although the YPP-50 keyboard stand can be assembled by a single person, the job is much easier with two people. Open the box and remove all the parts. On opening the box you should find the parts shown in the illustration. - Page 6 Attach the stand assembly to the main unit (A). Turn the assembled stand upside down and place it on top of the main unit (which should also be upside-down) with the feet extending toward the keyboard side of the main unit. The tops of the side panels fit into the recessed areas at the ends of the main unit.
- Page 8 METRONOME button and press- ing both the TEMPO buttons simultaneously. Note: The metronome is also related to operation of the YPP-50 Performance Memory. This relationship will be described in the “PERFORMANCE MEMORY” section on page 9.
- Page 9 Voice Selectors The YPP-50 has eight voice selectors. Simply press any of the voice selectors to select the corresponding voice. The LED indicator above the voice selector will light to indicate which voice is currently selected. The Bass Split Mode: The YPP-50 Bass Split Mode allows...
- Page 10 ENJOY THE DEMONSTRATION To give you an idea of the YPP-50’s sophisticated capabilities, it is programmed with a demonstration sequence which plays automatically while demonstrating some of the instrument’s voices. Short segments of the following pieces are included: 24 Preludes No. 15 in D flat major. “Raindrop” Op.28-15 by Chopin (PIANO voice).
-
Page 11: Pitch Control
OFF the entire time. To keep the recorded per- formance in memory for longer periods, make sure that the YPP-50 power is turned ON briefly at least once a week. Note: Recording can not be activatedif the YPP-60 Multi-Timbre Mode is engaged (see “The Multi-Timbre Mode”... -
Page 12: Midi Functions
See “Control Change ON/OFF” on page 11 for information on turning control change number reception and transmission ON or OFF. Note: None of the YPP-50 MIDI functions can be engaged while the built-in metronome is running. MIDI Transmit & Receive Channel... - Page 13 MIDI information received via the MIDI IN connector. This means that while an external MIDI sequence recorder such as the Yamaha EMQ-1 Memory Box, for example, plays the Per- sonal Electronic Piano’s internal voices, an external tone genera- tor such as the EMT-l can be played from the Personal Elec- tronic Piano keyboard.
-
Page 14: Transmitting The Panel Settings
3. Release the MIDI/TRANSPOSE button. The Split & Right Local Off Mode In the YPP-50 either the right- or left-hand section of the key- board can be assigned to control an external keyboard or tone generator. Assigning the left-hand section to external tone gener- ator control was described in the previous section. -
Page 15: Troubleshooting
OPTIONS & EXPANDER MODULES OPTIONS BC-7 Bench A stable, comfortable bench styled to match your Yamaha Personal Electronic Piano. HPEd Stereo Headphones High-performance lightweight dynamic headphones with extra- soft ear pads. - Page 16 10 Watts SPEAKERS 16 cm (6-2/7”) x 2 DIMENSIONS (W x H x D) 1157 x 396 x 759 mm (45-6/9” x 15-3/5” x 28-8/9”) WEIGHT 23 kg (50-5/7 lbs.) * Specifications subject to change without notice. YPP-50 /1~4 Vpp...
- Page 17 YAMAHA [ Personal Electronic Piano ] Model YPP50 MIDI Implementation Chart Function Basic Default Channel Changed Default Mode Messages Note Number True Voice O 9nH, v=1-127 Velocity Note on Note off X 9nH, v=0 Key's After Touch Ch's Pitch Bender...
- Page 18 This series of Yamaha Personal Electronic Piano uses frequencies that appear in the radio frequency range, and if installed in the immediate proximity of some types of audio or video devices within three meters (approximately ten feet), interference may occur.
- Page 19 YAMAHA YAMAHA CORPORATlON P.O. Box 1, Hamamatsu, Japan 909 VI27370 Printed in Japan...


Need help?
Do you have a question about the YPP-50 and is the answer not in the manual?
Questions and answers