Advertisement
Model#
SKU#
873W-6101
1001-240-663
INSTALLATION AND CARE GUIDE
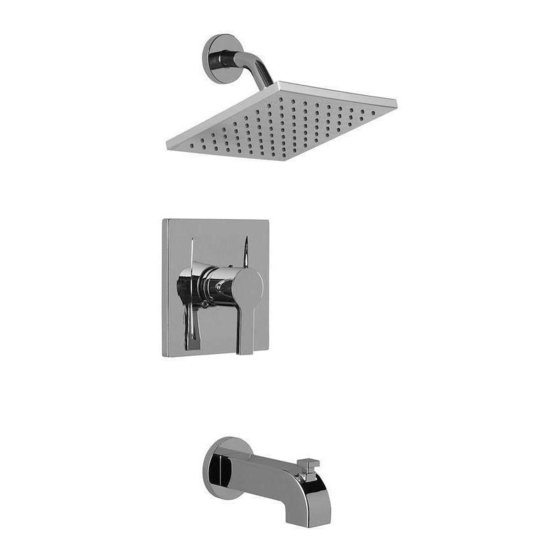
SINGLE-HANDLE TUB AND SHOWER FAUCET
Questions, problems, missing parts?
Before returning to the store, call Glacier Bay Customer Service
8 a.m. - 7 p.m., EST, Monday - Friday
9 a.m. - 6 p.m., EST, Saturday
1-855-HD-GLACIER (1-855-434-5224)
HOMEDEPOT.COM/GLACIERBAY
THANK YOU
We appreciate the trust and con dence you have placed in Glacier Bay through the purchase of this tub and
shower faucet. We strive to continually create quality products designed to enhance your home. Visit us online
to see our full line of products available for your home improvement needs. Thank you for choosing Glacier Bay!
THD
1/2015 REV.01
Advertisement
Table of Contents

Related Manuals for Glacier bay 873W-6101


Summary of Contents for Glacier bay 873W-6101
- Page 1 HOMEDEPOT.COM/GLACIERBAY THANK YOU We appreciate the trust and con dence you have placed in Glacier Bay through the purchase of this tub and shower faucet. We strive to continually create quality products designed to enhance your home. Visit us online to see our full line of products available for your home improvement needs.
-
Page 2: Table Of Contents
Glacier Bay products are manufactured with superior quality standards and workmanship and are backed by our limited lifetime warranty. Glacier Bay products are warranted to the original consumer purchaser to be free of defects in materials or workmanship. We will replace FREE OF CHARGE any product or parts that proves defective. -
Page 3: Pre-Installation
Pre-Installation PLANNING INSTALLATION ADVANCED INSTALLATION: Consult a plumber or professional before installing this product. Before beginning the installation of this product, ensure all parts are present. Compare parts with the Package Contents list. If any part is missing or damaged, do not attempt to install the product. Contact customer service for replacement parts. - Page 4 Pre-Installation (continued) B. IPS Safety Measuring Tube Thread Pipe Thermometer goggles tape cutter hole saw sealant tape wrench Phillips Flat blade Silicone Adjustable Flashlight Strap wrench screwdriver screwdriver sealant wrench C. PEX+COPPER COPPER COPPER Safety Measuring Tube Thread Full circle Thermometer goggles tape...
- Page 5 Pre-Installation (continued) D. CPVC+COPPER COPPER COPPER Safety Measuring Tube Thread Flashlight Thermometer goggles tape cutter hole saw sealant tape Phillips Flat blade Silicone CPVC CPVC Adjustable Strap wrench screwdriver screwdriver sealant cement cleaner wrench HOMEDEPOT.COM/GLACIERBAY Please contact 1-855-HD-GLACIER for further assistance.
-
Page 6: Package Contents
Pre-Installation (continued) PACKAGE CONTENTS Part Description Quantity Shower ange Shower arm Shower head Valve body Escutcheon Handle Set screw Protective cap Plug Tub spout Screw Plaster guard Escutcheon screw... -
Page 7: Installation
Installation Installing the valve body and Preparing for installation removing the plaster guard □ a Thin Wall Installation CAUTION: Always turn off the water supply before “Thin Wall” are usually built up with materials removing an existing faucet or replacing any part of a faucet. - Page 8 Installation (continued) Installing the supply Back to back installation connections □ If the hot and cold inlets are reversed (hot on NOTE: The hot water supply lines go into the H inlet, and right and cold on left), remove the screw, inverter, the cold water supply lines go into the C inlet.
- Page 9 Installation (continued) Flushing the water outlets Installing the plaster guard and checking for leaks □ Place the plaster guard (L) onto the body (D) □ Place the handle (F) on the valve body (D) and secure with the screws (K). inverter and turn the handle (F) to the full on mixed position.
- Page 10 Installation (continued) Installing the shower arm Installing the tub spout □ □ Insert the long end of the shower arm (B) through Wrap thread sealant tape around the pipe the ange (A), and wrap thread sealant tape (not threads of the tub spout (J) outlet in a clockwise included) around the long end of the shower arm direction, as shown.
- Page 11 Installation (continued) Installing the escutcheon Removing the plastic cap and handle □ Install the escutcheon (E) onto the valve body □ Before installing the escutcheon (E), remove the (D) using the escutcheon screws (M). plastic cap (1) from the valve body (D) by twisting the cap in a clockwise direction when the depth □...
-
Page 12: Adjusting The Temperature
Installation (continued) Checking for leaks □ Turn the handle to the full on mixed position. □ When the valve is turned on, water normally ows through the tub spout (J). To activate the shower, turn the valve on and pull the knob (1) up. - Page 13 Adjusting the Temperature (continued) Removing the red limit stop ring □ Remove the red limit stop ring (1) from the cartridge assembly (2). Adjusting the desired maximum water temperature □ Place handle (F) and inverter (1) onto the cartridge stem. □...
-
Page 14: Care And Cleaning
Adjusting the Temperature (continued) Reinstalling the red limit stop ring □ Reinstall the red limit stop ring (1) and readjust the teeth engagement position so that the stem cannot move beyond the adjusted point. Reinstalling the inverter, sleeve and handle NOTE: Rotate the cartridge stem (4) clockwise to turn off the water before you install the handle. -
Page 15: Troubleshooting
Troubleshooting NOTE: Refer to the service parts section in this manual for a detailed drawing showing the location of the parts listed below. Problem Possible Cause Solution □ Hot and cold are reversed. Lines reversed or cartridge installed upside Rotate the cartridge stem 180° down. -
Page 16: Service Parts
Service Parts Part Description Part Number Part Description Part Number Inverter RP64043 Shower ange RP38049* Screw RP50020 Shower arm RP38019* Escutcheon RP80469* Shower head RP38245* Escutcheon screw RP50066* O-ring RP60101 Handle RP13398* Cartridge RP20006 Set screw RP50002 O-ring RP60091 Plug RP70365 Bonnet nut RP70437... - Page 17 Questions, problems, missing parts? Before returning to the store, call Glacier Bay Customer Service 8 a.m. - 7 p.m., EST, Monday - Friday 9 a.m. - 6 p.m., EST, Saturday 1-855-HD-GLACIER (1-855-434-5224) HOMEDEPOT.COM/GLACIERBAY Retain this manual for future use.
Need help?
Do you have a question about the 873W-6101 and is the answer not in the manual?
Questions and answers