Table of Contents
Advertisement
Quick Links
Thank you for purchasing this Texsport BBQ grill. Please read and understand each step of the set-up instructions. We encourage you to
set-up this swivel grill at least once prior to your outdoor trip, ensuring that you have a satisfactory understanding of the set-up process.
We hope you enjoy your new BBQ grill and that it will give you many years of outdoor pleasure.
A
D
E
F
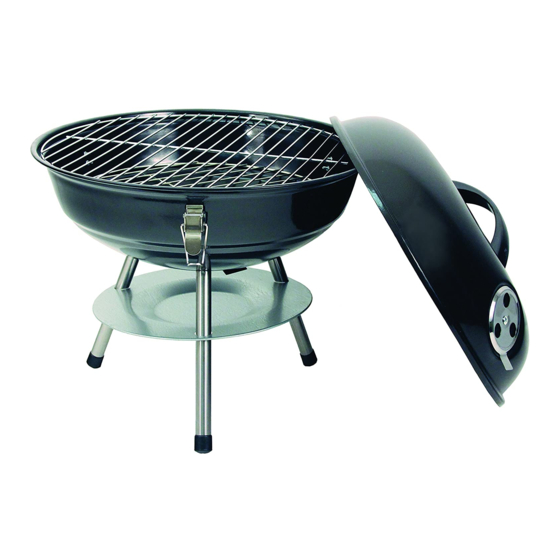
Parts List:
A .... Grill
B ..... Charcoal grate
C ..... Pit
D .... 3 Legs with screws and washers
E ..... Lid handle
F ..... Locking clips
G .... 2 Lid handle washers
STEP 1 - Attach locking clips (F)
to pit (C) using 2 locking clip
screws and nuts (J) as illustrat-
ed. Repeat for the other 2 lock-
ing clips.
#15100 - Mini Charcoal BBQ Grill
Do not apply excessive force to this product.
B
G
K
H
I
J
L
STEP 2 - Screw ash vent (K) to
pit (C) using 1 vent screw and
nut (I).
INSTRUCCIONES
M
H .... 2 Lid handle screws and nuts
I ...... 2 Vent screws and nuts
J ..... 6 Locking clip screws and nuts
K .... Ash vent
L ..... Lid vent
M .... Ash Tray
N .... Dome lid
STEP 3 - Remove screws to at-
tach ash tray (M) and legs (D).
C
N
Advertisement
Table of Contents

Subscribe to Our Youtube Channel
Related Manuals for Texsport 15100


Summary of Contents for Texsport 15100
- Page 1 #15100 - Mini Charcoal BBQ Grill Thank you for purchasing this Texsport BBQ grill. Please read and understand each step of the set-up instructions. We encourage you to set-up this swivel grill at least once prior to your outdoor trip, ensuring that you have a satisfactory understanding of the set-up process.
- Page 2 NOTE: Use locking clips to easily Questions: transport BBQ grill once cooled. If you should have any questions, problems or comments, please call our Customer Service Department at 1-800-231-1402 or e-mail info@texsport.com. This Department is open M–F from 8 a.m.–5 p.m. CST.
Need help?
Do you have a question about the 15100 and is the answer not in the manual?
Questions and answers