Table of Contents
Advertisement
Quick Links
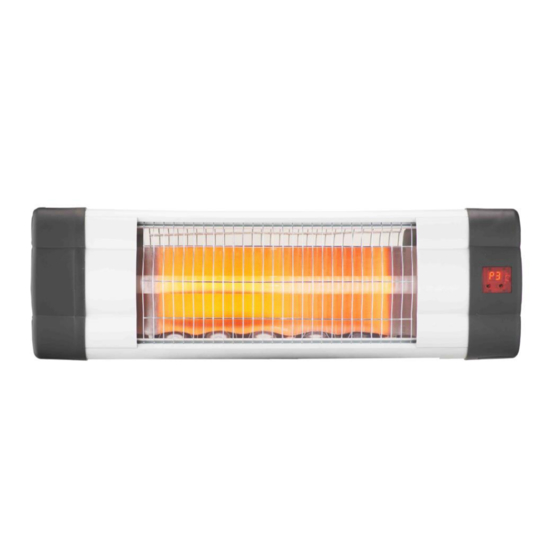
INFRARED HEATER
PHW-3000R
THE USER MANUAL AND WARRANTY CERTIFICATE
WARNING!
PLEASE DO NOT USE THIS PRODUCT IN THE VERTICAL
POSITION
Distinguished Customer,
This manual has been designed for our Infrared Line, Infrared Star and Infrared U K
Line models.
You have purchased a high quality, efficient and original Infrared Heater.
We would like to express our gratitude to you for your appropriate choice and confidence
Advertisement
Table of Contents

Summary of Contents for Adexa PHW-3000R
- Page 1 INFRARED HEATER PHW-3000R THE USER MANUAL AND WARRANTY CERTIFICATE WARNING! PLEASE DO NOT USE THIS PRODUCT IN THE VERTICAL POSITION Distinguished Customer, This manual has been designed for our Infrared Line, Infrared Star and Infrared U K Line models. You have purchased a high quality, efficient and original Infrared Heater.
-
Page 2: Table Of Contents
in our company. Please read this manual thoroughly in order to attain a sustainable satisfaction with your heater. Appropriate installation, operation and maintenance are of great importance for the security of you and of those who are to benefit from the heater. The difference between Infrared Classic, Infrared Line and Infrared Star models is the duration of lives of the filaments employed. -
Page 3: Safety
2. Safety 2.1 Safety Instructions (A+B) A-Electrical Connection Safety ⚫ Check whether your appliance and power cord are damaged before operating your appliance. ⚫ Check whether there is any crack, disjoint or scratch on the filament (heating tube). If any, contact with your authorized technical service. ⚫... - Page 4 ⚫ Do not make use of your heater to light up cigarette or similar materials. ⚫ Supervision is needed when this product is used anywhere near children. The appliance is not intended for use by children or other persons without assistance or supervision if their physical, sensory or mental capabilities prevent them from using it safely.
-
Page 5: Installation
⚫ Take out the front grid to clean the reflector (reflecting mirror) and the filament and apply the instructions on page 19. D-Repair and Service (page 20) ⚫ Attention! Only technical services and persons authorized by SUN may serve, repair and replace the parts of this heater. -
Page 6: Using Steps
distance on the wall parallel to the floor(At least 1.8 m from the floor and at least 0.5 m from the ceiling).(Figure 5). ④ Join the brackets on the heater with the brackets, fastened on the wall, with help of figured screw-nuts(Figure 6).Install the heater under necessary angle(in the direction to the area being heated).Look at issue 4:(Main rules of heater using). -
Page 7: Application Fields
Step 3:Press Open/Close second,the digital screen shows P.1,the function of a file connected Step 4:Press Open/Close third,the digital screen shows P.2,the function of two file connected Step 5:Press Open/Close forth,the digital screen shows P.3,the function of three file connected Step 6:After the function is on,1-24 hours timing shutdown can be adjusted arbitrarily, the digital screen showing 0.1 indicates timing one hour,showing 0.2 indicates timing two hour. -
Page 8: Technical Information-Heating Area / Size
Install the heater strict in horizontal position i.e. PARALLEL TO FLOOR Direct the heater the APPROPRIATE ANGLE Prevent the lost of directed heat through the windows. 6. Technical Information-Heating Area / Size Product Name / Model / Volt / Watt / Heating Area / Size Voltage AC220V-240V~ Frequency... -
Page 9: Operating Instructions
Operating Instructions 7.1 Definitions of the Buttons on the Remote Control The functions of the heater may be controlled via the buttons on your remote control and LED screen. You may also control some of the functions of your heater through the buttons on the front side of the heater. -
Page 10: Manual Operation
high-grade, the beeper will beep once, P3 indicator appears on the screen, and the indicator flashes three times, indicating that the appliance is in high-grade mode. Press the function button again, you can choose low, medium and high gear, P0 indicator appears on the screen, and the indicator flashes three times, indicating that the appliance is in stand by mode. -
Page 11: Cleaning And Maintenance Instructions
ON/OFF/Power mode button Timer button 8. Cleaning and Maintenance Instructions Maintenance Attention! Careful and regular maintenance of Infrared Heater considering our instructions assume great importance so as to attain a long and efficient operation of your appliance. 1- Check the filthiness of the Reflector and IR-Filament at least once a month. If necessary, apply cleaning and maintenance instructions. -
Page 12: Technical Service
dry air. The cloth may be damp but never too wet and the cleaner should not include any chemical. 5- Refrain from using cleaning material likely to damage the reflector (cleanser etc.). 6- Insert the wire grid using a slotted screwdriver. 9. - Page 13 2- Damage in the reflector or filament due to faulty cleaning. 3- Faulty installation or dismantlement. 4- Operating with damaged filament, frame or power cord. Above mentioned defects and services are not covered by the warranty. Should this product be proven defective in workmanship or material, the consumer’s sole remedies shall be such repair or replacement as provided by the terms of this warranty.


Need help?
Do you have a question about the PHW-3000R and is the answer not in the manual?
Questions and answers