Advertisement
Available languages
Available languages
Quick Links
Advertisement

Related Manuals for auna 10032834


Summary of Contents for auna 10032834
-
Page 3: Table Of Contents
Übersicht und Bedienfeld 5 Español 23 Bedienung und Funktionen 8 Français 33 Hinweise zur Entsorgung 12 Italiano 43 TECHNISCHE DATEN Artikelnummer 10032834 Stromversorgung 9-12 V ~ 50/60 Hz KONFORMITÄTSERKLÄRUNG Hersteller: Chal-Tec GmbH, Wallstraße 16, 10179 Berlin, Deutschland. Dieses Produkt entspricht den folgenden Europäischen Richtlinien:... -
Page 4: Sicherheitshinweise
SICHERHEITSHINWEISE Allgemeine Hinweise • Blitzschlag - Wenn Sie das Gerät länger nicht benutzen oder es gewittert, ziehen Sie den Stecker aus der Steckdose der trennen Sie das Gerät vom Antennenanschluss. Dadurch werden Schäden am Produkt durch Blitzschlag und Überspannung vermieden. •... -
Page 5: Übersicht Und Bedienfeld
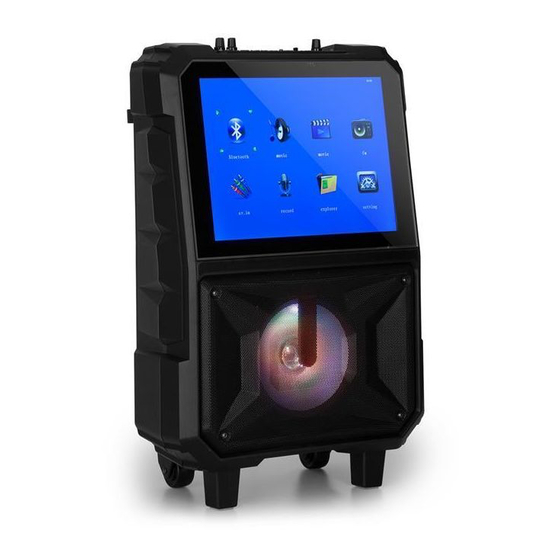
Bedienfeldtasten: ÜBERSICHT UND BEDIENFELD MENU – Auswahl zwischen USB/ TF/ Video/ Audio/ BT/ Geräteübersicht FM-Radio RETURN – Drücken, Griff um zum Menü oder zur vorherigen Einstellung Bedienfeld zu gelangen MOVIE – Auswahl an 14,1“ Bildschirm Filmen 4 MUSIC - Musikwiedergabe Gitter 5 BT –... - Page 6 Fernbedienung INPUT: AV-Modus öffnen MIC PR: Schaltfunktion für die Mikrofonpriorität MOVIE: Direkte Wiedergabe von Filmen und anderen Videodateien B.T: In den BT-Modus wechseln Aufwärts/Vorwärts: Richtungstaste. 2 Sekunden lang drücken, um zum vorherigen Song zu wechseln SETUP: Einstellungen öffnen OK: Zum Bestätigen einer Funktion.
- Page 7 STAND BY: Standby-Funktion für Video, keine Funktion für Audio LCD ein/aus: Ein- und Ausschalten der Bildschirmanzeige MODEL: Wechseln Sie zwischen den Modi BT, USB, TF-Karte und FM-Radio. ECHO: Umschalten der Tonspur auf Audio, Gesangsbegleitung, Umschalten zwischen Originalsänger und Gesangsbegleitung. MUSIC: Musikdateien direkt abspielen FM-Radio: Radio starten MENU: Starten Sie das Radio mit dem entsprechenden Modus.
-
Page 8: Bedienung Und Funktionen
BEDIENUNG UND FUNKTIONEN BT-Verbindung herstellen • Drücken Sie zur Auswahl des BT-Modus entweder die Taste BT oder bewegen Sie das BT-Symbol im Hauptmenü und drücken Sie die Taste PLAY/PAUSE. • Aktivieren Sie die BT-Funktion Ihres Tablets oder Smartphones und suchen Sie das Gerät in der Geräteliste. •... - Page 9 Verwendung des drahtlosen VHF-Mikrofons Im Lieferumfang des Geräts ist ein drahtloses Mikrofon enthalten, so dass Sie direkt starten können. Schalten Sie das Gerät ein. 2. Schrauben Sie die Unterseite des Mikrofons ab, um an das Batteriefach zu gelangen. Legen Sie zwei Batterien des Typs AA in das Batteriefach des Mikrofons ein.
- Page 10 Videowiedergabe • Wenn Sie einen USB-Stick oder eine TF-Karte in das Gerät hineinstecken, wird das Gerät die Priorität wiedergegebenen Video- dateien geben. Alternativ können Sie über die Taste MOVIE in den Videowiedergabemodus gelangen. • Drücken Sie die Taste PLAY/ PAUSE, um die Wiedergabe zu starten und drücken Sie die Taste erneut, wenn Sie die Wiedergabe pausieren möchten.
- Page 11 Audio-Video Input/Output • Stecken Sie ein AV-Kabel in die Audio- und Videoeingänge des Geräts. • Wählen Sie im Hauptmenü „AV“ aus und drücken Sie die Taste PLAY/ PAUSE zum Bestätigen Ihrer Auswahl. • Das Gerät zeigt alle Bilder, Audiodateien und Videodateien der entsprechenden Signalquelle an.
-
Page 12: Hinweise Zur Entsorgung
Hinweis zum Laden des integrierten Akkus Zum netzunabhängigen Betrieb ist das Gerät mit einem Akku ausgestattet. Der Akku wird automatisch geladen, sobald der Netzstecker in eine Steckdose gesteckt wird. Die Ladedauer eines komplett erschöpften Akkus beträgt ca. 8 Stunden. Nach dem Laden wird umgeschaltet auf Erhaltungsladen. - Page 13 Safety Instructions 14 Overview and Control Panel 15 Operation and Functions 18 Hints on Disposal 22 TECHNICAL DATA Item number 10032834 Power supply 220-240 V ~ 50/60 Hz DECLARATION OF CONFORMITY Producer: Chal-Tec GmbH, Wallstraße 16, 10179 Berlin, Germany. This product is conform to the following European...
- Page 14 SAFETY INSTRUCTIONS General information • Lightning - If you are not going to use the device for a long time or if there is a storm, disconnect the plug from the electrical outlet and disconnect the device from the antenna connector. This will avoid damage to the product that may be caused by lightning or overvoltage.
- Page 15 Controls: OVERVIEW AND CONTROL PANEL Selection for USB/ TFNideo/Audio/ Bluetooth/FM radio Overview Press return to the menu or return to the Griff previous layer in other interfaces Bedienfeld Movie play selection 4 Music song play 14,1“ Bildschirm 5 BT function 6.
- Page 16 Remote Control AV input: enter AV input mode P-Mic: switch function for the microphone priority Movie: Directly play movies and other video files Bluetooth: Enter into bluetooth mode Up/previous-Song: Up direction key,2s long press for previous song Setting: Enter into the setting interface of the products OK: Confirm to enter...
- Page 17 Stand by: stand by function for video,No function for audio LCD on/off: turn off/on screen display Mode: Toggle among modes of Bluetooth ,USB drive,TF card and FM radio Echo: Switch the sound track for audio,Vocal accompaniment,switch between the original singer and vocal accompaniment (the same function as the soundtrack) Music: Play music files directly FM Radio: Enter into the FM radio...
- Page 18 OPERATION AND FUNCTIONS BT-Connection • Move BT icon in main interface and then press play/pause key to enter BT mode, or press BT key to directly enter BT mode. • Start the BT function for tablet or mobile phone and then search the product and connect with it, after successful connection, use this product to enjoy the music in Tablet PC or mobile phone.
- Page 19 Using the Wireless VHF Microphone The PA speaker comes with wireless microphones to get you started straight out of the box. Tune on the unit. 2. Unscrew the bottom of the microphone to access the battery enclosure. Insert 2 AA batteries into the microphone. Take note the battery polarity when inserting the batteries.
- Page 20 Video Playback • Plug the USB drive or TF card, the product will give priority to playing video files, or press the „movie“ key to enter the automatic video play. Press the play/pause key to play the video files, press the key again to pause.
-
Page 21: English
Audio-video input/output • Plug AV cable into the audio and video input jack of the product, in the main interface. • Move to the external input icon, then press the play/pause key to enter the input mode (press the remote control input key to enter the input mode). - Page 22 Note on charging the integrated battery The device is equipped with a rechargeable battery for mains-independent operation. The battery is automatically charged as soon as the mains plug is plugged into an electrical outlet. The charging time of a completely exhausted battery is approx.
- Page 23 Vista general y panel de control 25 Puesta en marcha y funciones 28 Retirada del aparato 32 DATOS TÉCNICOS Número de artículo 10032834 9-12 V ~ 50/60 Hz Suministro eléctrico DECLARACIÓN DE CONFORMIDAD Fabricante: Chal-Tec GmbH, Wallstraße 16, 10179 Berlín (Alemania).
- Page 24 INDICACIONES DE SEGURIDAD Indicaciones generales • Relámpago - Si no va a utilizar el aparato durante un periodo largo de tiempo o si hay una tormenta eléctrica, desenchufe el aparato y desconecte el conector de antena. De este modo, protegerá el aparato de los daños que pueden ocasionar los relámpagos y la sobretensión.
- Page 25 Teclas de control: VISTA GENERAL Y PANEL DE CONTROL MENU – elegir entre USB/ TF/ Vídeo/ Audio/ BT/ Radio FM Vista general del RETURN –para acceder al aparato menú o a la configuración anterior Agarradera MOVIE – elegir una película Panel de control MUSIC - reproducir música BT –...
- Page 26 Mando a distancia ENTRADA: Modo AV abierto MIC PR: Función de conmutación para la prioridad del micrófono MOVIE: Reproducción directa de películas y otros archivos de vídeo B.T: Cambiar al modo BT Arriba/Adelante: Botón de dirección. Pulse durante 2 segundos para ir a la canción anterior.
- Page 27 STAND BY: función standby para vídeo, sin función para audio LCD encendido/apagado: Activar y desactivar la visualización en pantalla MODELO: Cambie entre los modos BT, USB, tarjeta TF y radio FM. ECHO: Cambio de la banda sonora a audio, acompañamiento vocal, cambio entre cantante original y acompañamiento vocal.
- Page 28 PUESTA EN MARCHA Y FUNCIONES Establecer conexión Bluetooth • Para elegir el modo BT, pulse el botón BT o mueva el icono BT y pulse el botón PLAY/PAUSE. • Active la función BT en su tableta o smartphone y busque en la lista el karaoke portátil.
- Page 29 Utilizar el micrófono inalámbrico VHF En el envío del karaoke portátil se incluye un micrófono inalámbrico para que empiece a cantar en seguida. Encienda el aparato. 2. Desatornille la parte inferior del micrófono para acceder al compartimento de pilas. Introduzca 2 pilas AA en el compartimento de pilas del micrófono.
- Page 30 Reproducir vídeo • Si introduce un lápiz USB o una tarjeta TF, el aparato da prioridad a los archivos de vídeo. De forma alternativa, puede pulsar el botón MOVIE para entrar en modo Reproducción de vídeo. • Pulse el botón PLAY/ PAUSE para iniciar la reproducción. Vuelva a pulsar el mismo botón para pausar la reproducción.
- Page 31 Entrada/Salida de audio-vídeo • Introduzca un cable AV en la entrada de audio/vídeo del aparato. • Seleccione en el menú principal «AV» y pulse el botón PLAY/ PAUSE para confirmar. • El aparato muestra todas las imágenes, archivos de audio y vídeo de la fuente correspondiente.
- Page 32 Indicaciones sobre la carga de la batería integrada El aparato dispone de una batería integrada para funcionar sin estar conectado a una red eléctrica. La batería se carga automáticamente cuando el aparato está conectado a una toma de corriente. Para cargar por completo una batería descargada se necesitan aprox.
- Page 33 Consignes de sécurité 34 Aperçu et panneau de commande 35 Utilisation et fonctions 38 Conseils pour le recyclage 42 FICHE TECHNIQUE Numéro d'article 10032834 Alimentation 9-12 V ~ 50/60 Hz DÉCLARATION DE CONFORMITÉ Fabricant : Chal-Tec GmbH, Wallstraße 16, 10179 Berlin, Allemagne.
- Page 34 CONSIGNES DE SÉCURITÉ Consignes générales • Foudre - Si vous n‘utilisez pas l‘appareil pendant une longue période ou s‘il y a de l‘orage, débranchez la fiche de la prise et débranchez l‘antenne de l‘appareil. Cela évite d‘endommager le produit à cause de la foudre et des surtensions.
- Page 35 Touches du APERÇU ET PANNEAU DE COMMANDE panneau de commande MENU – sélection entre USB / TF / vidéo / audio / Aperçu de l‘appareil BT / radio FM RETURN – appuyer pour 1. Poignée accéder au menu ou au paramètre précédent 2.
- Page 36 Télécommande INPUT : Ouvrir le mode AV MIC PR : Fonction de commutation pour la priorité du microphone MOVIE : Lecture directe de films et autres fichiers vidéo B.T : Passer en mode BT Haut/en avant : Touche de direction. Appuyez pendant 2 secondes pour passer à...
- Page 37 STAND BY : fonction standby pour la vidéo, pas de fonction pour l'audio Activation/désactivation de l'écran LCD : Activation et désactivation de l'affichage à l'écran MODÈLE : Basculez entre les modes radio BT, USB, carte TF et FM. ECHO : Passage de la bande son à l'audio, accompagnement vocal, passage du chanteur original à...
- Page 38 UTILISATION ET FONCTIONS Établir une connexion BT • Pour sélectionner le mode BT, appuyez sur le bouton BT ou déplacez l‘icône BT dans le menu principal et appuyez sur le bouton PLAY/PAUSE. • Activez la fonction BT de votre tablette ou de votre smartphone et recherchez l‘appareil dans la liste des appareils.
- Page 39 Utilisation du micro sans fil VHF L‘appareil est livré avec un microphone sans fil afin que vous puissiez démarrer directement. Allumez l‘appareil. 2. Dévissez le bas du microphone pour accéder au compartiment de la pile. Insérez deux piles AA dans le compartiment des piles du microphone.
- Page 40 Lecture de vidéo • Lorsque vous insérez une clé USB ou une carte TF dans l‘appareil, celui- ci donne la priorité à la lecture de fichiers vidéo. Vous pouvez également utiliser le bouton MOVIE pour accéder au mode de lecture vidéo. •...
- Page 41 Entrée sortie Audio-Vidéo • Insérez un câble AV dans les entrées audio et vidéo de l‘appareil. • Dans le menu principal, sélectionnez „AV“ et appuyez sur le bouton PLAY/PAUSE pour confirmer votre sélection. • L‘appareil affiche toutes les images, fichiers audio et fichiers vidéo de la source de signal correspondante.
- Page 42 Conseils pour recharger la batterie intégrée Pour le fonctionnement indépendant du secteur, l‘appareil est équipé d‘une batterie rechargeable. La batterie se charge automatiquement dès que la fiche d‘alimentation est branchée sur une prise de courant. Le temps de charge d‘une batterie complètement épuisée est d‘environ 8 heures. Lorsque la charge est complète, l‘appareil bascule en mode de charge lente.
- Page 43 Descrizione prodotto e pannello comandi 45 Utilizzo e funzioni 48 Uso del microfono via cavo 49 Smaltimento 52 DATI TECNICI Articolo numero 10032834 Alimentazione 9-12 V ~ 50/60 Hz DICHIARAZIONE DI CONFORMITÀ Produttore: Chal-Tec GmbH, Wallstraße 16, 10179 Berlino, Germania.
- Page 44 AVVERTENZE DI SICUREZZA Avvertenze generali • Colpo di fulmine – Se il dispositivo non viene utilizzato o c’è un temporale, staccare la spina dalla presa di corrente e scollegare il dispositivo dalla connessione dell’antenna. In questo modo si evitano danni al dispositivo dovuti a colpi di fulmine o sovratensione. •...
- Page 45 Tasti pannello DESCRIZIONE PRODOTTO E PANNELLO dei comandi COMANDI MENU – Selezionare USB/ TF/ Video/ Audio/ BT/ FM Radio Descrizione del RETURN - Premere dispositivo per tornare al menu o all‘impostazione Impugnatura precedente MOVIE - Selezione film Pannello dei comandi MUSIC - Riproduzione musica Display 14.1 “...
- Page 46 Telecomando INPUT: Aprire la modalità MIC PR: funzione di commutazione per la priorità del microfono MOVIE: Riproduzione diretta di filmati e altri file video B.T: Passa alla modalità BT Su/avanti: Pulsante di direzione. Premere per 2 secondi per passare alla canzone precedente.
- Page 47 STAND BY: funzione standby per il video, nessuna funzione per l'audio LCD on/off: Attivare e disattivare la visualizzazione sullo schermo MODELLO: Commuta tra le modalità radio BT, USB, TF card e FM. ECHO: commutazione della colonna sonora in audio, accompagnamento vocale, commutazione tra l'accompagnamento vocale e l'accompagnamento originale del cantante e della voce.
- Page 48 UTILIZZO E FUNZIONI Connessione BT • Per selezionare la modalità BT, premere il tasto BT o spostare l‘icona BT nel menu principale e premere il tasto PLAY/PAUSE. • Attivare la funzione BT del tablet o dello smartphone e cercare il dispositivo nell‘elenco dispositivi.
- Page 49 Uso del microfono VHF senza fili Il dispositivo è dotato di un microfono senza fili. Accendere il dispositivo. 2. Svitare la parte inferiore del microfono per accedere al vano batteria. Inserire due pile AA nel vano del microfono. 3. Assicurarsi che la polarità sia corretta quando si inseriscono le pile. Reinserire il coperchio.
- Page 50 Riproduzione video • Quando si inserisce una chiavetta USB o una scheda TF nel dispositivo, il dispositivo darà la priorità ai file video riprodotti. In alternativa, premere il tasto MOVIE per accedere alla modalità di riproduzione video. • Premere il tasto PLAY/ PAUSE per avviare la riproduzione e premere di nuovo il tasto per metterla in pausa.
- Page 51 Ingresso/uscita Audio-Video • Collegare un cavo AV agli ingressi audio e video del dispositivo. • Selezionare „AV“ dal menu principale e premere il tasto PLAY/ PAUSE per confermare la selezione. • Il dispositivo visualizza tutte le immagini, i file audio e video provenienti dalla sorgente di segnale corrispondente.
- Page 52 Nota sulla ricarica della batteria integrata Il dispositivo è dotato di una batteria ricaricabile per il funzionamento indipendente dalla rete elettrica. La batteria viene caricata automaticamente non appena la spina viene inserita in una presa elettrica. Il tempo di carica di una batteria completamente scarica è di circa 8 ore. Dopo la carica, il dispositivo passa alla carica di mantenimento.
Need help?
Do you have a question about the 10032834 and is the answer not in the manual?
Questions and answers