Advertisement
Q
.uick Start Guide: Q.brixx Assembly and Configuration Guide
Purpose: This guide will describe how to put together a Q.brixx system using a test controller (i.e.
Q.station or Q.gate) and the measurement modules. To disassemble or replace a module, simply reverse
the procedure.
Tools Required:
-
Torx T10 screw driver
-
2.5 mm hex key
Items Required:
-
Gantner test controller: Q.station or Q.gate.
-
Gantner measurement module: at least one measurement module.
Procedure:
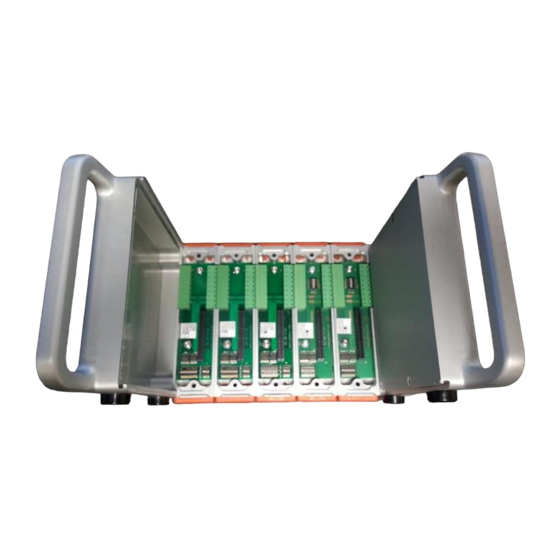
1. Each controller and measurement module includes a base. Separate the base from the module
by removing the 2 x Torx T10 screws from the back of the base.
2. A controller in the brixx packaging comes with 2 x handles (a left side and a right side). Attach
the left side handle to controller's base.
3. Attach all the bases together moving from left to right. Secure the bases together using a 2.5
mm hex key (2 x screws):
Gantner Instruments Incorporated
9835 Carroll Centre Road, Suite 100
San Diego, CA 92126 USA
www.gantnerinstruments.com
Toll Free: (877) 725-6997 (877 QBLOXXS)
Direct:
(858) 537-2060
info@gantnerinstruments.com
Toll Free Fax: (800) 303-9381
Direct Fax:
(858) 537-2064
Advertisement
Table of Contents

Related Manuals for Gantner Q.brixx


Summary of Contents for Gantner Q.brixx
- Page 1 .uick Start Guide: Q.brixx Assembly and Configuration Guide Purpose: This guide will describe how to put together a Q.brixx system using a test controller (i.e. Q.station or Q.gate) and the measurement modules. To disassemble or replace a module, simply reverse the procedure.
- Page 2 11100000 Key: 1 = UP 0 = DOWN www.gantnerinstruments.com info@gantnerinstruments.com Gantner Instruments Incorporated 9835 Carroll Centre Road, Suite 100 Toll Free: (877) 725-6997 (877 QBLOXXS) Toll Free Fax: (800) 303-9381 San Diego, CA 92126 USA Direct: (858) 537-2060...
- Page 3 8. Secure the modules to the base using 2 x Torx T10 screws for each module: 9. The Q.brixx assembly and address configuration is complete. The system can be powered on and connected to the PC for internal configuration.
Need help?
Do you have a question about the Q.brixx and is the answer not in the manual?
Questions and answers