Table of Contents
Advertisement
Quick Links
Advertisement
Table of Contents

Related Manuals for Pinnacle Technology CS3X


Summary of Contents for Pinnacle Technology CS3X
- Page 1 CS3X Cash Register Scale Quick Start Pinnacle Technology Corp.
- Page 3 Important Safety Information Please read these safety instructions carefully. For safety of SD card and USB data ,When pulling out SD or USB,please firstly press power button slightly for standby mode and then pull it out . Keep this user manual for later reference. Before turning on the machine, please make sure that the electric power meets the requirements, (such as the electrical pressure and frequency), and that your electrical outlet is really connected to the ground.
- Page 4 17. Please do not disconnect the line cord while its working, if not the product would be broken. 18. Please be sure use our line cord only. 19. If there is abnormal noisy, burnt smell or smoke given out from the product, please cut off the power and disconnect the plug immediately.
-
Page 5: Table Of Contents
CONTENT Summarization and Precaution ....................... 1 Display Device Installation ......................1 Paper Installation ..........................1 Battery Replacement (Optional) ...................... 3 Hotkey Sheet Installation ......................... 6 User-Defined Key ..........................7 Power on Operation ..........................8 Power on/off ............................ 8 Tare ..............................8 Zeroing Operation .......................... -
Page 6: Summarization And Precaution
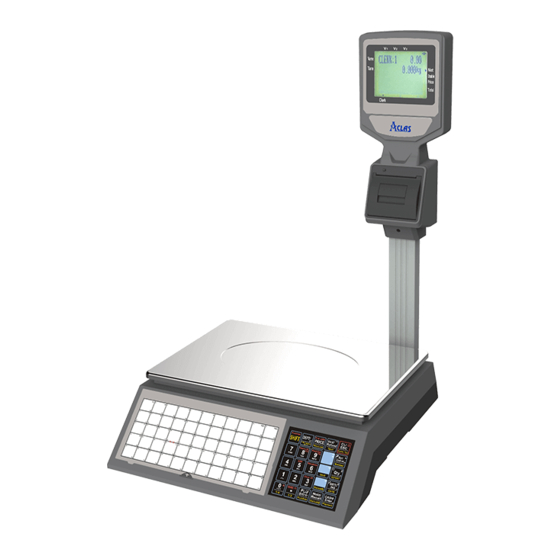
1 Summarization and Precaution 1.1 Display Device Installation Note: the non-pole scale can skip this chapter’s contents. Before normally using the cash register scale, users should first install the display device when they open the package. During the sale, display device can display the goods’ related information, such as price and weight and so on. -
Page 7: Paper Installation
1.2 Paper Installation Thermal Paper Installation Steps Note: Clean tear the gummed paper on the roll paper and do not leave any foreign matters to protect print head. 1. Unclose the paper compartment cover from central position circled as the above picture shows. 2 .... -
Page 8: Battery Replacement (Optional)
of print head. Therefore, you’d better use specified thermal paper (Pinnacle DJ03, PD-160R, etc.). 1.3 Battery Replacement (Optional) Battery Replacement (the type with battery) Note: This chapter only applies for battery replacement (the type with battery). We use sealed lead-acid battery for our ECR. Generally, new battery can be used for two years. If battery’s working time is shortened apparently after charging, you need to replace a new one. - Page 9 (1)Unscrew the four screws and then took off the battery cover. (2)Insert UPS to the part that the dot line circled. The board with line part should be toward left as the left picture shows.
- Page 10 (3) Install new battery. Pay attention to the polarity (red for anode, black for cathode). (4) Screw the bolt . (5)Replace the cover.
-
Page 11: Hotkey Sheet Installation
1.4 Hotkey Sheet Installation Note:Please refer to “PC software management/File column/chapter Programming hotkey” in attached Cut the hotkey sheet down and insert the hotkey sheet into the keyboard. Please take below pictures for your references: Cut the hotkey sheet down along the dotted line. -
Page 12: User-Defined Key
1.5 User-Defined Key There are 3 user-defined functions key and all the hot keys which can be defined as one of the following function. FUNTION DESCRIPTION: Tare 3 1. Default 15. V1 2. %PRM 16. V2 3. +%PRP 17. V3 4. -
Page 13: Power On Operation
2 Power on Operation 2.1 Power on/off Hard turning on/off Method 1: 1. Connect the power wire to charger. 2. Put power switch to on position to turn on the switch. 3. Put power switch to off position to turn off the switch. Before turning off the switch,please switch to soft turning off mode. -
Page 14: Zeroing Operation
2.3 Zeroing Operation Sometimes the display will not show “0” when there is not thing on the scale. Maybe the reason of this is that the scale loses balance. Beside adjusting the balance of scale,during selling you can press [PLU ZERO] to return to zero level of weight which saves time and avoid weight mistakes. Operating as below: Press key [PLU Zero]. -
Page 15: Check Price
number will be twinkling. If you want to log out, please press numerical key [0] first and then press the clerk number you want. After weighing the PLU, press V1 to confirm the sales and press [CASH] to settle accounts. The Methods of Selling PLU 1) Press [BARCODE] + [PLU] 2) Press [Hotkey]... -
Page 16: Change Price
QTY”, press [CASH], press [↑] or [↓] to choose “YES”, and press [CASH] to confirm. Method 1: Input number “20”--- press [PRICE] key --- Input number “3”--- press [Quantity] --- press [V1] key to confirm---press [CASH] to settle accounts. Method 2: Press [PRICE] key --- input number “20” --- press [CASH] to confirm --- Input number “3”... - Page 17 Operation of %PRM and +%PRP are the same. Discount rate range is 0.01%~99.99%. Note: Before you do the operation of %PRM, deduction, +%PRP and AddAmt, please do the following setting with pressing [Set Cashier] key.. 1. Set the “SET/DISCOUNT SET/PLU MANUAL DISCOUNT?” to “YES” in “SET” mode. Clear Z daily report before this setting.
-
Page 18: Void /Return Operation
--- Choose the specific discount item “1.-%DISCOUNT OFF”[CASH]---press [Cash] key--- Input discount rate “10”---press [Cash] key to confirm the rate---press [V1] to confirm this operation---press [CASH] to settle accounts. Method 2 : Press [1] [PLU] key---press [Quantity]--- input PLU quantity “2” and [CASH] key--- press [shift] --- press [DISCOUNT] --- Choose the specific discount item “1.-%DISCOUNT OFF”[CASH]---press [Cash] key--- Input discount rate “10”---press [Cash] key to confirm the rate---press [V1] to confirm this operation---press [CASH] to settle accounts. -
Page 19: Plu Sales In Barcode
(Set the PLU of bracode 1 as ‘001’, the original price as $10; and the PLU of barcode 2 is ‘002’, the original price is $5.) Pinnacle Technology Corp Press [1] [PLU] key---input number’15’ and press [Price] DATE: 10.12.03 08:05 No:000002... -
Page 20: Pay By Member Card
E, G.: Press [1] [PLU] key or hotkey [PLU1]on the first scale--- Put PLU1 on the first scale--- press [V1] to confirm--- Press [2] [PLU] key or hotkey [PLU2] key on the second scale--- Put PLU2 on the second scale---press [V1] to confirm--- press [CASH] to settle accounts on the second scale. 3.8 Pay by Member Card Note: Before you do the member card payment, please do the following setting. -
Page 21: X/Z Report Mode
3.10 X/Z REPORT MODE Press [Set Cashier] key---Choose “X Report” or “Z Report” and press [CASH] key to enter. Or press [SHIFT] +[REPORT], and input manager number and password and [CASH] key to print report. X REPORT Choose “X REPORT” and press [CASH] key to print all of the following reports for check out. And the data will not be cleared. -
Page 22: Discount Set
select “Exit temporary training mode”. 4.2 Discount Set Press key [Set Cashier] to select “SET” item, and press key [CASH], input the manage number and password and press [CASH] key to confirm. Select “Discount set” item, and press key [CASH] to enter this function. 1. -
Page 23: Member And Member Card Set
System prompts: <payment IDX>,input the IDX(1-20), and press key [CASH] to confirm. System prompts: <payment >, input the payment name, and press key [CASH] to confirm. System prompts: <PAYMENT(0.NORMAL 2.TICKET PAY5.CREDIT6.CHECK)>, input the corresponding number, and press key [CASH] to confirm. (Note: Ticket only specified for DANIANGDUMPLING: Press “SET”... -
Page 24: Appendix-Bar Code Type Table
5 Appendix-Bar Code Type Table This CS3X (M3) support 13 digits EN-13 code. When the first digit is 2, this bar code is considered as inner code. Generally speaking, the last digit(S) used as check code. This CS3X(M3) can select 10 inner barcode, which start with 2X(20~29), from the 65 types of code. - Page 25 CCCCCCCC CCCCCCCC Barcode Type Start Code Code Weight or Qty. Check Sum CCCCCCCC 0.WW CCCCCCCC 0.0WW CCCCCCCCC CCCCCCCCC CCCCCCCCC 0.0W CCCCCCCCC 0.00W CCCCCCCCCC PPPPPPP.PP PPPPPP.PP PPPPP.PP CCCC PPPP.PP CCCCC PPP.PP CCCCCC PP.PP CCCCCCC P.PP CCCCCCCC 0.PP CCCCCCCCC 0.0P CCCCCCCCCCCCC PPPPPPPPP PPPPPPPP PPPPPPP CCCC...
- Page 26 This scale also supports bar code type 18. Barcode Type Start Code Code Price Check CCCCCC PPP.PP WW.WWW CCCCCC PPP.PP WWWW.W CCCCCC PPP.PP WWWWW CCCCCC UUU.UU WW.WWW CCCCCC UUU.UU WWWW.W CCCCCC UUU.UU WWWWW CCCCCC IIII RR WW.WWW CCCCCC PPP.PP WW.WWW CCCCCC PPP.PP WWWW.W...
- Page 28 DCS3M30ENV0-05...
Need help?
Do you have a question about the CS3X and is the answer not in the manual?
Questions and answers